This article describes how to update the Wi-Fi setting for any of your Blink devices.
Updating the Wi-Fi settings for your Sync Module
When you move your Sync Module to a new location or Wi-Fi network, you will need to set up the Sync Module for its new network. Your Sync Module may stay connected to the same Wi-Fi setup when you move it, but we do not guarantee it will perform. We recommend that you manually update the Wi-Fi settings for the Sync Module's new network.
Before you begin
This procedure requires direct communication between the mobile app and the Sync Module. Both must be active and on the same Wi-Fi network. To complete this procedure, you must be physically with your system and have your Sync Module plugged in to a power supply.
Note: Reconfiguring the Sync Module Wi-Fi network will not delete saved clips.
Change a Sync Module's Wi-Fi Network
- From the Home screen, tap on Sync Module.
- Tap on Change Wi-Fi Network.
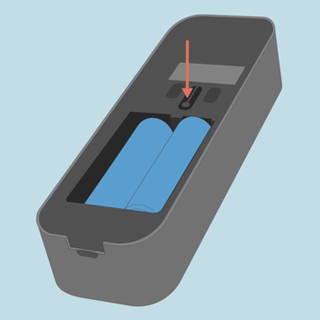
- On the change Wi-Fi screen, you will see a blinking blue light above a steady green light.
- Press the Reset button, or in some specific models of the Sync Module, insert a pin to reach the Reset button.
- Press until you feel it click, and hold until one LED turns red; then release the button.

- Press until you feel it click, and hold until one LED turns red; then release the button.
- When the lights match a blinking blue and solid green pattern, tap Discover Device when prompted to join the Sync Module's temporary Wi-Fi network. Tap Join, and then select your Wi-Fi network.
- Enter your Wi-Fi password and tap Join.
- After the devices have finished communicating, you’ll receive a message, “Sync Module added to <system name> system!”. Once you receive that message, tap Done.
- Your system is ready to be used as normal.
Updating the Wi-Fi settings for your Wired Floodlight camera
This article outlines the steps for updating the Wi-Fi settings for your Wired Floodlight camera.
Please have your Wi-Fi credentials available and have power connected to your camera before proceeding.
- Tap the More (...) button located at the bottom-right corner of the device thumbnail to access Device Settings.
- Select General Settings > Change Wi-Fi.
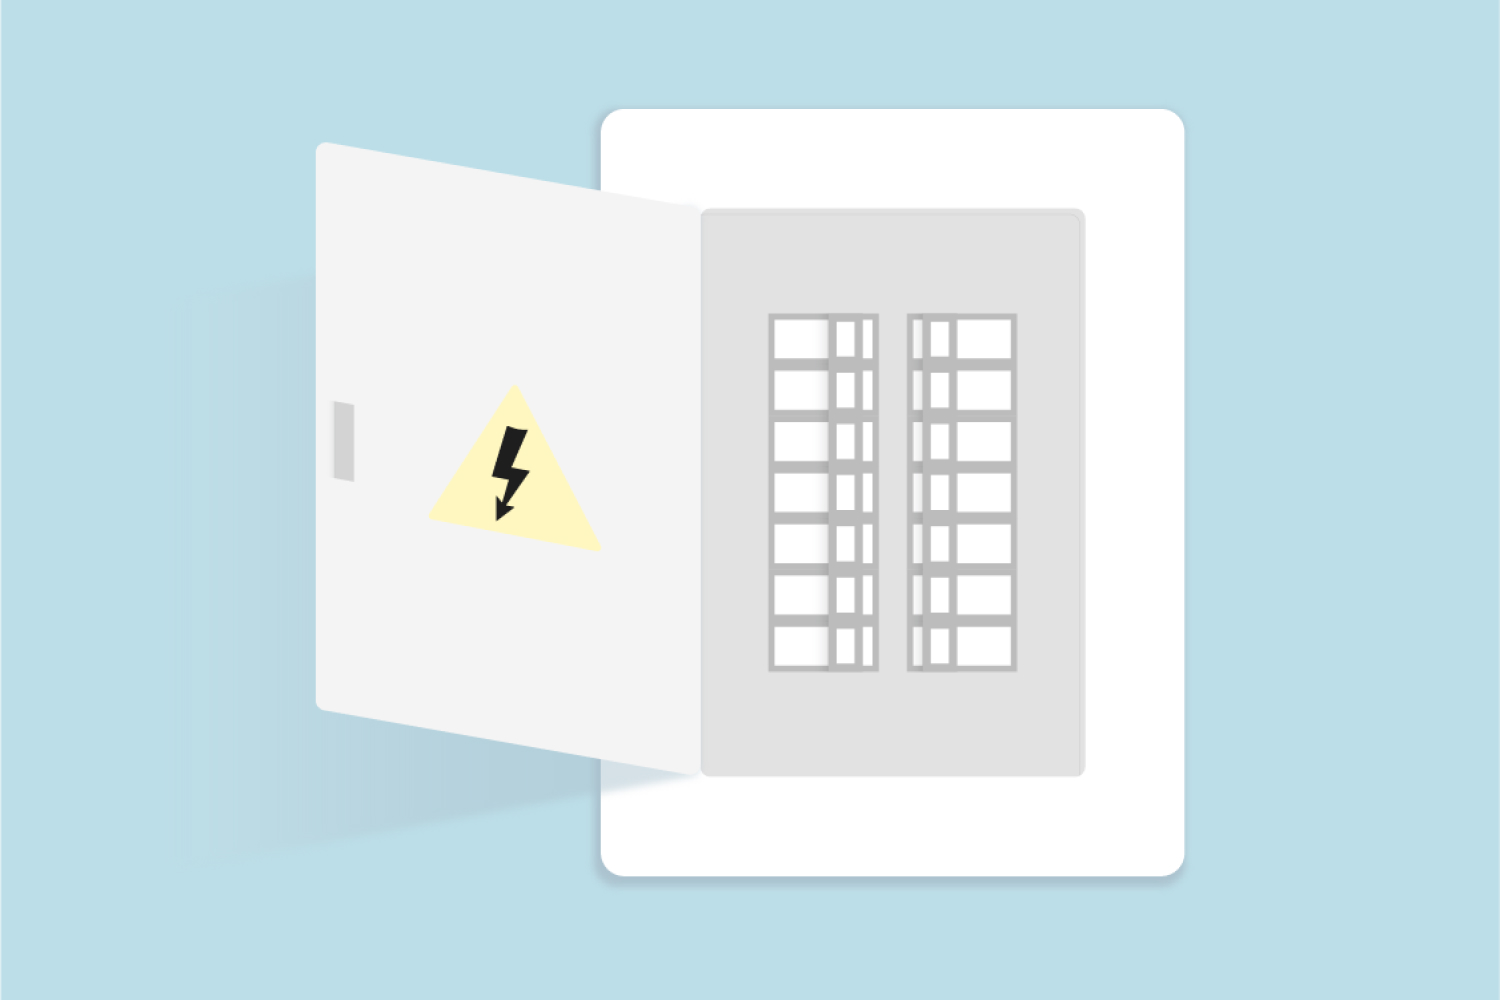
- On the Change Wi-Fi screen, follow the instruction to wait for blinking blue and steady green lights to display. If this doesn't occur, you can press the reset button located above the camera housing, or power off and on your camera by flipping a wall switch or circuit breaker.
- Tap Discover Device and a pop-up window prompts you to join the "Blink" Wi-Fi network, "BLINK-XXXX."
- Tap Join and select your Wi-Fi network from the list. If your network is not listed, tap Refresh List.
Note: You may be required to move the camera closer to your Wi-Fi router or troubleshoot your router. - Enter your Wi-Fi password and tap Join.
- If successful, the following message displays “Wired Floodlight camera Wi-Fi changed!”
Tap Done to return to the Home screen.
Updating the Wi-Fi settings for your Mini camera
This section will outline the steps for updating the Wi-Fi settings for your Blink Mini and Mini 2 cameras.
- Tap More (...) on your camera's thumbnail and select Device Settings
 .
. - Tap General Settings > Change Wi-Fi.
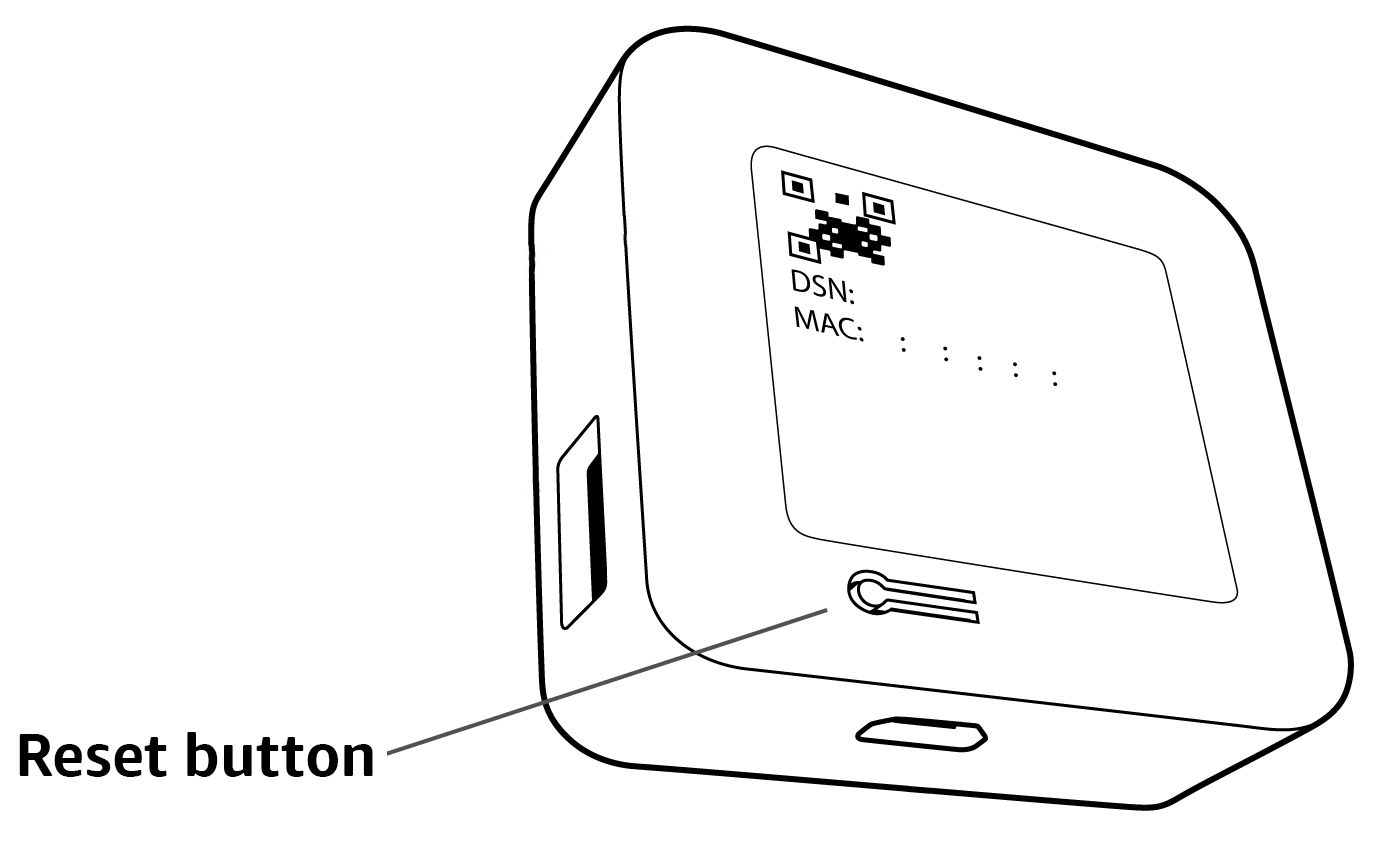
- On the Change Wi-Fi screen, follow the instruction to "Press and release the reset button on the camera until red and blue lights flash. When ready, the lights will display: Blinking Blue, Steady Green." Learn more about the reset button on Mini and Mini 2 cameras.
- Tap Discover Device, a pop-up window prompts you to join the "Blink" Wi-Fi network, "BLINK-XXXX."
- Tap Join, select your Wi-Fi network from the list. If your network is not listed, tap Refresh List.
Note: You may be required to move the camera closer to your Wi-Fi router or troubleshoot your router. - Enter your Wi-Fi password and tap Join on your keyboard.
- If successful, the following message displays “Mini camera changed Wi-Fi!”
Tap Done to return to the Home screen.
Updating the Wi-Fi settings for your Blink Video Doorbell
This article describes how to update the Wi-Fi setting for your Video Doorbell. These are the same steps you follow after tapping the "Doorbell Offline" message in the Blink app.
To update your Wi-Fi settings, follow these steps.
- Tap the More button located at the bottom-right corner of the doorbell's thumbnail to access Device Settings.
- Tap General Settings.
- Tap Change Wi-Fi.
- If your doorbell is connected to chime wiring, turn off power to the chime system and then tap Continue.
- If your doorbell is not connected to chime wiring, tap Continue.
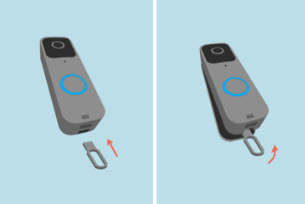
- Remove the doorbell from its mounting plate with the release key.
- After you remove the doorbell, tap Continue.
- When the Change Wi-Fi screen displays, press and release the reset button on the doorbell (shown below) until the red and blue LED flashes.
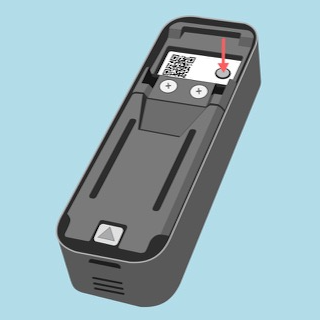
- Once the red LED flashes, release the reset button and tap Continue.
- If the red LED does not flash after 30 seconds, try replacing your batteries.
- To learn more about your doorbell's LED patterns, visit Understanding the LEDs on your Video Doorbell.
- Select your network name among the list of discovered 2.4 GHz Wi-Fi networks. While the red LED flashes, tap Discover Device. To learn more about your doorbell's LED patterns, visit Understanding the LEDs on your Video Doorbell.
- Tap Join to connect to the temporary Blink Wi-Fi network. Note: If you do not see your Wi-Fi network, tap Refresh List.
- Enter your Wi-Fi password. Tap the eye icon in the password field to make the characters visible. Carefully enter your password and then tap Continue. For Wi-Fi password help, visit Troubleshooting Incorrect Wi-Fi Password in the Blink App.
- The doorbell connects to the Blink servers and performs network updates. When the Wi-Fi network update is complete, a confirmation message displays. Tap Continue.
- Reconnect the doorbell by aligning the top edge of your Video Doorbell to the back plate. Push it firmly against the back plate until you hear and feel a slight click.
- Your doorbell mounting is how complete. Tap Done to return to the Home screen.
Two-hole back plate reset button location
If your Video Doorbell has a two-hole backplate instead of three mounting holes, your reset button is located on the back of doorbell as shown below.