Use this article to understand how to mount your Blink Mini camera.
How the mount attaches to the Mini
The Mini camera ships with an attached camera mount along with two screws in the box. Make sure to remove the clear protective film covering the lens prior to using the camera.
Depending on the orientation of where the camera will live, you’ll use one of the two mounting points:
- The vertical mounting point (for walls or other vertical surfaces) is located above the USB port at the rear of the camera.
- The horizontal mounting point (for flat surfaces and ceilings) is located at the bottom of the unit.
The Mini can also fit onto other standard Blink camera mounts.

Mounting the Blink Mini Camera
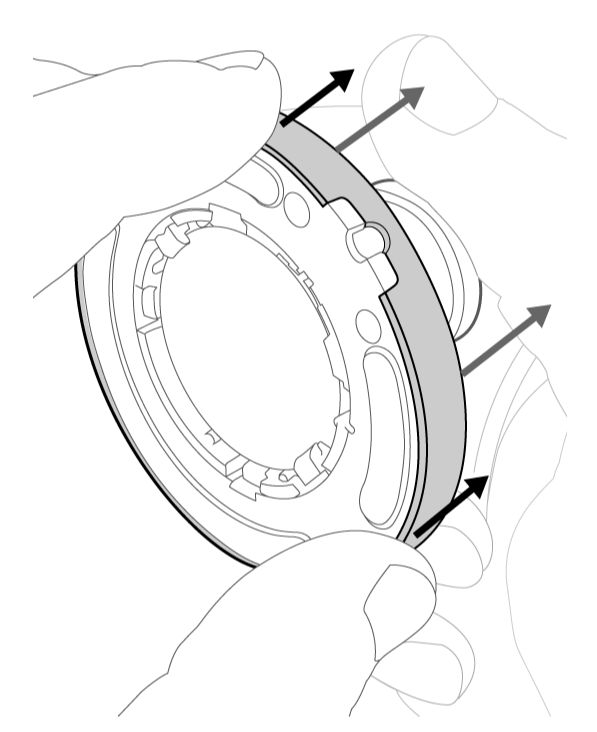
- Hold the camera and pull the mount from the camera.Put the camera in a safe place where the lens won’t be scratched.
- While holding the mount in both hands, apply pressure to the outer ring while supporting the mount with the opposite hand.
- Select a location to mount your camera. When you’ve decided where it will go, use the included screws to secure the mount to your surface. Proper camera placement is important for good image quality. Mini cameras have been used to detect motion through glass. Remember, this is not the most accurate way to detect motion. When using your Mini through glass, make sure to turn off the Recording LED and the Night Vision IR LED to prevent glare from reflected light. Learn about camera placement.

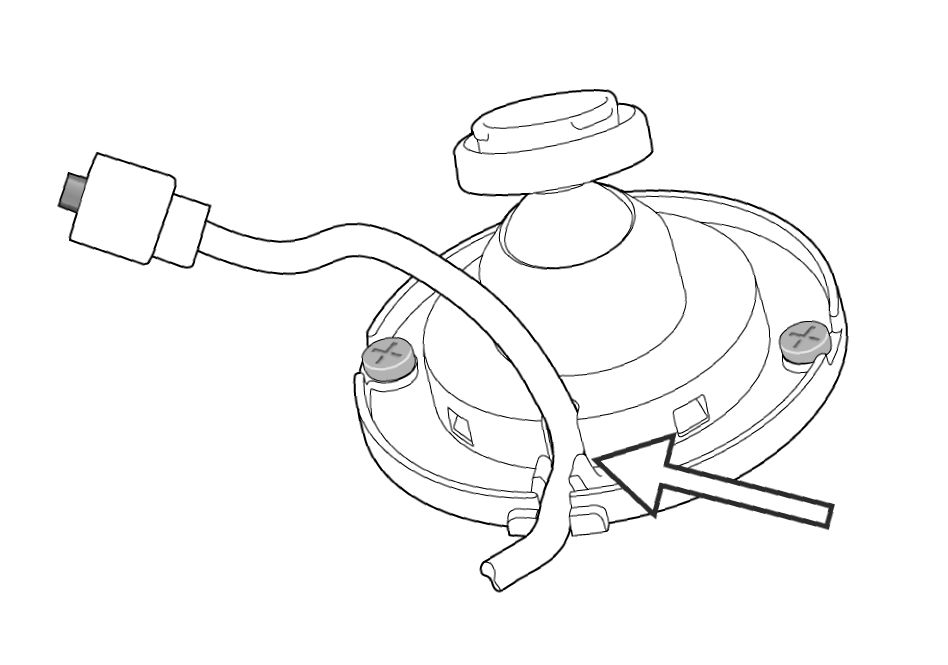
- After the mount has been secured, press the cable into the moulded clips in the base.
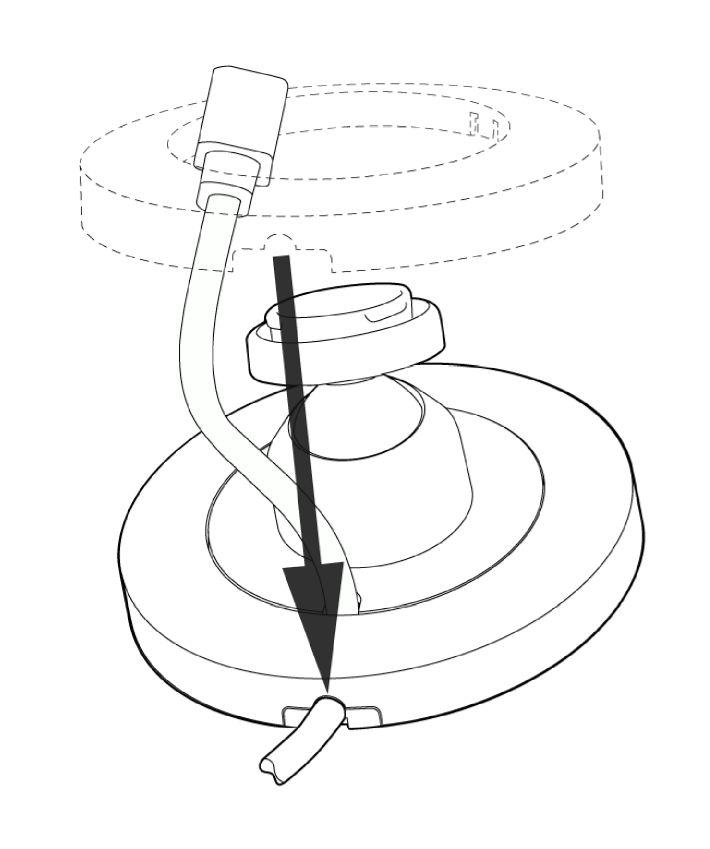
- Thread the cable end through the retaining ring and line up the notch with the cable. Press all sides of the retaining ring to secure it in place.
- Press the Mini onto the mounting point. It will click into place as the camera is secured.

- Plug the cable into the USB port in the back of the Mini and aim the camera.
- Plug the other end of the cable into the power supply and then plug the power supply into your wall socket.
You can test the camera’s orientation by using Live View in the Blink app.
Note: The new Pan-Tilt Mount is designed exclusively for use with the Blink Mini camera and supports user-controlled pan-tilt functionality directly from the Blink app.
Optional: Flipping video
If you want to mount the Mini onto a ceiling or an overhead surface, you may need to flip the camera’s video so it outputs properly. You can make this change in the Blink app under Device Settings by tapping the More button (...) on your camera thumbnail and select Device Settings  in the lower-right corner of the thumbnail image. Then select Video and Photo and tap Flip Video to turn on this setting.
Visit the camera settings page for more information about settings.