This article describes how to mount your Video Doorbell.
Before you begin
Before you begin mounting your doorbell, please make note of the following.
-
Back plate screws
- For mounting on uneven or smaller surfaces, use only the top and middle holes.
- When using all three mounting screws, be careful to not over-tighten the middle screw.
- If a gap appears between the back plate and the doorbell, performance is not affected. To remove the gap, you can slightly loosen the middle screw.
-
Mounting surface
Once you decide on the doorbell's location, thoroughly clean the surface area. -
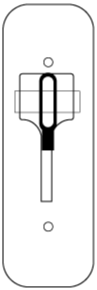
Opening key
Your doorbell packaging contains a paper template to use when drilling the mounting holes. If you decide to install a Wedge or Corner mount, the same template can be used. This template also has an opening key attached. Make sure to keep this key so you can remove the doorbell as needed.

-
Tools
Have the following tools and accessories on hand:- Drill
- Drill bit size:
- Screws: 3/32-inch (2.375 mm)
- Wall anchor: 7/32-inch (5.41 mm)
- Tape to hold the template in place
- Screwdriver
- Clear plastic accessory bag (contains screws and wall anchors)
Mounting the doorbell
The following steps describe how to mount your Video Doorbell. Note: The back plate does not need to form a weather-tight seal because the battery cover provides IP-54 weather-resistance.
- Tape the paper template 40 - 48 inches (102 - 122 cm) above the floor.
- Drill two guide holes approximately one inch deep (2.5 cm).
Note: For mounting on brick, stucco, or drywall-type materials, use the included white plastic wall anchors which fit the hole from a 7/32-inch (5.41 mm) drill bit.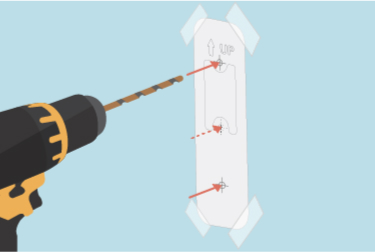
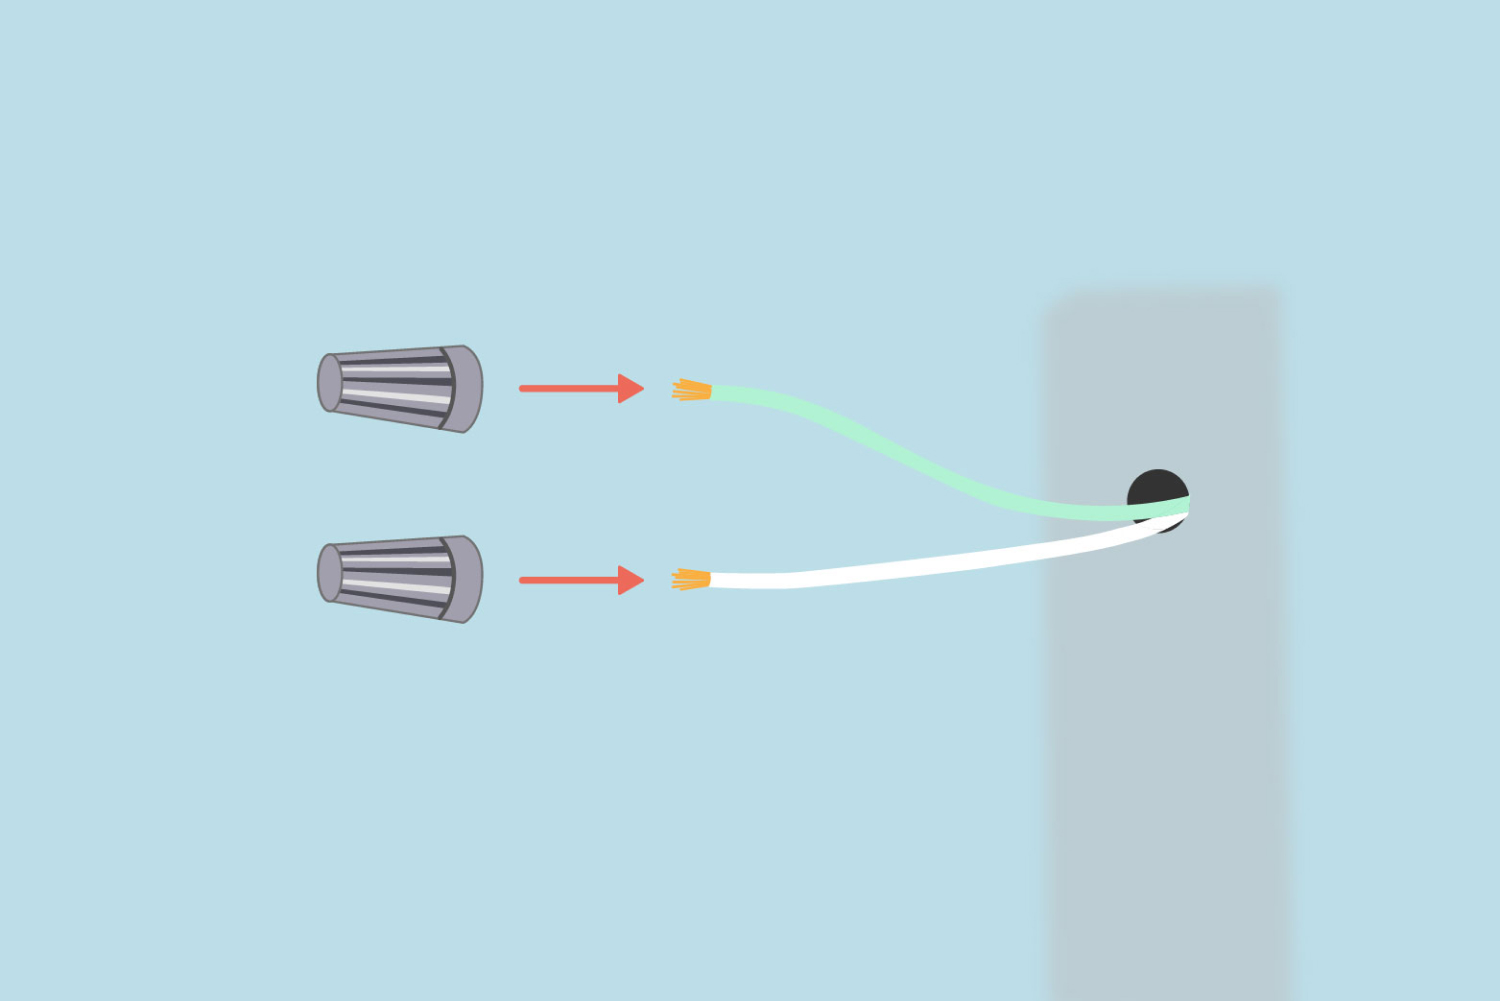
- Remove the paper template. Secure exposed wires if necessary. If you are not using existing wires, but they are present, twist a grey terminal cap onto each exposed wire tip to prevent dangerous sparking or other issues. Two terminal caps are included in the accessory bag with the mounting screws.
-
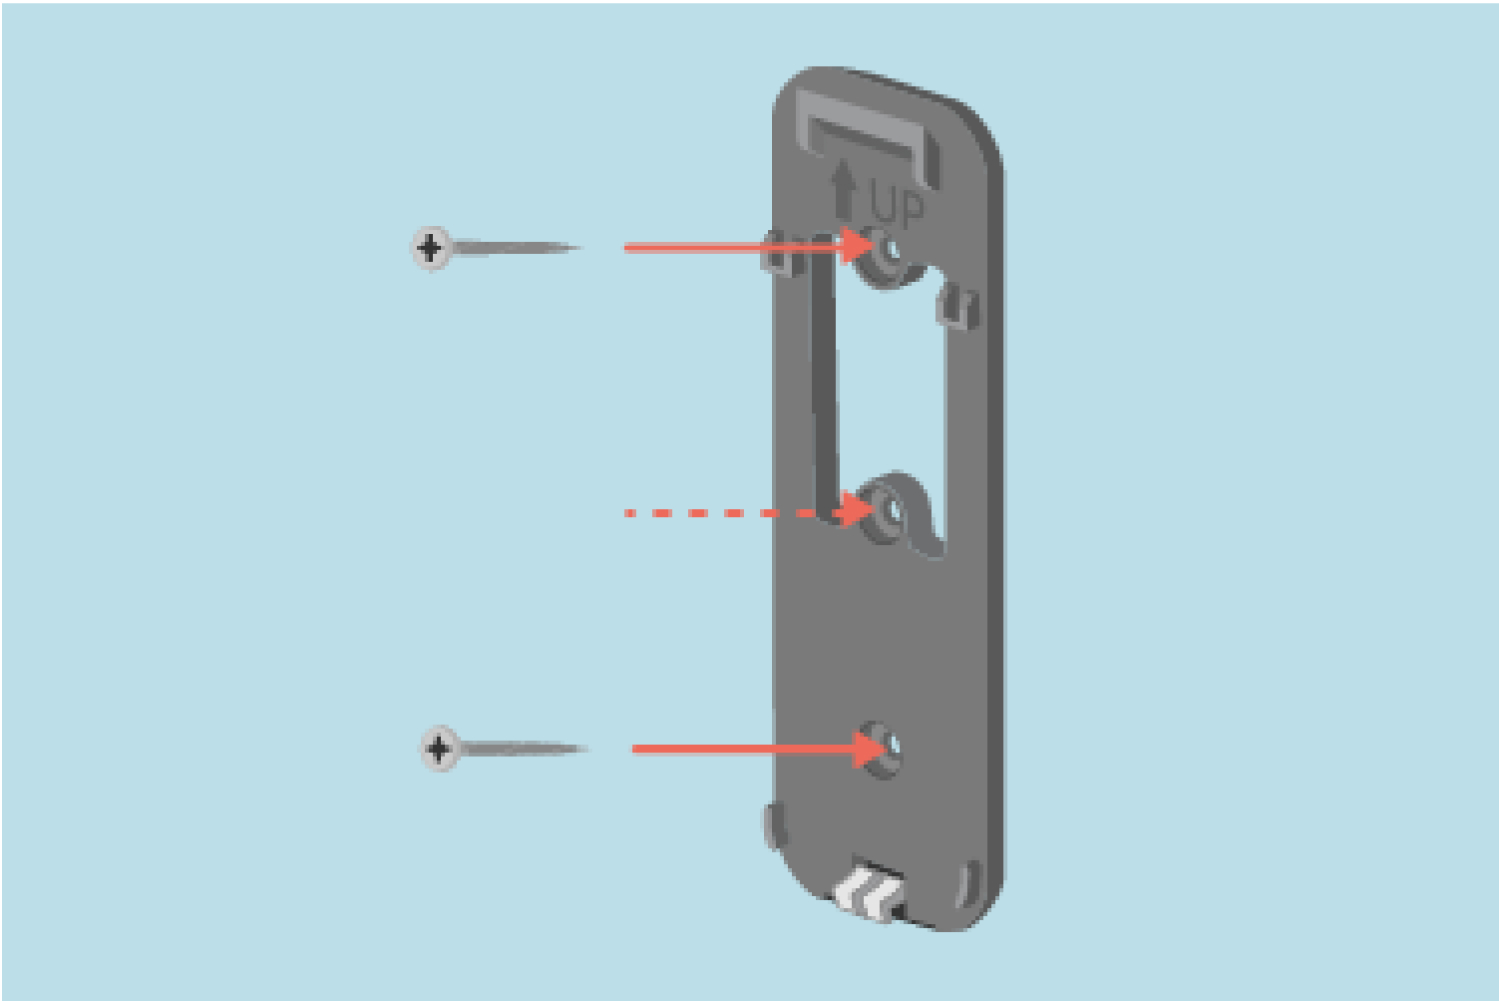
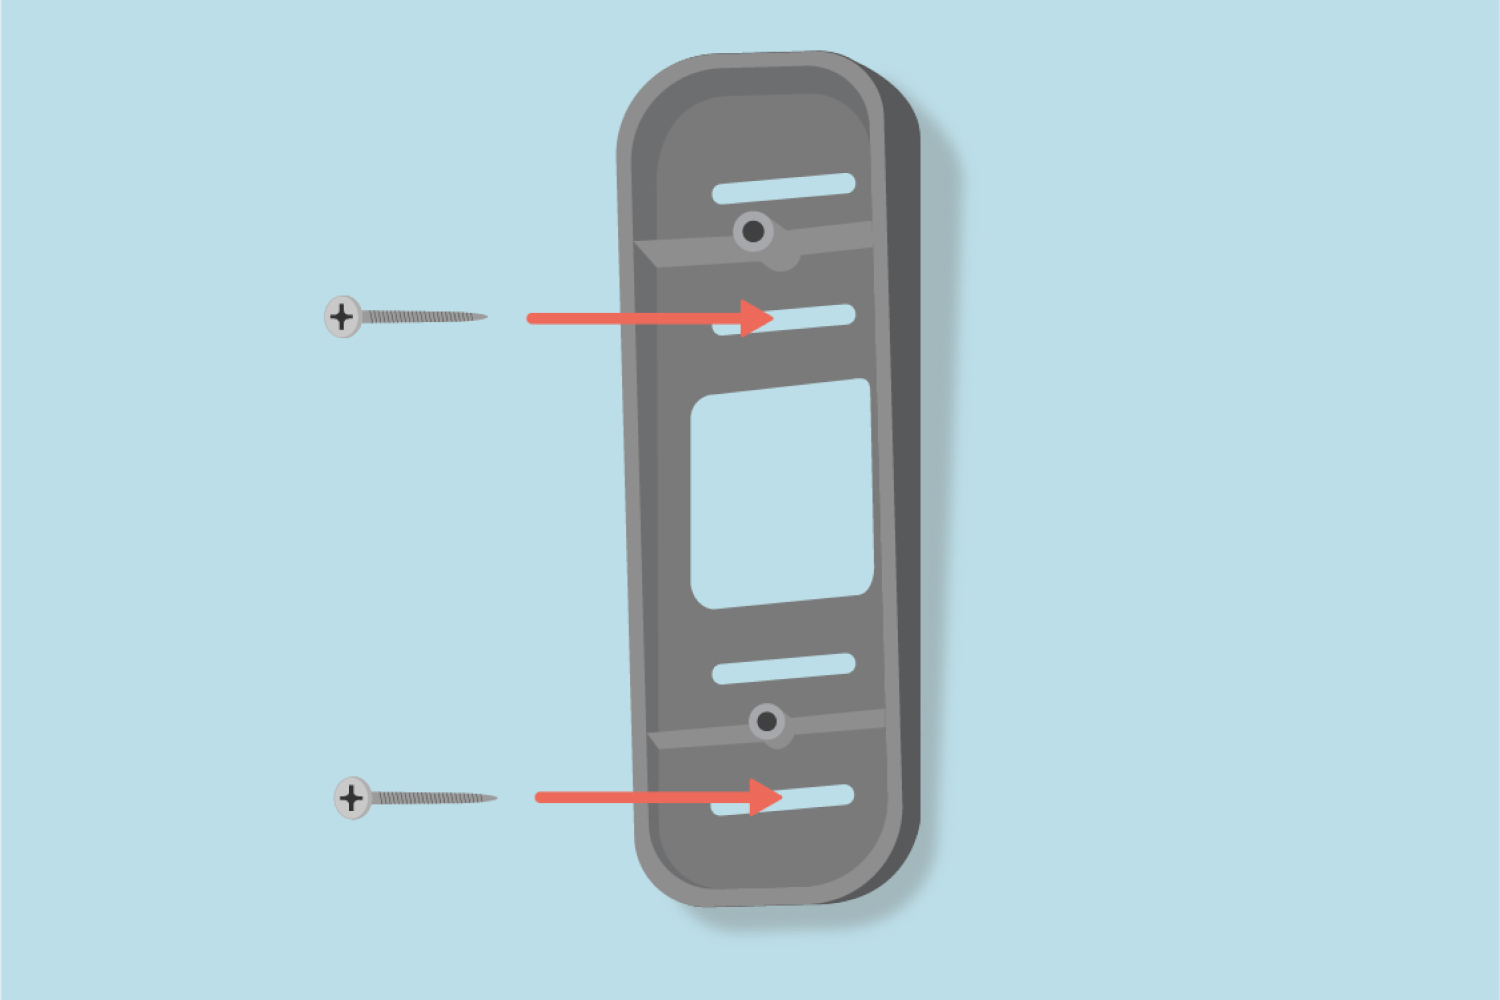
Attach the back plate to your surface with two screws (do not over tighten). All-purpose screws are included with two wall anchors and wire terminal end caps in the accessory bag. Use two screws even if there are three holes in the back plate. Note: The back plate does not need to form a weather-tight seal because IP-54 weather-resistance is provided by the battery cover.
- For a flat surface, use the top and bottom screws.
- For uneven or shorter mounting locations, use the top and middle screw.
- Note: The back plate with three mounting holes does not need to form a weather-tight seal with the doorbell. IP-54 weather-resistance is provided by the battery cover.
- Your install is complete. You can now check your placement using Live View.
- If your doorbell is in Event Response, press the doorbell button, then tap the notification that appears on your mobile device.
- To adjust the view 5º up-down, or 25º side-side, learn about installing a wedge or corner mount.
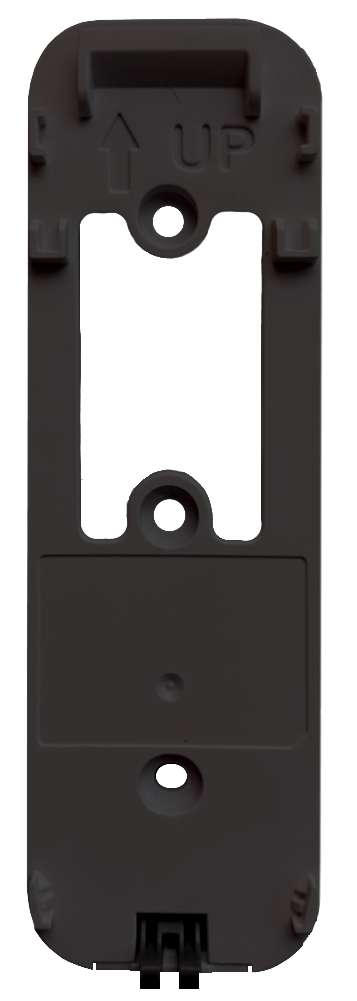
Two-hole back plate
If your doorbell's back plate has two-holes
This section describes how to mount your Video Doorbell if your back plate two mounting holes.
Before you begin
Back plate screws- For mounting on uneven or smaller surfaces, use only the top and middle holes.
- When using all three mounting screws, be careful to not over-tighten the middle screw.
- If a gap appears between the back plate and the doorbell, performance is not affected. To remove the gap, you can slightly loosen the middle screw.
Mounting surface
Once you decide on the doorbell's location, thoroughly clean the surface area.
Opening key
Your doorbell packaging contains a paper template to use when drilling the mounting holes. If you decide to install a Wedge or Corner mount, the same template can be used. This template also has the opening key attached. Make sure to keep this key so you can remove the doorbell as needed.
Have the following tools and accessories on hand:
- Drill
- Drill bit size:
- Screws: 3/32-inch (2.375 mm)
- Wall anchor: 7/32-inch (5.41 mm)
- Tape to hold the template in place
- Screwdriver
- Clear plastic accessory bag (contains screws and wall anchors)
Mounting the doorbell
The following steps describe how to mount your Video Doorbell with a two-hole back plate. Note: This back plate needs to form a weather-tight seal with the doorbell, and a flat, sturdy placement is important.
- Tape the paper template 40 - 48 inches (102 - 122 cm) above the floor.
- Drill two guide holes approximately one inch deep (2.5 cm).
Note: For mounting on brick, stucco, or drywall-type materials, use the included white plastic wall anchors which fit the hole from a 7/32-inch (5.41 mm) drill bit. - Remove the paper template. Secure exposed wires if necessary. If you are not using existing wires, but they are present, twist a grey terminal cap onto each exposed wire tip to prevent dangerous sparking or other issues. Two terminal caps are included in the accessory bag with the mounting screws.
-
Attach the back plate to your surface with two screws (do not over tighten). All-purpose screws are included with two wall anchors and wire terminal end caps in the accessory bag. Note: The back plate does not need to form a weather-tight seal because IP-54 weather-resistance is provided by the battery cover.
- For a flat surface, use the top and bottom screws.
- For uneven or shorter mounting locations, use the top and middle screw.
- Note: The back plate with three mounting holes does not need to form a weather-tight seal with the doorbell. IP-54 weather-resistance is provided by the battery cover.
-
Your install is complete. You can check your placement using Live View.
- If your doorbell is in Event Response, press the doorbell button, then tap the notification that appears on your mobile device.
- To adjust the view 5º up-down, or 25º side-side, learn about installing a wedge or corner mount.
Things to know
Can I use wall anchors?
Yes. Use the white plastic wall anchors when the threads of the screw cannot dig into the material (such as brick). Drill a hole large enough for the wall anchor to fit in tightly. When you use the mounting screws, the anchors will securely hold the threads.
- Drill a 7/32-inch hole, 1 inch (2.5 cm) deep.
- Insert the wall anchor until it is flush with the mounting surface.
- Continue with the installation.
Can I shift my doorbell's view?
Yes. Blink offers Wedge and Corner Mount accessories that can shift the doorbell camera's motion sensor view.
The Wedge Mount provides a 5° vertical tilt (up or down). The Corner Mount provides a 25° horizontal tilt (side-to-side). To learn more, visit Install a Wedge or Corner Mount.
To adjust your camera position in the opposite direction, flip your Wedge or Corner Mount 180º so that the top and bottom switch positions.
Can I mount my doorbell on vinyl siding?
Screw-free siding brackets are available from third party vendors; however, Blink product warranty does not cover third party accessories, or any injury/damage resulting from their use.
When mounted, the three-holed back plate does not need to form a weather-tight seal. The seal is in the battery door, which gives the doorbell its IP-54 weather-resistant rating.
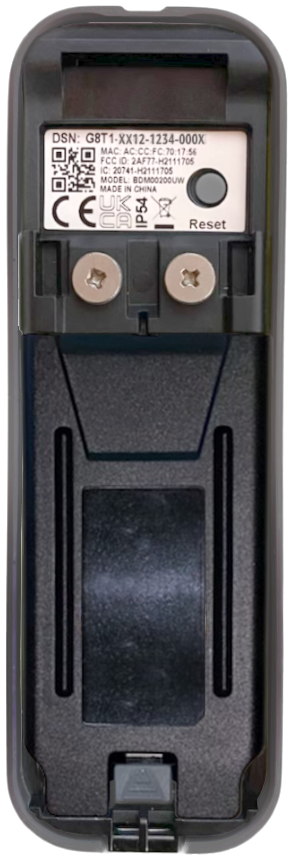
DeleteCan I wire my Video Doorbell to my existing doorbell system?
- Yes, if you wire your doorbell to compatible chime wiring, your in-home chime will sound for doorbell button presses. Learn about Blink Video Doorbell wired installation.
- When wired, doorbell battery life is extended up to two years. Even when wired, the doorbell is always powered by size AA, 1.5 volt, lithium non-rechargeable batteries.
- Mechanical or digital chime systems must provide 16 - 24 volts AC at 50 - 60Hz, and 40VA maximum to the doorbell. If your chime system provides less than 16 volts AC, the doorbell enters Event Response mode and your in-home chimes will not sound with doorbell presses.
- To check your chime system's voltage, visit How do I find my doorbell's system voltage?