Live View allows you to see what the camera is currently capturing and monitor the scene rather than viewing a recorded version of the event. This article describes how to save a Live View clip.
To save a Live View, you must have:
- A Blink Subscription Plan or free trial
- A Legacy account activated by April 15th, 2020
Live View clips are never saved or backed up to Local Storage. This includes Live View sessions accessed from Alexa devices like an Echo Show (no Local Storage option).
XT2 camera Live View clips take more storage space than motion clips, so be aware of your 7200 second storage limit. When the limit is reached, your oldest clip will be automatically deleted to make room for the newest one.
Note: XT and Indoor (1st Gen) cameras do not support saving Live View clips.
Save a Live View from a Camera
Here's how to save Live View as a clip.
1. From the Home screen, choose your camera and tap Live View  .
.
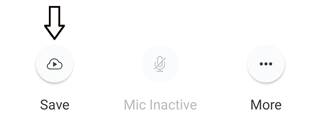
2. On the Live View screen, Save in the lower left shows the current session is saved to Cloud Storage for that camera. Tap this icon to enable or disable saving the Live View session. The Save icon changes whether saving is active or inactive.
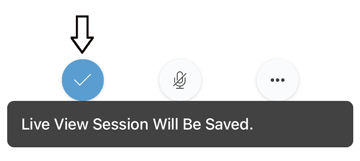
Tap Save to enable saving the Live View session.
The icon changes and a message appears confirming the current Live View session is saved to Cloud Storage.
Save icons
-
 Cloud with play symbol - Saving Live View clips is disabled. Clips won't be saved to Cloud Storage.
 -
 Blue circle with a check mark - Saving Live View clips is enabled. Clips are saved to Cloud Storage.
Note: When Save all Live Views is enabled in your Blink App Settings, Save is on by default for each time you enter a Live View session. You can turn off saving the Live View session by tapping Save.Delete
View a saved Live View
- Tap Clips
 in the footer of the Home screen.
 - Saved Live View sessions show
 next to the timestamp on your Clip List. Tap your desired clip to view it in the app.
Learn more about viewing clips by visiting Viewing Motion Clips in the Blink app.
DeleteSave all Live Views setting
This setting allows you to automatically save a Live View session to Cloud Storage any time you access Live View through a camera.
1. Tap App Settings  in the bottom nav bar and select Device and System Settings.
2. Under Systems, select the system name by tapping it.
3. Tap Save all Live Views and Live View events for the system selected above will now be saved in Cloud Storage.
Saving Live Views with Alexa
When you have a Blink subscription and use an Alexa-enabled device to open the Live View session, the entire session is saved unless you stop it manually.
To start a live view from your Blink camera, say:
"Alexa, show [camera name]."
To stop a live view, say:
"Alexa, stop."
"Alexa, end."
"Alexa, exit."
"Alexa, go home."
"Alexa, hide [camera name]."
Note: Live view commands work with compatible Alexa-enabled screen devices.