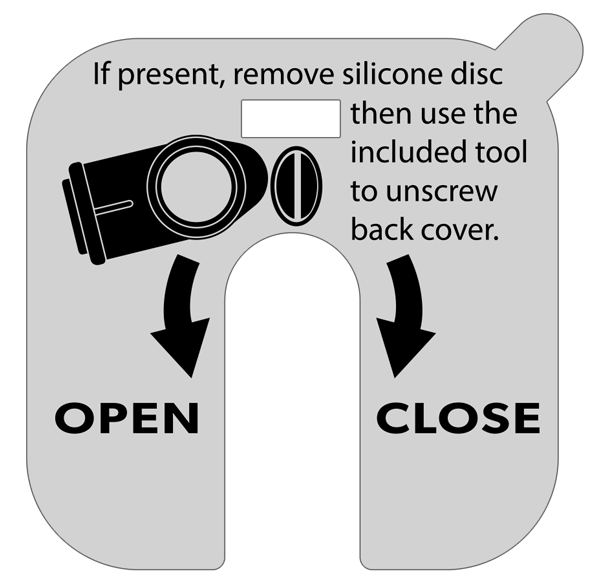
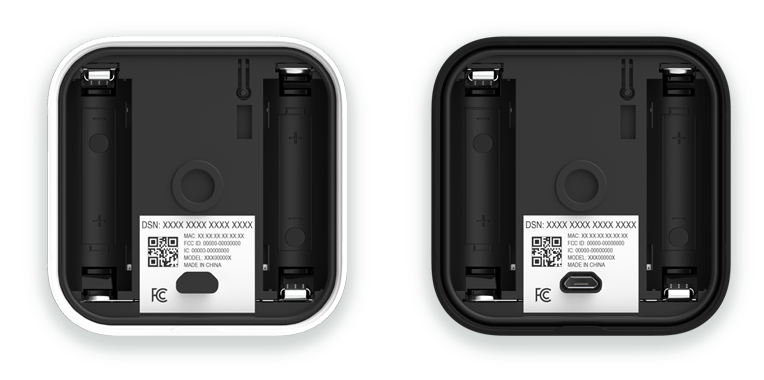
Questo articolo descrive come rimuovere il coperchio posteriore dei dispositivi Blink. È possibile rimuovere il coperchio posteriore per installare le batterie o per trovare il codice QR su alcuni dispositivi Blink.
Il codice QR, che include il numero di serie del dispositivo (DSN), si trova sul retro di alcuni dispositivi Blink o all'interno del dispositivo. È inoltre possibile trovare il codice QR nella guida di configurazione inclusa nella confezione.
Rimuovere il coperchio posteriore delle telecamere
Telecamere Outdoor
Questo articolo descrive come rimuovere la cover posteriore Outdoor 4 e sostituire le batterie.

* Outdoor 4 può essere alimentato tramite la porta USB-C utilizzando un adattatore USB-C resistente agli agenti atmosferici; tuttavia, una volta rimosso il coperchio della porta USB, la fotocamera non è più resistente agli agenti atmosferici finché non viene reinserita.
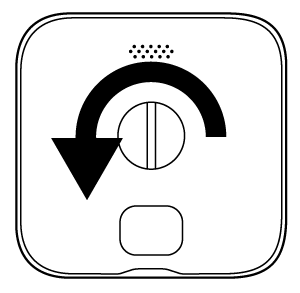
Come rimuovere la cover posteriore
Per rimuovere la cover posteriore della fotocamera, utilizzare lo strumento di apertura ad angolo retto/adattatore incluso o un cacciavite grande.
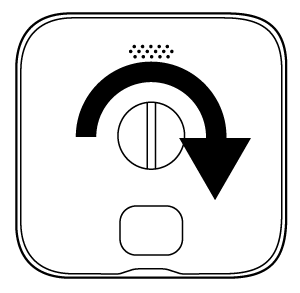
1. Ruotare la vite verso sinistra (in senso antiorario) finché non ruota liberamente.

2. Utilizzare lo strumento di apertura dell'adattatore/angolo retto per fare leva delicatamente in una direzione, sollevando la cover posteriore.
Come installare le batterie
Una volta rimossa la copertura posteriore, inserisci le batterie con i poli positivo (+) e negativo (-) allineati all'interno del vano batterie.
Nota : le fotocamere Blink sono compatibili solo con batterie al litio non ricaricabili di formato AA da 1,5 volt .
Come sostituire la cover posteriore
Per garantire che la cover posteriore sia posizionata correttamente, nel suo design è incluso un montante. La cover posteriore si adatta solo quando il montante è allineato con il foro della serratura sulla fotocamera.
1. Allineare il perno della cover posteriore con il foro della serratura accanto alla porta USB della fotocamera e spingere per chiudere.

2. Utilizzare lo strumento di apertura ad angolo retto/adattatore, una moneta o un cacciavite grande per ruotare la vite verso destra (in senso orario) di circa tre giri finché la cover posteriore non è a filo con la fotocamera.
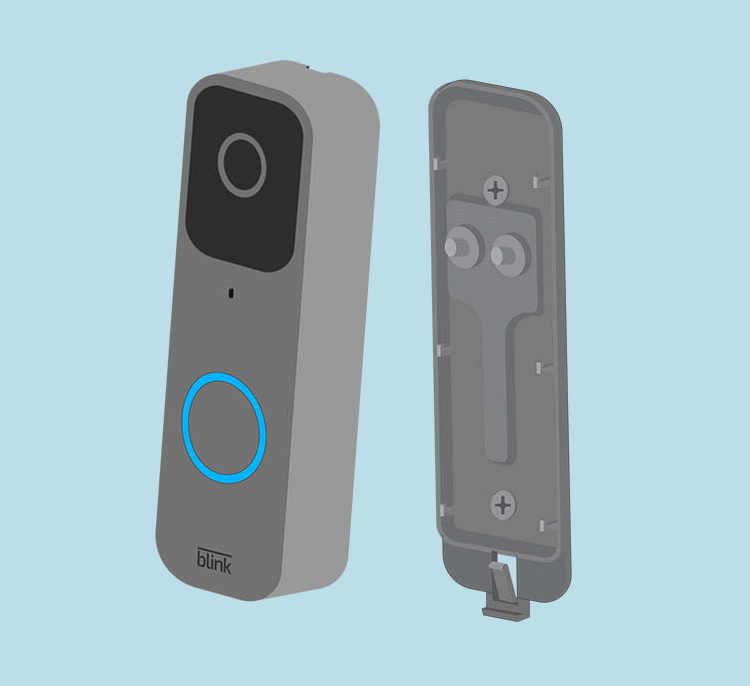
Video Doorbell
Questo articolo descrive come rimuovere il coperchio posteriore e installare o sostituire le batterie del Video Doorbell .
Prima di iniziare
Chiave di rilascio
Individua la chiave di sblocco attaccata al modello di carta nella confezione del campanello. Se hai smarrito la chiave di sblocco, contatta il Servizio Clienti e te ne invieremo una nuova.

Rimuovi il campanello dalla piastra di montaggio
- Premere il tasto di rilascio direttamente nella fessura sul fondo per rilasciare il fermo.
- Una volta rilasciato, rimuovi il campanello dalla piastra di montaggio.

Rimuovere la copertura posteriore
- Per rimuovere la cover posteriore, capovolgi il campanello in modo da guardare il retro (mostrato di seguito).
- Con l'unghia, solleva la chiusura grigia nella parte inferiore del campanello. Questo rilascia la copertura resistente agli agenti atmosferici.
Nota : conservare il coperchio in un luogo sicuro durante la sostituzione delle batterie.

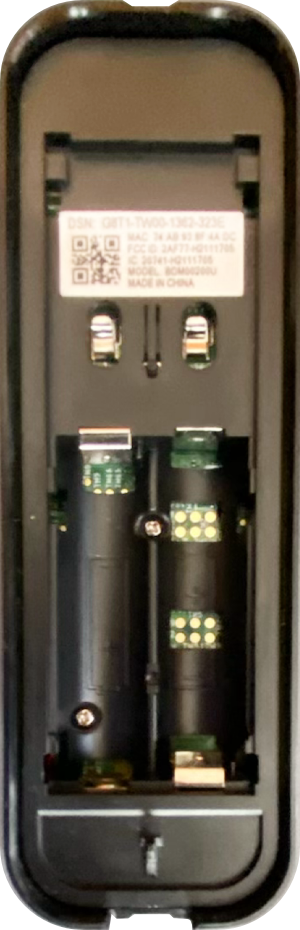
Installare o sostituire le batterie
Una volta rimossa la copertura posteriore, inserire le batterie al litio non ricaricabili AA da 1,5 volt con i poli positivo (+) e negativo (-) allineati all'interno del vano batterie.
Riposizionare la cover posteriore
- Inserire le linguette nella parte superiore della porta nelle fessure vicino alle viti dei terminali.
- Spingi la parte inferiore del coperchio posteriore finché non vedi e senti il fermo grigio scattare in posizione.
Rimonta il campanello
- Allinea la parte superiore del campanello con la parte superiore della piastra posteriore in modo che il gancio si fissi.
- Successivamente, premi con decisione la parte inferiore del campanello contro la piastra posteriore finché non senti un clic.
- Se hai spento il sistema di cicalino, riaccendilo.
- Una volta rimontato, premere il pulsante del campanello per testarlo.
Istruzioni per una piastra posteriore a 2 fori
Se il campanello è dotato di piastra posteriore a due fori, segui questi passaggi per sostituire le batterie.
Rimuovere il campanello dalla piastra di montaggio
- Premere il tasto di rilascio direttamente nella fessura sul fondo per rilasciare il fermo.
- Una volta rilasciato, stacca il campanello dalla piastra di montaggio e fai scorrere il campanello verso l'alto ruotandolo lontano dalla piastra di montaggio.
Sostituire le batterie
Dopo aver rimosso il campanello dalla piastra di montaggio, capovolgi la videocamera e sostituisci le batterie.
Rimonta il campanello
- Allinea la parte superiore del campanello con la parte superiore della piastra posteriore in modo che il gancio si fissi.
- Successivamente, premi con decisione la parte inferiore del campanello contro la piastra posteriore finché non senti un clic.
- Se hai spento il sistema di cicalino, riaccendilo.
- Una volta rimontato, premere il pulsante del campanello per testarlo.
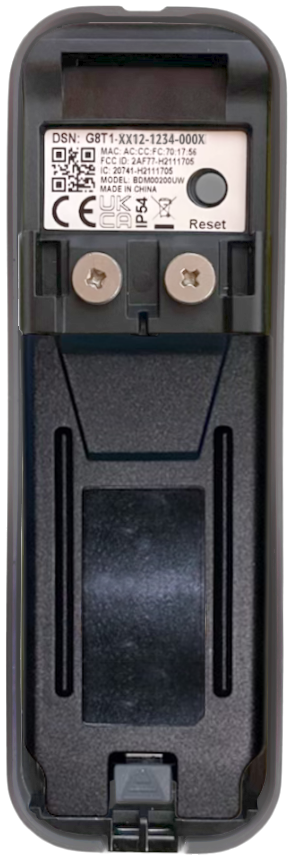
Telecamere Outdoor e Indoor (3rd Gen)
Utilizza questo articolo per istruzioni su come rimuovere la cover posteriore e installare le batterie per le fotocamere Blink Outdoor e Indoor (3rd Gen) .
Prima di iniziare
Prima di tentare di rimuovere la cover posteriore, assicurarsi che la fotocamera sia scollegata da eventuali supporti o accessori. Ciò include eventuali prodotti di terze parti a cui potrebbe essere collegato.
Se la fotocamera è nuova, un adesivo di plastica sul retro della fotocamera mostra la direzione in cui girare. Staccare questo adesivo prima di utilizzare la fotocamera.
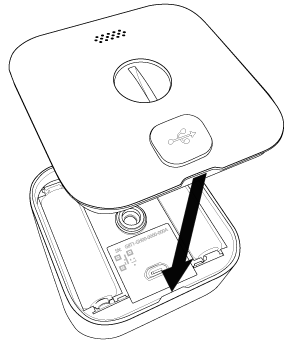
Per rimuovere la cover posteriore e aprire la fotocamera
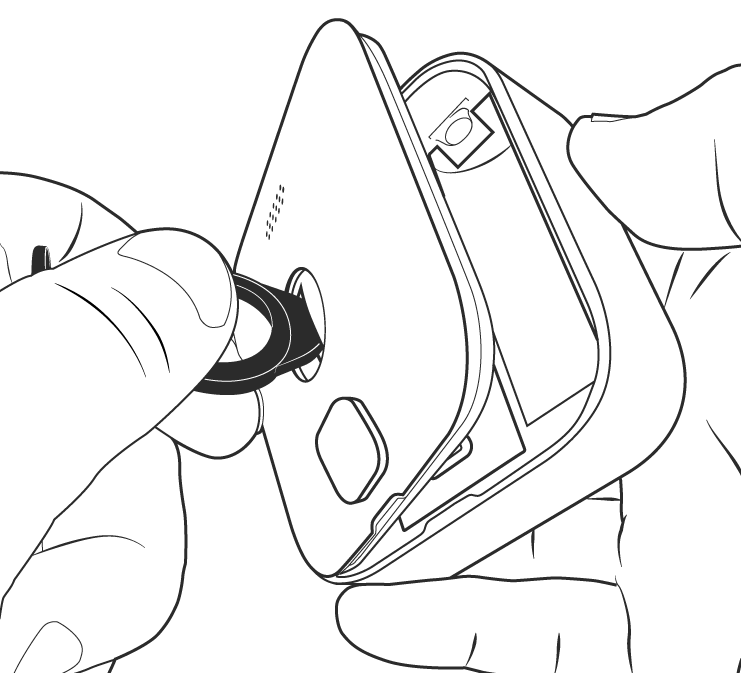
- Se presente, rimuovere la copertura protettiva in silicone dalla vite di fissaggio e conservarla per un utilizzo futuro.
- Utilizzare lo strumento di apertura incluso per ruotare la vite in senso antiorario (ruotando verso sinistra) finché la vite non ruota liberamente. Se lo strumento non è disponibile è possibile utilizzare anche un oggetto equivalente come una moneta o un cacciavite a testa piatta.

- Con lo strumento inserito nella fessura, esercitare una pressione laterale sullo strumento e sollevare delicatamente il coperchio per allentarlo. Come mostrato nell'illustrazione, tenere la fotocamera su un lato con una mano mentre si tira con l'altra mano.
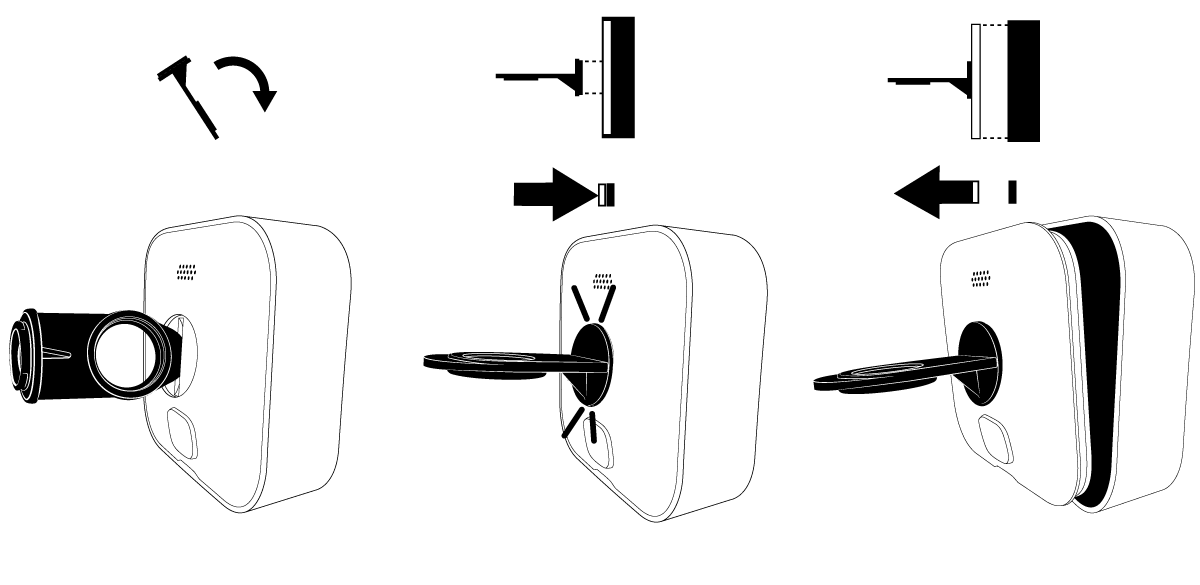
Istruzioni facoltative: esiste un altro modo per rimuovere la cover posteriore.
- Dopo che la vite è stata svitata completamente, capovolgi lo strumento di apertura e inserisci l'estremità di montaggio nel foro del coperchio posteriore della fotocamera. Sentirai e sentirai un clic quando lo strumento sarà fissato.
- Tenere la fotocamera con una mano e tirare delicatamente all'indietro lo strumento di apertura. Ciò consentirà alla cover posteriore di staccarsi.
Installare o sostituire le batterie
Una volta rimossa la cover posteriore, avrai accesso al vano batteria. Aggiungi o sostituisci le 2 batterie AA al litio nei rispettivi slot, facendo corrispondere i segni + e - etichettati sulla fotocamera con i segni + e - etichettati sulle batterie.
Riposizionare e fissare la cover posteriore
- Allineare le tacche della guida come mostrato e premere nuovamente il coperchio in posizione contro il corpo della fotocamera.
- Stringere a mano la vite in senso orario (ruotando verso destra) finché non è ben fissata. Fare attenzione a evitare un serraggio eccessivo. Una volta terminato, la copertura dovrebbe essere a filo con il corpo della fotocamera.
Telecamere XT2 e XT
In questo articolo ti mostreremo come rimuovere il coperchio della batteria dalla telecamera Blink XT .
1. Tieni la fotocamera in modo che la parte posteriore sia rivolta verso di te.
2. Noterai un interruttore grigio con una freccia rivolta verso la parte inferiore della fotocamera. Fallo scorrere e tienilo premuto nella direzione della freccia.
3. Mentre fai questo, tira verso l'alto il coperchio della batteria con il pollice. Potrebbe essere necessaria una certa forza perché la fotocamera è ermetica.
4. Sollevare il coperchio della batteria dalla fotocamera.
Ecco fatto, ora puoi inserire le batterie e accedere al numero di serie del dispositivo (DSN) della tua fotocamera.
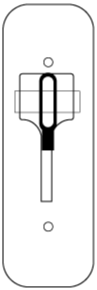
Telecamera Indoor (1a generazione)
Il fermo per rimuovere la cover posteriore della telecamera Indoor (1a generazione) si trova in basso. Fai scorrere il fermo per sbloccare il coperchio della batteria.