This article describes how to remove the back cover of Blink devices. You can remove the back cover to install batteries, or to find the QR code for some Blink devices.
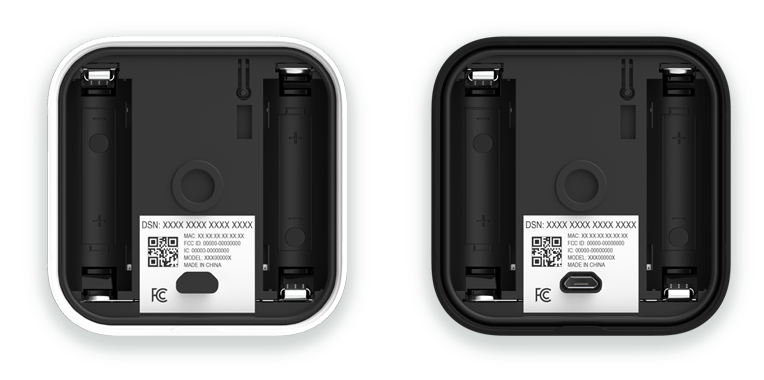
The QR code, which includes the Device Serial Number (DSN), can be found on the back of some Blink devices or inside the device. You can also find the QR code in the setup guide included in the packaging.
How to replace Blink outdoor camera batteries
In this video, we'll walk you through each step of replacing your Blink outdoor camera batteries.
Remove the back cover of cameras
Outdoor cameras
This article describes how to remove the back cover of the Outdoor 4 and replace the batteries.

*The Outdoor 4 can be powered through its USB-C port using a weather resistant USB-C adapter; however, once the USB port cover is removed, the camera is no longer weather-resistant until it's reinserted.
How to remove the back cover
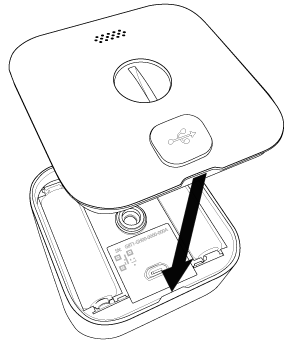
To remove the back cover of your camera, use the included right angle/adapter opening tool or large screwdriver.
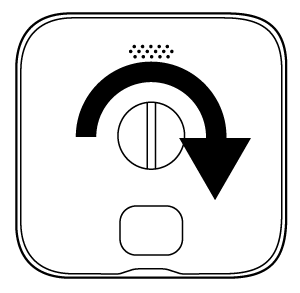
1. Turn the screw to the left (counterclockwise) until it rotates freely.

2. Use the right angle/adapter opening tool to gently pry in one direction, lifting the back cover.
How to install your batteries
Once your back cover is removed, insert your batteries with the positive (+) and negative (-) poles aligned within the battery compartment.
Note: Blink cameras are only compatible with size AA 1.5 volt Lithium non-rechargeable batteries.
How to replace the back cover
To make sure the back cover is placed correctly, a post is included in its design. The back cover only fits when the post is aligned with the key hole on the camera.
1. Align the back cover's post with the key hole next to the camera's USB port and push to close.

2. Use the right angle/adapter opening tool, a coin, or large screwdriver to turn the screw to the right (clockwise) about three turns until the back cover is flush with the camera.
Video Doorbells
This article describes how to remove the back cover and install or replace batteries for the Video Doorbell.
Before you begin
Release key
Locate the release key that was taped to the paper template in the doorbell packaging. If you've misplaced your release key, please contact Customer Service and we'll send you a new one.

Remove the doorbell from mounting plate
- Press the release key straight into the slot on the bottom to release the catch.
- Once released, pull the doorbell off the mounting plate.

Remove the back cover
- To remove the back cover, flip the doorbell over so you're looking at the back (shown below).
- With your fingernail, lift the gray latch at the bottom of the doorbell. This releases the weather-resistant cover.
Note: Keep the cover in a safe place while you change batteries.

Install or replace the batteries
Once your back cover is removed, insert the AA 1.5-volt-lithium non-rechargeable batteries with the positive (+) and negative (-) poles aligned within the battery compartment.
Replace the back cover
- Insert the tabs at the top of the door into the slots near terminal screws.
- Push the bottom of the back cover until you see and hear the gray latch click into place.
Remount your doorbell
- Align the top of the doorbell with the top of the back plate so that the hook sets.
- Next, firmly press the bottom of the doorbell against the back plate until you feel and hear a click.
- If you've switched off the power to your chime system, turn it back on.
- Once remounted, press the doorbell button to test it.
Instructions for a 2-hole back plate
If your doorbell has a 2-hole back plate, follow these steps to replace your batteries.
Remove the doorbell from the mounting plate
- Press the release key straight into the slot on the bottom to release the catch.
- Once released, pull the doorbell off the mounting plate, and slide the doorbell up while pivoting away from the mounting plate.
Replace the batteries
Once you've removed the doorbell from the mounting plate, flip the camera over and replace the batteries.
Remount your doorbell
- Align the top of the doorbell with the top of the back plate so that the hook sets.
- Next, firmly press the bottom of the doorbell against the back plate until you feel and hear a click.
- If you've switched off the power to your chime system, turn it back on.
- Once remounted, press the doorbell button to test it.
Outdoor and Indoor (3rd Gen) cameras
Use this article for instructions on how to remove the back cover and install batteries for Blink Outdoor and Indoor (3rd Gen) cameras.
Before you begin
Before attempting to remove the back cover, make sure the camera is disconnected from any mounts or accessories. This includes any third-party products it may be attached to.
If the camera is brand new, a plastic sticker on the back of the camera shows the direction to turn. Peel off this sticker before using the camera.
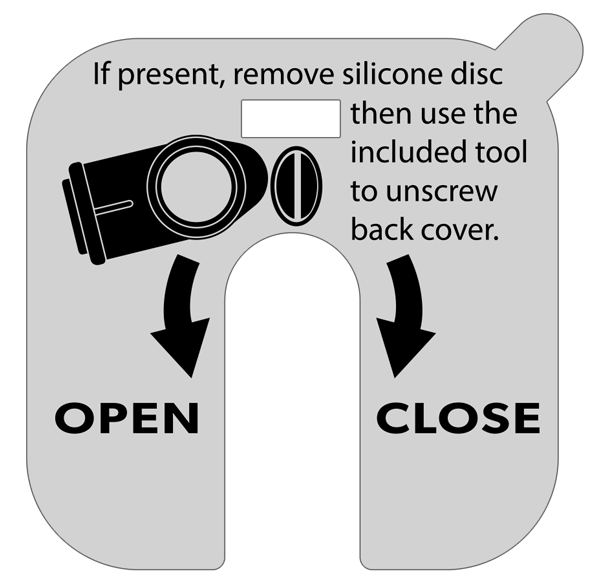
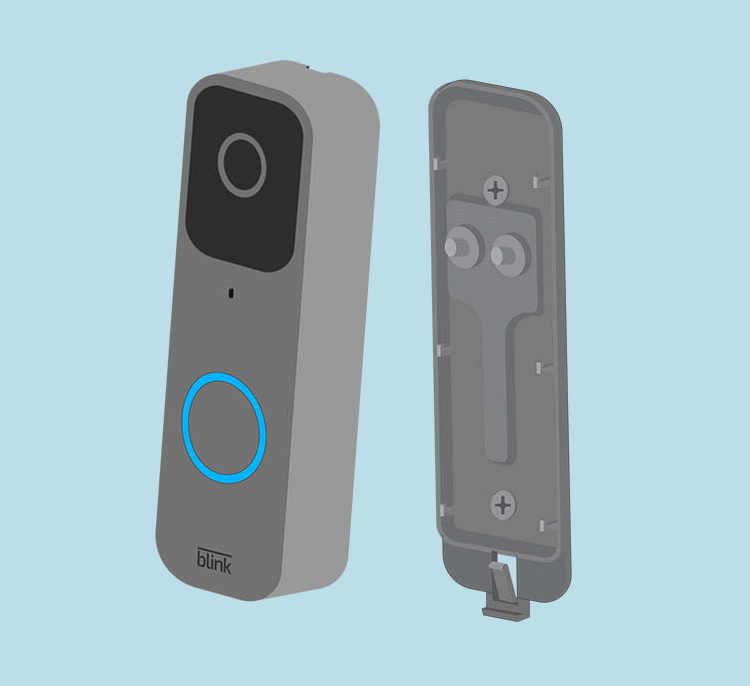
To remove the back cover and open the camera
- If it is present, remove the silicone protective cover from the fastening screw, and keep it for future use.
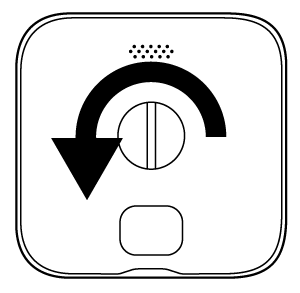
- Use the included opening tool to turn the screw counter-clockwise (turning to the left) until the screw rotates freely. If the tool isn't available, an equivalent object such as a coin or a flat head screwdriver can also be used.

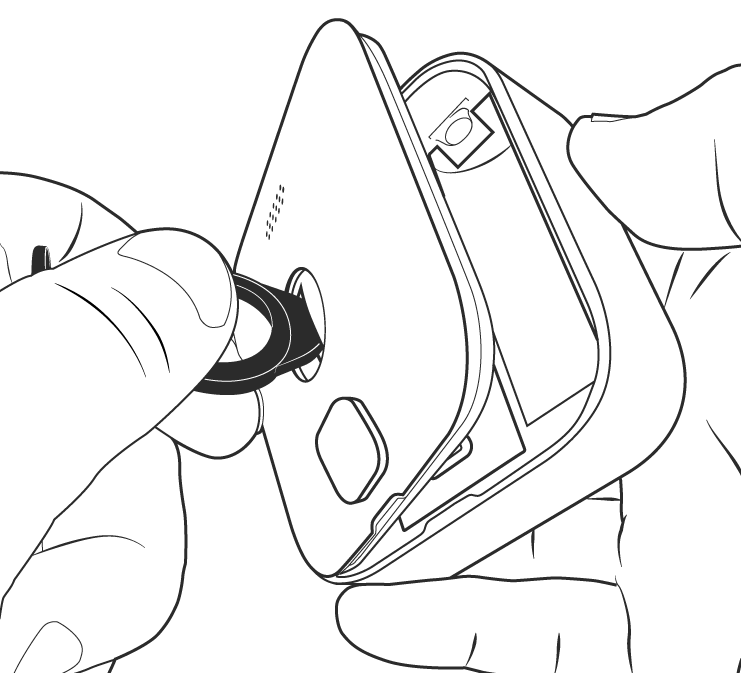
- With the tool inserted into the slot, apply side pressure on the tool and gently pry the cover loose. As shown in the illustration, hold the camera on its side with one hand while you pull with the other hand.
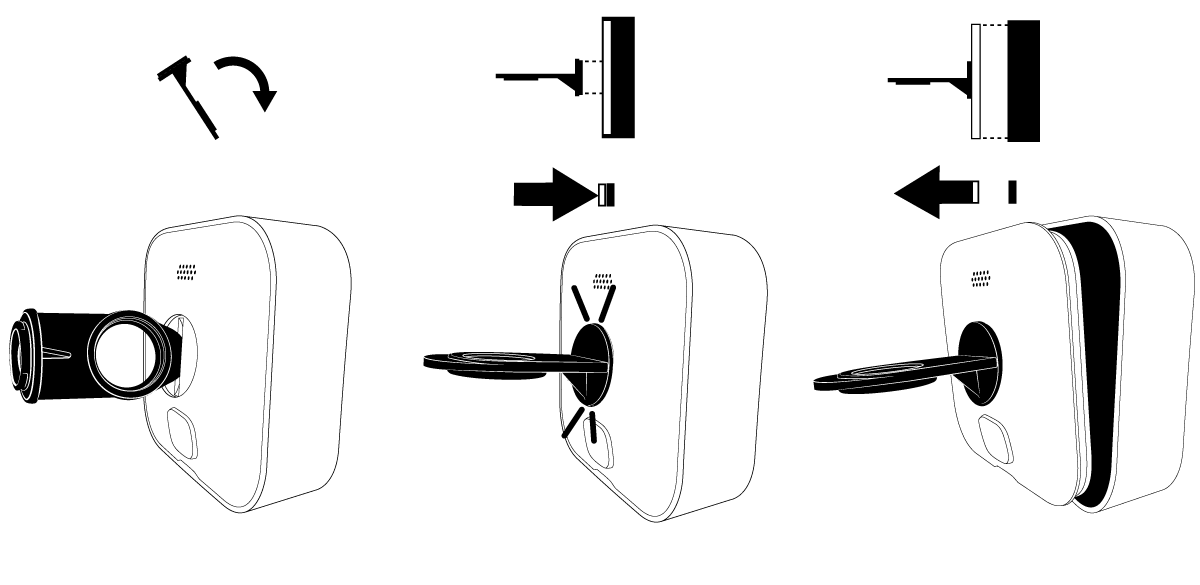
Optional instructions: There is another way to remove the back cover.
- After the screw has been unscrewed completely, flip the opening tool around and insert the mounting end into the camera's back cover hole. You will feel and hear a click when the tool is secured.
- Hold the camera with one hand and pull the opening tool gently backwards. This will allow the back cover to come off.
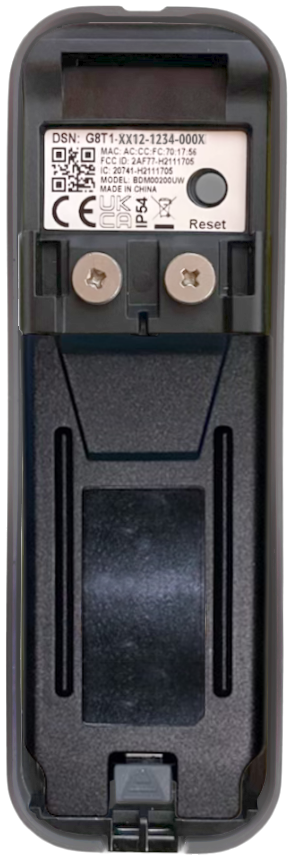
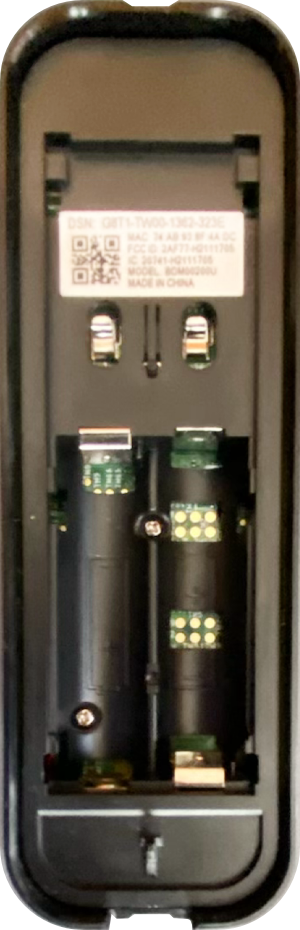
Install or replace batteries
Once the back cover has been removed, you will have access to the battery compartment. Add or replace the 2 AA lithium batteries into their slots, matching up the + and - that's labeled on the camera with the + and - labeled on the batteries.
Replace and secure the back cover
- Align the guide notches as shown, and press the cover back in place against the camera body.
- Hand tighten the screw clockwise (turning to the right) until snug. Take care to prevent over-tightening. The cover should be flush with the camera body when you are done.
XT2 and XT cameras
This article will show you how to remove the battery cover from your Blink XT camera.
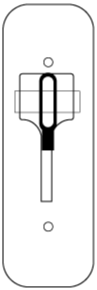
1. Hold the camera so that the back is facing you.
2. You'll notice a grey switch with an arrow facing toward the bottom of the camera. Slide and hold that in the direction of the arrow.
3. While doing this, pull up on the battery cover with your thumb. This may require some force as the camera is air tight.
4. Lift the battery cover off of the camera.
That's it, you can now insert the batteries and access your camera's Device Serial Number (DSN).
Indoor (1st Gen) camera
The latch to remove the back cover of Indoor (1st Gen) camera is on the bottom. Slide the latch to release the battery cover.