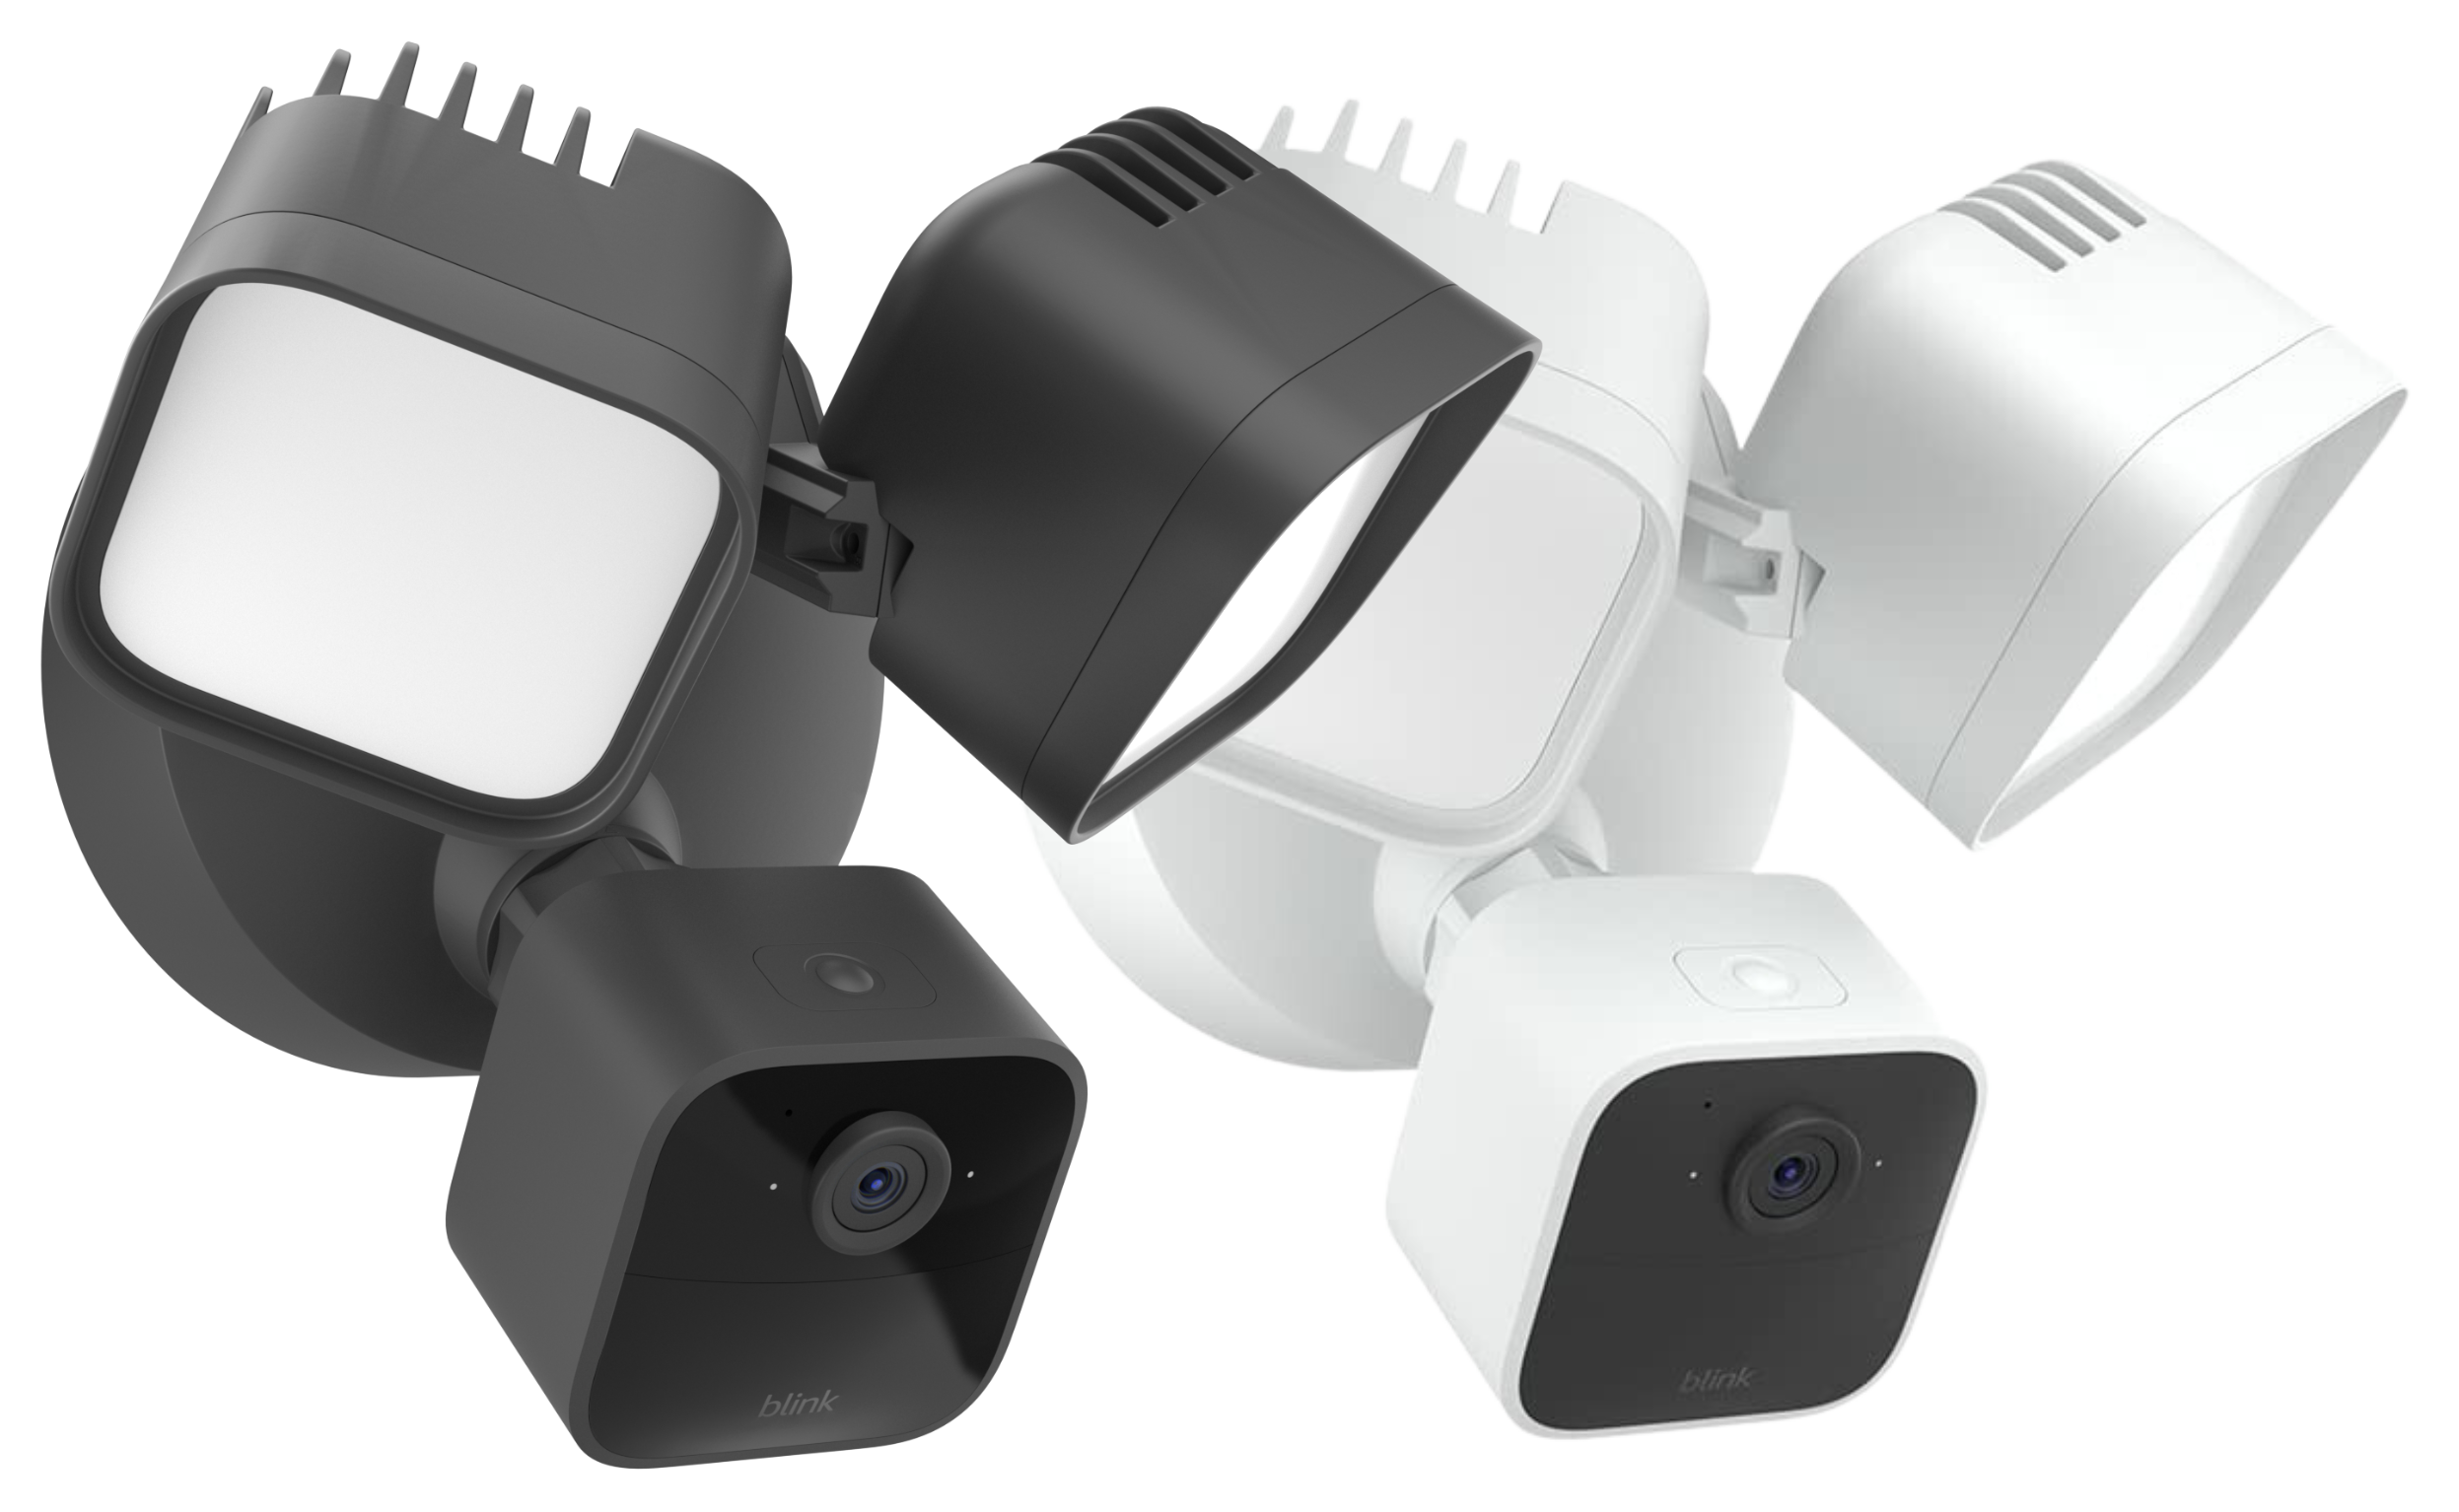
The Blink Wired Floodlight Camera is a hardwired floodlight camera that connects to your Wi-Fi and brings you 1080p HD video, two-way talk, and live view in the Blink app on your mobile device. The camera features 2600 lumens of LED lighting, night view in color, enhanced motion detection, and a siren. The lights turn on and off when motion is detected, or you can manually control your lights from the Blink app.
Getting started
New to Blink? If so, welcome! Learn more about downloading the Blink app and setting up your Blink Account before you begin setting up your new Wired Floodlight Camera. Learn how to install your Blink Wired Floodlight Camera with this instructional video.
Installing your Wired Floodlight Camera
How to install your Blink Wired Floodlight Camera
This article describes how to install your new Blink Wired Floodlight Camera.
Please be aware of the following safety information before you start the installation of your Wired Floodlight Camera.
Verify that the supply voltage is correct. Connect fixture to a 100VAC-240VAC 50/60Hz power source.
Working with electricity can be dangerous unless proper safety precautions are taken. If you are not comfortable or are inexperienced with the processes and tools described in this manual, we recommend that you hire a licensed electrician. Installation by a qualified electrician may be required in your area. Refer to your local laws and building codes before performing electrical work; permits plus professional installation may be required by law.
Additionally:
- Only install the Blink Wired Floodlight Camera on a 4-inch round, UL listed, weatherproof electrical box.
- If you don’t have an existing electrical box, or are unsure how to install one in compliance with your local building electrical codes, it is recommended that you hire a licensed electrician for assistance.
- The ground wire must be connected to the light fixture. DO NOT INSTALL if a working earth ground connection is not available.
- Risk of fire. Do not install near combustible or flammable surfaces. Do not connect this light fixture to a dimmer switch or timer.
- To reduce the risk of falling, take extra caution when using a ladder or similar equipment to mount the product.
The Wired Floodlight Camera must be installed on a wall or covered ceiling.
Check your Wired Floodlight Camera box contents
If anything is missing, do not attempt to install your Wired Floodlight Camera.
You should have:
(1) Wired Floodlight Camera with installation kit:
| Packet | Contents |
| - | (1) Metal mounting bracket |
| - | (1) S-Hook |
| A | (2) #10 - 24 x 1/2“ (M4.6 x 12.6mm) |
| B | (2) #10 - 24 x 3/4“ (M4.6 x 19mm) |
| C | (2) #10 - 24 x 1“ (M4.6 x 25mm) |
| D | (2) #8 - 32 x 1/2“ (M3.9 x 12.6mm) |
| E | (2) #8 - 32 x 3/4“ (M3.9 x 19mm) |
| F | (2) #8 - 32 x 1“ (M3.9 x 25mm) |
| G | (3) Wire Nuts |
| H | (1) Threaded Nut |
| I | (2) Silicone Plugs |
Installation steps
These instructions are for informational purposes only. Working with electricity can be dangerous unless proper safety precautions are taken. If you are not comfortable or are inexperienced with the processes and tools described in this manual, consult a licensed electrician. A 4-inch round, UL listed, weatherproof electrical box is required for installation.
Note: The installation of your Wired Floodlight Camera requires an outdoor silicone sealant, which is not included with this product. Ensure you have an outdoor silicone sealant available before beginning installation.
1. Turn off power at the breaker.
Turn off power at the breaker. This step is essential to keeping you and your new Blink product safe. If you’re not sure which breaker to turn off, turn off the master breaker for your home, or contact a licensed electrician.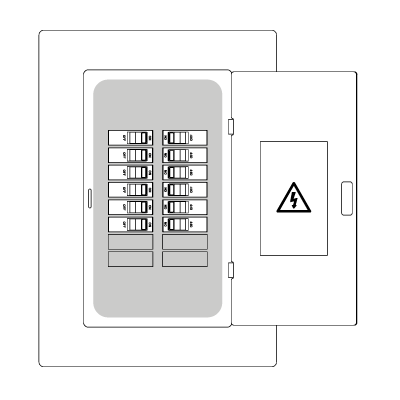
2. Select your location.
Make sure your install location is 9 feet (2.7m) above the ground for best motion detection.
3. Have your hardware ready.
Make sure your Wired Floodlight Camera and hardware are ready to go (screws, metal mounting bracket, and the S-hook). That’s all you’ll need for now.
4. Remove existing wired floodlight (if applicable).
Uninstall your existing wired floodlight according to the manufacturer’s instructions. Be sure to remove any wires, wire nuts, screws, and hardware that came with the device.
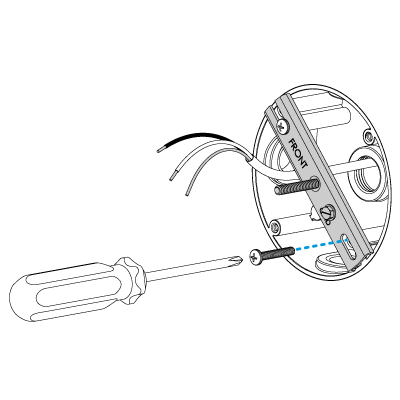
5. Install the mounting bracket.
Using a handheld screwdriver, install the metal mounting bracket. Make sure the side marked “Front” is facing you. Tighten the screws* in the two opposing holes on your electrical box. Not sure which screw to use? See below:
*Screws
Bag A - Standard screws that fit most metal electrical boxes
Bags B & C - Longer screws for recessed metal electrical boxes
Bags D, E, & F - Best for plastic electrical boxes with smaller screw holes
Ensure the metal mounting bracket is secure to the electrical box before moving to the next step.
6. Inspect the wires in your electrical box.
You should see one black wire (for live), one white (for neutral), and one bare metal or green (for ground).
WARNING: If you can’t easily identify the wires coming out of your electrical box or have difficulty or are uncomfortable in any way connecting them, consult a licensed electrician.
7. Hang your Wired Floodlight Camera.
Use the provided S-hook to hang the Wired Floodlight Camera from the mounting bracket while you connect the wires.
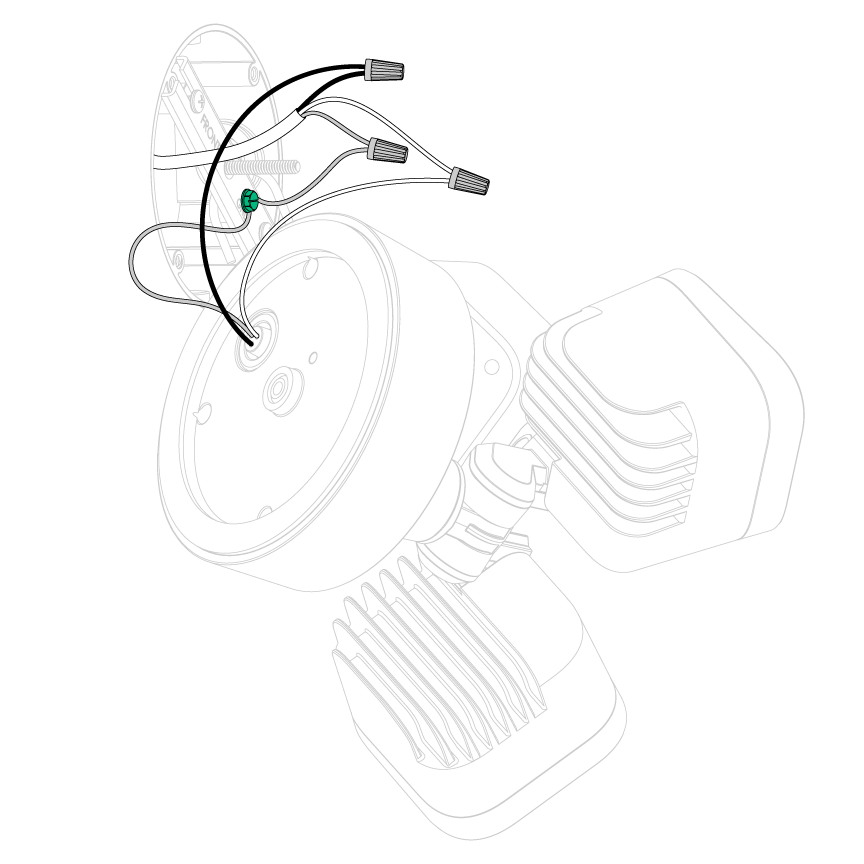
8. Find and connect the ground wires.
The green wire coming from the Wired Floodlight Camera is a ground wire. Connect this green wire to the green ground screw (marked “GND” on the bracket) and to the existing ground wire inside your electrical box. If needed, use one of the included wire nuts.
If you are unable to identify the ground wire coming out of your electrical box, consult a licensed electrician.
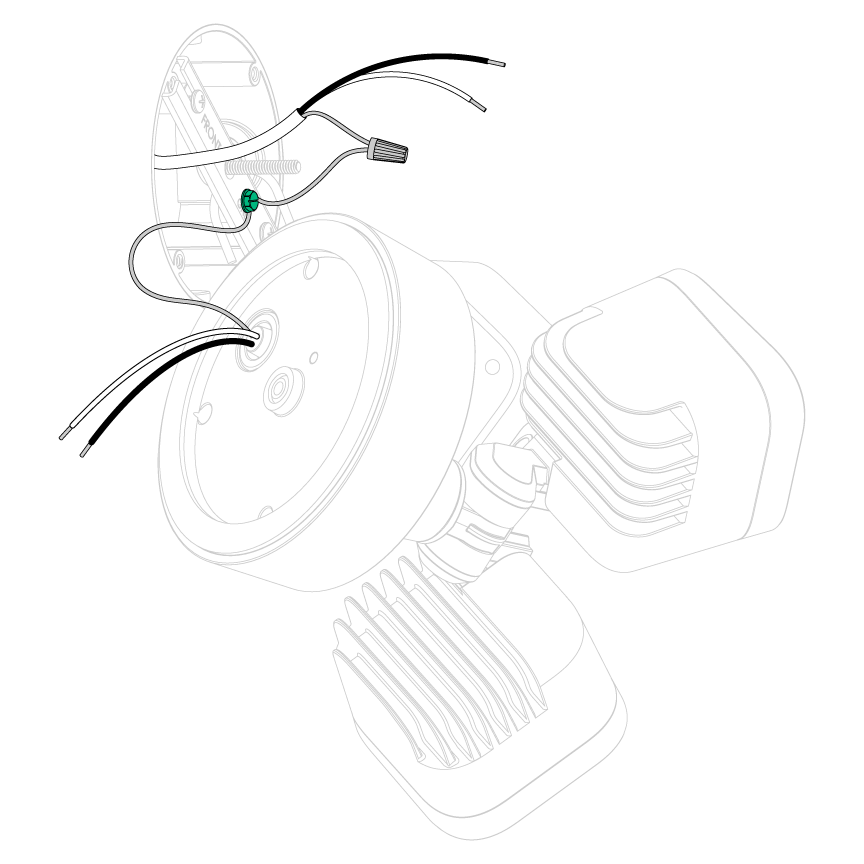
9. Find and connect the power wires.
The white wire coming from the Wired Floodlight Camera is a neutral wire. Connect this wire to the white (or neutral) wire coming out of your electrical box using a wire nut.
The black wire coming from the Wired Floodlight Camera is a hot wire. Connect this wire to the black (or hot) wire coming out of your electrical box using another wire nut.
If you don’t have clearly black-colored or white-colored wires coming out of your electrical box, consult a licensed electrician.
10. Remove the S-hook, then align the light fixture to the electrical box.
11. Place your Wired Floodlight Camera on the bracket.
Use a Phillips-head screwdriver to install the threaded nut from the bag marked “H” onto the post.
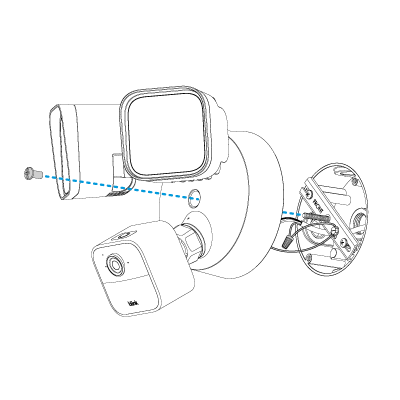
- If you’re installing on a wall, the UP arrow should point up when the wires have been fed through the mounting plate.
- If you’re mounting on a covered ceiling, the arrow should point toward the wall.
12. Insert the silicone plug “I” into the screw hole.
Once your Wired Floodlight Camera is secure, apply an outdoor silicone sealant (not included) to seal around the outside of the Wired Floodlight Camera between the light fixture base and the wall or covered ceiling.

13. Adjust the light heads and camera into the desired position.
For covered ceiling mounting, rotate the camera so you can see the Blink logo when looking at the camera.

14. Restore power at the breaker.
It may take a moment for your Wired Floodlight Camera to power on. It will be ready for setup when the green light is illuminated and the blue light is slowly blinking.
15. Complete the setup in the Blink Home Monitor app.
How to add your Wired Floodlight Camera to the Blink app
Make sure that you download the most recent version of the Blink mobile app and have an account set up. For detailed instructions, see the step-by-step process below.
1. In the Blink app, tap the + on the home screen and select Wired Floodlight Camera.
2. If you've already installed your Wired Floodlight Camera, select It's Been Installed.
If you have not installed Wired Floodlight Camera, select No, I need To Install It and the app will guide you through the installation.
3. We recommend you scan the QR code located on the cover of your Quick Start Guide. The QR code is also located on the back of the mount or on the back of the camera. You can also choose not to scan the QR code by selecting Enter Serial Manually and enter the number from the QR code label.
4. To add the Wired Floodlight Camera to an existing system, tap the system name and tap Next. Or, to create a new system just for the Wired Floodlight Camera, enter a name in the text entry area and tap Continue.
5. The floodlight will be in "Discover Device" mode where one LED displays solid green and the other is slow flashing blue.
The app also shows a popup with instructions to manually discover your device.
a. Long press - erases memory, and enters discover device mode.
b. Power cycle - Off-On (x1) using breaker or power switch (if available).
6. Tap Discover Device in the Blink app.
When the connection request appears ("Blink" would like to establish a connection to the "BLINK-XXXX" network), tap Join.
7. Connect the Wired Floodlight Camera to your Wi-Fi.
Choose your network name (SSID) from the screen that appears. During setup, the Blink app and the Blink device need to be on the same Wi-Fi network. If you added the camera to an existing system, make sure to choose the same Wi-Fi network as your system's.
8. When the Blink servers are ready, the Camera Added screen appears. Tap Done to complete the setup and return to the home screen.
9. The Wired Floodlight Camera now appears on the main screen of the Blink app under the system name. You can tap the serial number label to provide a new name that is easier to identify, and tap the Thumbnail icon to take a fresh image of the camera view.