Use this article for tips on how to securely mount your Blink Outdoor or Indoor (3rd Gen) wireless camera.
Included accessories
Your Blink Outdoor and Indoor (3rd Gen) camera comes with the following accessories:
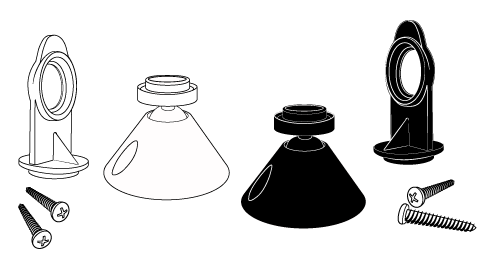
- A back cover opening tool/
- A Blink Camera Mount cone-shaped swivel mount matching the color of your camera body
- Extra Blink Camera Mounts are also sold separately.
- Two screws for the mount
Find the perfect spot
The best motion detection occurs when movement goes across the field of view. Motion directly toward or away from the camera can be harder to detect. Camera placement helps your camera settings be most effective.
You can verify the camera view and check placement by holding your camera in the desired location, and use the Blink app to refresh the camera thumbnail, or enter Live View. Once you've determined the perfect spot, mark your spot with a pencil or a piece of masking tape.
Install the mount onto a surface
When you have determined the best location for your camera, secure the mount to a surface with the provided screws.
Note: The mount and screws are non-corrosive, but if you're mounting outside, some moisture buildup may occur underneath the mount base.
Mounting tips
Now it's time to place your camera onto the mount. Depending on where your camera is placed, it may be helpful to attach the adapter to the camera before attaching both to the mount.
Vertical surface
In vertical mounting locations such as a wall or post, the camera can connect directly to the volcano mount. The camera opening snaps directly onto the mount as shown in the image.

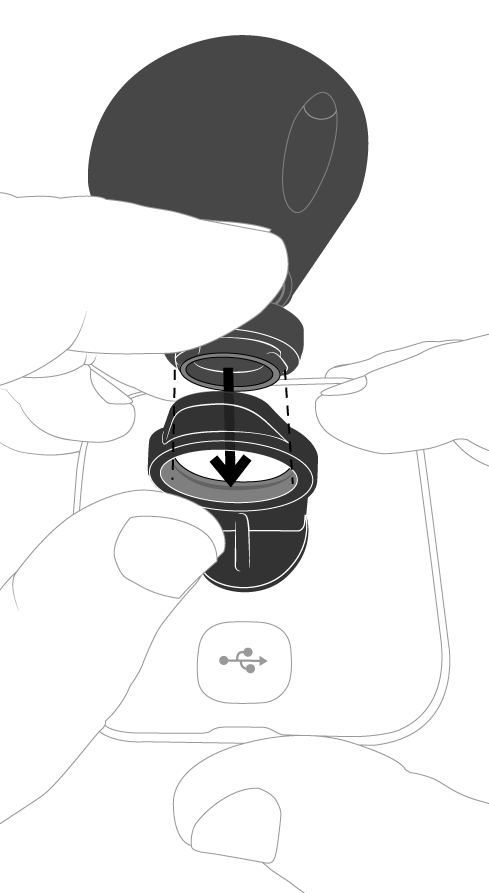
Horizontal surface
In horizontal locations such as a ceiling or shelf, use the right angle adapter. This adapter snaps into the opening on the back of the camera, as shown in the diagram below. You may need to first remove the silicone disc to access the mount opening.
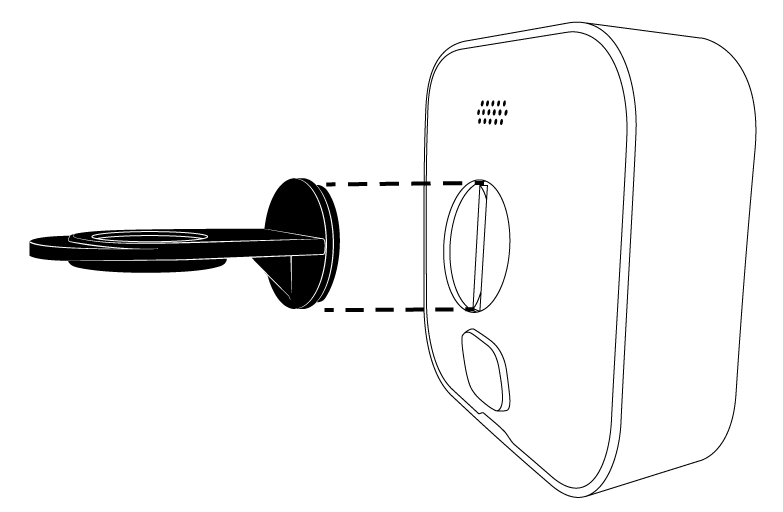
Press the adapter onto the connecting point of the mount. The adapter will snap into place indicating a secure attachment.
After mounting
Once your camera is properly mounted, go back into the Blink app, create a thumbnail or enter Live View to confirm your camera is correctly viewing the area or needs to be adjusted. You can tilt and rotate the mounted camera by gently moving it with your hand to get the perfect viewing angle.