Device Status
The Device Status button on the thumbnail appears if your camera's battery is low or your camera is offline. For floodlight owners, it also indicates if the floodlight battery is low.
Battery status can also be found under General Settings (as shown below).
Learn more about the Camera offline message.
Device Settings
To display all camera settings, tap the More button and then select Device Settings. While the More button provides quick access to commonly used functions, there may be a need to adjust camera settings not listed there, such as audio levels, motion detection sensitivity, or updating privacy zones.
The appearance of the More button varies depending on your Device Settings (see below).
| More button | Description |
|---|---|
 |
System is disarmed |
 |
Motion Detection on |
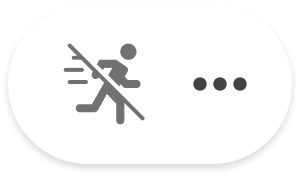 |
Motion Detection off |
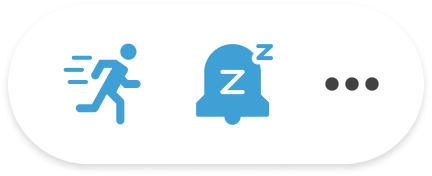 |
Both Motion Detection and Snooze Notifications are on |
From the Device Settings menu, you have access to the following options. Note: If your settings appear differently than shown below, please update your Blink app. To learn more visit Current Blink App Versions.
 General Settings
Last Updated
Tap Pull to Refresh to manually update your camera status.
Name
Camera name that will be displayed on your Home screen. You can edit this name at any time from here or at the Home screen.
Battery Level
This will indicate if your batteries are OK or need to be replaced.
Firmware
Displays your current firmware version.
Status LED
You can set when the LED light displays either as Off or Recording.
Change Wi-Fi
Use this option if you need to connect your Mini, Mini 2, or Wired Floodlight camera to a different router or reconnect your camera to your existing router to troubleshoot an issue.
Network Strength
Displays the Signal Strength from the last time the camera connected. After moving your camera it is a good idea to return here and ensure you have good signal strength.
Connection to Sync Module
Displays the most recent Signal Strength measurement. After moving any part of your system, it is a good idea to visit this settings page to ensure you have good signal strength. If not, move the camera closer to the Sync Module or the Wi-Fi router.
Temperature
The current temperature of that camera. Tap on the temperature to enable temperature alerts or to calibrate the thermometer.
Delete Device
This option removes the camera from your Blink system and it will no longer appear on the home screen. Learn more about deleting devices.
 Motion Settings
Motion Detection
This setting must be on for the camera to detect motion. If this setting is off, the camera will not detect motion. Note: Once you enable motion detection, arm your camera to receive Motion Detection notifications and to save motion clips.
Motion Recording Types
For Mini 2, Outdoor 4 and Wired Floodlight cameras, select whether you want to see video for all motion, people only, or have them suppressed so no recordings are saved. Note: The Person Detection feature is only available when you have a Blink Subscription plan.
Motion Sensitivity
Controls motion sensor sensitivity. Low sensitivity detects larger objects in motion. High sensitivity detects smaller objects. Adjust sensitivity then test by creating motion notifications to achieve the right balance for your needs. Learn more about Motion Sensitivity.
Motion Zones
Disables motion detection for selected regions of the camera view to prevent unwanted motion clips or notifications. Learn more about Motion Zones.
Retrigger Time
The length of time from the completion of one motion clip to the start of another. This can be set from 10-60 seconds. Learn more about Retrigger Time.
Early Notification
This option sends the notification as soon as motion is detected and before the clip is complete. In the Blink App, tap the notification to be immediately taken to the Live View of that camera.
Learn more about Motion Settings.
Delete
 Video and Photo Settings
Motion Clip Length
The length of motion clips to be recorded can be set between 5 and 60 seconds. Video Doorbell and Mini and Mini 2 cameras record clips up to 30 seconds. Mini 2K+ can record up to 60 seconds.
Video Quality
This allows you to change the video quality of your Blink camera. More information about the different modes can be found here.
End Clip Early If Motion Stops
If the camera stops detecting motion, the clip will end before the full clip length is reached.
Flip Video
This should be enabled when mounting a Mini or Mini 2 camera upside down on a ceiling so that the image is rotated right side up.
Night Vision
If set to Off, the illuminator will not turn on. If set to On, the illuminator will always turn on. If set to Auto, the illuminator will only turn on in low light conditions.
IR Intensity
This value controls brightness of the IR illuminator. This value can be set to Low, Medium, or High. Adjust to control glare or show more detail.
Illuminator Intensity
Adjusts the brightness of the LED on the Indoor (1st Gen) camera.
Photo Capture
If Photo Capture is enabled, a photo is taken once per hour. If motion notifications or other events happen (or not), the images are assembled at the end of the day into a photo-animation in the Clip Roll. Learn more about Photo Capture.
Auto-Update Thumbnail
Allows you to refresh your thumbnail image on the Home Screen in the Blink app, with each camera motion event or doorbell press. Auto-Update Thumbnail is enabled by default when new eligible cameras are added to a system. Learn more about Auto-Update Thumbnail.
Note: Photo Capture and Auto-Update Thumbnail only works with Mini 2, Outdoor 4, Indoor and Outdoor (3rd Gen) and Blink Video Doorbell cameras when you have an active Blink Subscription Plan or trial.
 Audio Settings
Speaker Volume
This slider can adjust the speaker audio level for talking through and listening from your Blink cameras.
Dingtone Volume
Controls how loud the Blink chime sound plays when you press your Video Doorbell button when it's wired.
Learn more about Audio Settings.
 Floodlight and Lighting Settings
Wired Floodlight Settings:
Light Brightness
This slider sets the lights' brightness from a scale of 1-10. The default setting is 5.
Dusk to Dawn
Turn on this setting to automatically switch your floodlights on at dusk and off at dawn, based on the amount of light the camera senses.
Timeout after Manual Activation
Select the amount of time the lights will stay on after they are manually turned on. The default is 5 minutes and you can set the lights to stay on for 30 seconds or up to 15 minutes. You also have an initial option *Until I turn off*, which requires you to manually turn off the lights.
Motion Activation
When enabled, the lights will turn on if motion is detected. The lights will turn on regardless of whether your system is armed or not.
Motion Activation when armed: When enabled, the lights will turn on if motion is detected and the camera will record a motion clip.
Motion Activation when disarmed: When enabled, the lights will turn on if motion is detected, even if your system is disarmed. No clips will be saved.
Learn more about arming and disarming your Blink system.
Timeout after Motion Activation
Select the amount of time the lights will stay on after motion is detected. The default is 30 seconds and you can set the lights to stay on for 30 seconds or up to 15 minutes.
Floodlight Mount Settings:
Battery Level
Displays the battery charge percentage for the floodlight.
Light Brightness
This slider sets the LED brightness from a scale of 1-10. The default setting is 5.
Timeout after Motion Activation
This setting controls how long the LEDs remain lit after the detected motion stops. You can chose between 15 and 30 seconds, 1, 2 and 5 minutes. 15 seconds is the default.
Daylight Mode
When enabled, the LEDs will activate when motion is detected during certain daylight hours, when the outside light is limited like at dusk and dawn. The LEDs will not activate when there is an abundance of outdoor light, often during midday hours.
Daylight Sensitivity
This setting only appears when "Daylight Mode" is enabled and controls the sensitivity of the lights during daylight hours. Lower setting values only activate the LEDs in darker conditions and higher values will activate the LEDs in brighter conditions.
Firmware
This displays your current firmware version which may be automatically updated at certain intervals.
Learn more about Floodlight Settings.
Mini 2 Settings:
Light Brightness
This slider sets the LED brightness.
Timeout after Manual Activation
Select the amount of time the lights will stay on after they are manually turned on. The default is 30 seconds and you can set the lights to stay on for 30 seconds or up to 10 minutes.
Motion Activation
When enabled, the lights will turn on if motion is detected.
 Pan Tilt Settings
Firmware
View your current firmware version.
Calibrate Pan-Tilt Mount
Select this option to perform a manual calibration. Learn more about how to calibrate your Mini Pan-Tilt mount.
Learn more about Pan Tilt Settings.
 Doorbell and Chime Settings
Chime settings when Doorbell isn't wired:
Use Blink Mini Camera as Chime
Opens the Mini camera selector. All Mini cameras on the system will be displayed. Learn more about using the Mini camera as a chime.
Mount with wiring
Full instructions for mounting with wiring.
Mount without wiring
Full instructions for mounting without wiring.
Additional settings when Doorbell is wired:
Chime Type
Select the chime type you use such as Mechanical, Digital or Mini.
Chime Power
Allows you to control the volume of your indoor chime by adjusting how much power the chime receives.
Learn more about setting up your Blink Video Doorbell and using the Video Doorbell with a chime.
 Privacy Settings
Privacy Zones
Disables motion detection for selected regions of the camera view to prevent unwanted motion clips or notifications.
Video Recording
When this setting is off, the camera will only send motion notifications without recording clips; however, Live View is still available.
Audio Streaming
Turn this setting off to disable the audio features of your camera.
 Help
Help
Learn more about your device
Displays links to the Blink Support Site that contain setup information for your devices.
Contact Support
This screen contains Blink Customer Support contact information.