This article describes how to manage the Motion Detection feature for your Blink camera.
How Blink cameras detect motion
Blink cameras use either Passive Infrared (PIR) or Pixel Difference Analysis (PDA) to detect motion. Both technologies provide similar motion detection. Blink cameras detect motion best from about 7 to 19 feet (2m to 6m) away, and can respond to motion at 30 feet (10m). Other factors affect what motion is detected like camera placement, object size, and temperature.
Motion Detection using Passive Infrared (PIR) sensors
Blink Outdoor 4, Wired Floodlight, Outdoor and Indoor (3rd Gen), Blink Indoor (1st Gen), XT2 and XT
The Passive Infrared (PIR) sensor detects heat energy from anything in the view. To detect movement, a special lens exaggerates activity across the sensor. PIR can be sensitive to groups of motion, like sunlight and shadows through a tree, blowing leaves, or rain.
PIR is most sensitive to motion moving across the field of view. Objects that are the same apparent temperature as the background may not be detected when they move. PIR sensors also work well with the Night Vision IR light in Blink cameras.
Motion Detection using Pixel Difference Analysis
Blink Mini and Mini 2
Pixel Difference Analysis (PDA) compares every frame of video to the next one, looking for a certain amount of difference. The amount of change needed to make a Motion Detection event is controlled with the Sensitivity setting in the Blink app. Low sensitivity means it is harder to make a motion detection event. High sensitivity responds to small amounts of motion.
Mini cameras have been used to detect motion through glass. This is not the most accurate way to detect motion, however, you can take the following precautions.
- Make sure the area being watched is well lit.
- Put the face of the Mini as close to the window as possible. Some people have even used gaffer's tape to seal the Mini against the window.
- Turn off the Recording LED and the Night Vision IR LED to prevent glare from reflected light.
Note: The Mini camera was not designed to detect motion through glass and your results may not be consistent.
Motion Settings
Motion Settings allow you to customize how your Blink camera detects motion. This setting is accessible by tapping the More  button located at the bottom-right corner of the device thumbnail to access Device Settings. You can then control motion detection, zones, retrigger time, and more. Visit the Device Layout Settings article for a complete list of motion settings for your Blink camera. Note: Before you Enable Motion Detection on your camera, you must first arm your Blink system.
Arming and Disarming your Blink system
By default, your system is disarmed when setting up a new system. When armed, your cameras detect motion and send motion notifications. To save motion clips, you must have a storage option in place. Learn more about available storage options.
Arming your system
To arm your system:
- Tap Armed at the bottom of the home screen of the system you wish to arm. A confirmation message will appear once the system is armed.
You can also arm your system using:
- Scheduling: Set your system to automatically arm at specific times with Scheduled Arming.
- Alexa: Arm your system using the Blink SmartHome Alexa Skill.
The following table refers to how a single camera works when you arm/disarm your system:
| System Status | Motion Detection* | Motion Recording** | Motion Notifications |
|---|---|---|---|
| Armed | On | ||
| Disarmed | On | ||
| Armed | Off | ||
| Disarmed | Off |
*When adding a camera to your system, motion detection is enabled by default. To receive motion notifications, motion detection must be enabled. Motion detection can be enabled or disabled individually for each camera.
**To save motion recordings, a storage option is required. Learn more about available storage options.
To adjust your cameras motion detection settings, from the Home Screen, tap the More button  located at the bottom-right corner of the device thumbnail, then select Device Settings > Motion Settings.
The table below explains the various icons you may encounter:
| Icons | Description |
|---|---|
|
System is disarmed. |
 |
Motion detection is on. |
 |
Motion detection is off. |
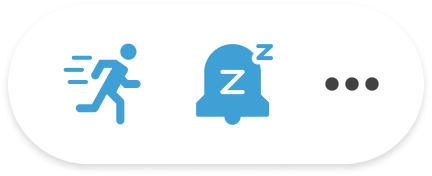 |
Motion detection is on, and Snooze* is active. |
*When Snooze is active, your cameras will still record motion if you have a storage option in place, but motion notifications will be paused. Learn more about snoozing motion notifications.
Disarming your system
When your system is disarmed, your cameras will not record motion events or send motion notifications to your mobile device.
To disarm your system:
- Tap Disarmed at the bottom of the home screen. A confirmation message will appear once the system is disarmed.
Frequently asked questions
Do I need a storage option to save motion clips?
Yes, to save motion clips, you must have a storage option in place. Learn more about available storage options.
DeleteWhy are my motion clips not saving even though my system is armed?
If your system is armed and motion recordings are not saving, verify the following:
- You have an active storage option to save motion clips. Learn more about available storage options.
- Motion detection is enabled for your device. If motion detection is turned off, motion clips will not be saved. Learn more about motion detection.
Does arming your system automatically enable motion detection for all devices?
No, arming your system does not automatically enable motion detection for all devices. Motion detection is enabled by default for each device but can be individually disabled. When you arm your system, only cameras with motion detection enabled will detect motion. If motion detection is disabled for a camera, it will remain off even when the system is armed.
To enable or disable motion detection:
- Tap Settings from the bottom navigation menu.
- Tap Device and System Settings.
- Under Systems, select your system.
- Tap All Devices.
- Select the device for which you want to adjust motion detection.
- From Device Settings, tap Motion Settings.
- From Motion Settings, you can enable or disable motion detection for your camera.
Learn more about motion detection.
DeleteCan I pause motion notifications without disarming my system?
Yes, you can pause motion notifications using Snooze. You can set Snooze for 30 minutes, 1, 2, 3, or 4 hours. With a Blink Plus subscription plan or trial, you can customize the Snooze duration from 1 minute up to 24 hours.
If you have a storage option, your clips will still be recorded and saved when Snooze is enabled. Learn more about Snooze.
DeleteCan I manually arm/disarm my system if a schedule is set?
Yes, you can manually arm or disarm your system even with a schedule set. For example, if your system is scheduled to arm from 8 AM to 5 PM on weekdays and you disarm it at 12 PM on Monday, it will stay disarmed until the next scheduled arming at 8 AM on Tuesday. Learn more about Scheduling.
DeleteEnable Motion Detection
Use this article to understand how to turn Motion Detection On or Off.
By default, Motion Detection is On for every camera on your system.
When Motion Detection is On for a camera:
-
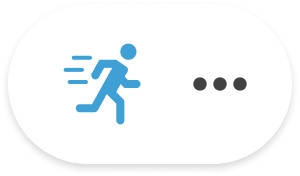
The Motion Detection icon (Running Man)
 appears on the Home screen next to More
  for each of your camera's thumbnails.
 - You will receive motion notifications for motion events on your mobile device once you have Armed your system.
- If you have a Blink Subscription Plan or trial or are using Local Storage with a Sync Module 2 and USB drive,` motion events are recorded as motion clips. If you are not subscribing to a Blink Subscription Plan or do not have local storage, no motion clips are saved. Learn more at Blink storage options for motion clips.
When Motion Detection is Off for a camera:
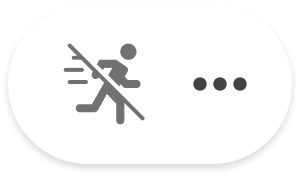
- The Motion Detection icon (Running Man) changes to
 .
.
- You will not receive motion notifications on your mobile device.
- Motion clips will not be recorded and saved into your storage location.
How to activate it
In the lower right of the camera's thumbnail, tap More, and then tap Motion Detection  .This turns the Motion Detection setting On or Off.
- A message displays at the top of your camera's thumbnail confirming Motion Detection has been turned On or Off.
-
 means Motion Detection is On, and the camera is actively watching for motion.
 -
 means Motion Detection is Off for that camera.
Note: The Motion Detection setting can also be accessed by tapping More > Device Settings.
Turning off Motion Detection
If you have have a Blink Subscription Plan or trial, and you want a specific camera in your system to record motion clips, turning off Motion Detection may be a solution.
For example, you want notifications for a visitor arriving at your "Front door" camera, but you don't want to be notified of motion events seen by your indoor "Living Room" camera. In this scenario, Motion Detection is On for the "Front door," and Off for the "Living Room."
- When the system is Armed, all motion seen by "Front door" creates a notification, but all motion seen by "Living Room" will not.
- When the system is Armed, video clips are recorded for "Front door" events, but no motion clips are recorded from the "Living Room."
- When the system is Disarmed, no notifications are sent and clips will not be recorded by either camera.
Snooze
Alternatively, if you want to temporarily disable Motion Detection, you can use Snooze. Learn more about How to Snooze Motion Notifications.
Settings memory
Each time your system is Armed, your settings will stay the same. Cameras that have Motion Detection On or Off remain that way until you change them.
Turning Motion Detection On or Off within Device Settings
You can also turn Motion Detection On or Off through your camera's Device Settings.
Note: This setting functions the same as turning Motion Detection on or off through More.
- From your camera's thumbnail, tap More here
 .
. - Tap Device Settings
 .
. - Tap Motion Settings.
- The first setting is Motion Detection. Tap the toggle to turn On or Off.
Snooze Motion Notifications
You can pause motion notifications on your mobile device using Snooze. Your notifications will automatically resume once your selected time period ends.
Your camera continues recording during Snooze if you have:
- A Blink Subscription Plan (active or trial).
- Local storage with a Sync Module 2 and USB drive or Sync Module XR and MicroSD card.
With a Blink Subscription Plan, you can use Custom Snooze to pause notifications anywhere from 1 minute to 24 hours. To learn how, see the "Custom Snooze" section below.
Turning on snooze in the Blink app
- On your camera's thumbnail, tap More (...).
- Tap the Snooze button
 and then select how long you want the Snooze to last.
- Select 30 minutes (default) or up to 4 hours. If you want to cancel, tap the back arrow.
- Once you've chosen your snooze length, tap Start Snooze.
- If you'd like the Snooze to apply to all of the cameras in your system, check the box next to Apply to all devices.
- When your camera's notifications are being Snoozed, the Snooze icon
.png) will appear to the left of Motion Detection
will appear to the left of Motion Detection .png) .
.
Turning off snooze in the Blink app
To end an active Snooze early, tap the solid blue button. A confirmation message displays the amount of Snooze time remaining.
- The Snooze icon will switch back to gray.
- Tap the Apply to all devices checkbox to end Snooze for all cameras on the system.
Snoozing motion alerts from a notification
You can quickly snooze motion alerts directly from a motion notification:
- To snooze motion alerts:
iOS - Press and hold the Blink notification sent to your mobile device.
Android - Tap the Blink notification sent to your mobile device. - In the quick action menu that appears, select either Snooze: 1 hour or Snooze: 4 hours.
For additional snooze durations, follow the steps in "Turning on snooze in the Blink app" above.
Alexa Snooze Notifications
Alexa will continue announcing events even if you have turned on Snooze notifications for your camera or system. To turn off Alexa Motion Announcements, follow these steps:
- Go to the Alexa app.
- Go to Settings > Device Settings.
- Select the device you want to stop the announcements for.
- Under ANNOUNCEMENTS, turn off Motion Announcements.
If you want Alexa to resume announcing motion notifications, you must turn on Motion Announcements in the Alexa app.
DeleteSetting custom snooze notifications
When you have a Blink Subscription Plan or trial, you can set a Custom time frame for snoozing your motion notifications and enter any time increment from 1 minute and up to 24 hours. Learn more about Blink Subscription Plans.
- Tap More (...) on the Home Screen and then Notification Snooze.
- Tap Custom.
- Select the amount of time to Snooze your notifications and then tap Start Snooze. Choose any time from 1 minute to 24 hours to pause notifications. Your set custom Snooze time will then appear as a notification on the Home screen.
To start receiving notifications again, tap the solid Snooze icon. It turns gray when off.
Motion Zones
Activity Zones are available for all Blink cameras. Setting Activity Zones allow you to eliminate areas in your camera's field of view which may be causing too many motion notifications.
For example, if your Outdoor camera view has a tree or bush that is triggering unwanted motion clips, you can adjust your Activity Zones to exclude that area. The camera will ignore the motion occurring in the Activity Zone which prevents sending unwanted motion notifications.
Creating Activity Zones
- Choose the camera that you want to add Activity Zones to, tap More (...) then select Device Settings.
- From Device Settings, select Motion Settings and then tap Motion Zones.
- On the Activity Zones screen, the most recent thumbnail is shown with a grid pattern.
Tap Update Photo to refresh the thumbnail image so your settings are accurate. - Select your desired inactive Activity Zones by tapping on the rectangle you would like to isolate. A selected area will become grayed out. The area within the gray square will not detect motion, even if motion occurs.
In the example below, bushes and plants are chosen as inactive Activity Zones since these outdoor elements may cause unnecessary motion events.
Note: The Advanced option in the Motion Zones screen is only available for Mini 2, Outdoor 4, Wired Floodlight, Indoor and Outdoor (3rd Gen), and XT2 cameras. This allows you to zoom into the thumbnail for more precise zone selection. When using the Advanced option, swipe to move the view and tap to select areas that are active or inactive for motion detection. When you're done, tap Save.
- After you've selected your desired inactive Activity Zones, tap Done. To make all zones active and restart the process, tap Reset Zones.
How to set up activity zones
In this video, we'll walk you through each step of setting up activity zones.
Privacy Zones
Privacy Zones allow you to block off areas in your camera view that will not be recorded. This is only available for the Mini 2, Outdoor 4, Wired Floodlight, Video Doorbell and Indoor and Outdoor (3rd Gen) Camera. Learn about on-camera Privacy Zones.
Troubleshooting
Activity Zones
If you're experiencing issues with Activity Zones, it's important to understand how Activity Zones work.
In a typical event without Activity Zones enabled, the camera uses the Passive Infra-Red (PIR) sensor to detect motion. If a person walks past the camera, that person has a different temperature than the background image that the PIR sensor has been looking at and it triggers a motion event.
With Activity Zones, the camera uses the PIR sensor in addition to analyzing the image to look for changes. The camera analyzes the motion event over the course of two seconds and looks for pixels in the images changing.
- If the camera sees pixels changing in Activity Zones, the camera continues to record and will send the notification.
- If the camera sees pixels changing within a non-Activity Zone, the camera turns off and stops recording.
Considerations
In certain situations, pixels can change outside of your Activity Zones when there technically isn't motion.
- Example: Your camera is pointing toward the street, but you have Activity Zones on the part of the view that is the street to keep passing cars from sending you notifications. During the day, Activity Zones function as intended. However at night, a car's headlights could shine into areas outside of your Activity Zones. This could be perceived as motion by the camera, as it would see pixels change, and therefore send you an unwanted notification.
To fix the above scenario, you may need to fine tune the precise positioning and angle of the camera, as well as adjusting Activity Zones so that you can find out what works best in your environment.
If you're continuing to have difficulty with unwanted notifications, learn more by visiting Troubleshooting Motion Notifications.
DeleteDoorbell
The Video Doorbell offers two solutions to minimize unwanted motion alerts:
- Activity Zones: Define specific areas where motion detection is active
- Mounting Options:
- Wedge Mount: Adjusts view up or down.
- Corner Mount: Adjusts view left or right.
For example, to reduce alerts from street traffic, use the Wedge Mount to angle the camera downward, focusing on the immediate doorway area.
To learn more:
- For Video Doorbell (1st Gen), visit Install a wedge or corner mount.
- For Video Doorbell (2nd Gen), visit Video Doorbell: (2nd Gen) Installing a Corner or Wedge Mount.
Privacy Zones
A Privacy Zone is an area you select that will not be recorded by your camera. For example, you may want exclude a neighbor's door or window from being viewed or recorded by your camera. Up to two Privacy Zones can be set and they are easily recognized as gray areas of the screen.
Note: Privacy Zones are only available for the Mini 2, Outdoor 4, Wired Floodlight, Video Doorbell and Indoor and Outdoor (3rd Gen) Camera.
Creating Privacy Zones
- Choose the camera that you want to add Activity Zones to and tap More (...) located at the bottom-right corner of the device thumbnail to access Device Settings.
- From Device Settings, select Motion Settings and then tap Motion Zones.
- On the Motion Zones screen, tap Privacy Zones at the top.
The most recent thumbnail is shown with a grid pattern. Tap Update Photo to refresh the thumbnail image so your settings are accurate. - Tapping Reset Privacy Zones deletes the existing zones. Privacy Zones cannot be edited, only deleted (reset) and recreated.
- Tap and drag on the screen to draw up to two zones you want selected within the thumbnail image. Once zones are created they can be moved and resized by dragging on the blue dots at the corners of each.
- After your zones are drawn, tap Done to save them. You can tap Save to apply all settings changes and be sent to the Home screen.
- If you tap Zones again, the Zones screen now shows the Privacy Zones in black to help contrast with activity zones, which are grey in the Activity Zone view.
Retrigger time
This article describes how to adjust the retrigger time for your Blink camera.
Retrigger time is the amount of time between the end a motion capture and beginning of a new motion event. During the retrigger time, your camera does not record motion events.
By default, the system will capture a five second clip, and wait for the retrigger time of 30 seconds. If motion continues, the camera will capture another five second clip. Retrigger time can be adjusted under Device Settings.
Note: Each camera in your system has an individual retrigger time setting.
Adjusting the Retrigger Time
- From the Home screen, tap the More (...) button and then select Device Settings.
- From the Device Settings screen, tap Motion Settings.
- In Motion Settings, you can adjust the Retrigger time value from 10 to 60 seconds. To increase the retrigger time, move the slider to the right and to decrease the delay move the slider to the left.
- The longer the retrigger time is set, your camera allows more time between notifying you of the next motion event it detects. This is useful if your camera views an area where motion occurs often or if you are getting false triggers.
- When you have this setting where you want it, tap Save.
Test your settings
After you have set your desired retrigger time, Arm your Blink system and then walk through the field of view of your adjusted camera. You will receive a motion alert on your screen. Continue to walk through the field of view of this camera for the length of your delay. You will receive a second motion alert when your system has captured another clip. If the retrigger time was too short or too long between captured clips, return to camera settings to fine tune.
Adjusting Sensitivity for your Blink Camera
Your Blink camera captures motion based on either Passive Infrared (PIR) or Pixel Difference Analysis (PDA). Your camera's Motion Sensitivity setting adjusts how much input it takes to send you a notification. Learn more about how Blink cameras detection motion.
Low sensitivity is less responsive, so a larger amount of heat or motion are needed to cause a notification. The highest setting may cause alerts from blowing leaves or even shadows.
If you are receiving too many notifications with nothing interesting, try reducing the Motion Sensitivity down two levels. If that is effective, test by arming the system, and walking in the field of view when Motion Detection is on, to make sure a human sized object will trigger a notification.
Be careful if you tap the notification and enter Live View with your microphone or speakers on, since significantly loud feedback may occur. In this case, tap mute speaker in the upper right corner of the Live View.
Each camera has an individual sensitivity setting and you can find this in the Device Settings for each camera in your system.
Choosing High or Low Sensitivity
The motion sensitivity setting on your camera not only depends on what is making the movement, but how long the movement is occurring.
- High sensitivity (values of 6-9) means less motion over a shorter period of time will create a notification.
- Low sensitivity (values of 1-4) means more movement over a longer period of time will create a notification.
Note: Default sensitivity is normally a value of 5, except for Outdoor 4 cameras which have a default sensitivity of 6.
The motion can be a big or small object, or a lot of small objects. Motion detection depends on where the object is in relation to the camera lens. For example, a bird flying close to the camera can be perceived as bigger than the person walking on the sidewalk in the distance. A person walking directly toward the camera will produce less motion than a dog walking left to right across the camera's field of view. It's about the amount of motion that's occurring within the detection zone of the camera and not necessarily how large the object is.
Testing sensitivity for your home camera
- Tap More (...) on your camera's thumbnail and select Device Settings
 .
.
- Select Motion Settings.
- On Motion Sensitivity, move the slider two or three increments to the left for a lower numeric setting. Tap Save to save this setting and walk out of the frame of view of this camera.
- From the main screen of the Blink app, set your system to Armed to enable Motion Detection.
- Test the camera sensitivity by introducing movement.
- If the sensitivity is not successful, reduce the slider more, save, and try again.
- If you have adjusted the sensitivity to your liking, proceed to test with a larger moving object, such as yourself. Walk in front of your camera and check to see if the setting gives the desired motion alert.
- If the lowest sensitivity continues to cause an unwanted Motion notification, you may need to create an Activity Zone instead. Learn more about setting Activity Zones.
Early Notification
When early notification is turned on, your camera sends a notification to your mobile device as soon as motion is detected. If early notification is turned off, the notification is sent after the clip has been recorded and is available to view in the clip list. Learn more about motion detection and motion notifications.
What happens when you receive an early notification?
When you tap a motion notification while a clip is still recording, you'll be taken directly to the clip list where a "Recording in progress" message will appear. Once the clip finishes recording, it will automatically update to "The clip is ready to view."
If you exit the clip list before the clip has finished recording, a banner will appear at the bottom of the app letting you know that a new clip is available to view.
Early notification availability
Early notification is available for:
- Outdoor and Indoor (3rd Gen)
- Mini
- XT2
- Mini 2*
- Outdoor 4*
- Wired Floodlight Camera*
- Video Doorbell*
*Early notification is turned on by default and cannot be turned off.
Turning early notification on/off
To turn early notification on or off:
- Tap the More (...) button located at the bottom-right corner of the device thumbnail.
- Tap Device Settings.
- Tap Motion Settings.
- Toggle on Early Notification.
End Clip Early if Motion Stops
How to enable the setting
- From the Home screen, tap More
 on your desired camera and then tap Device Settings
 .
. - From the Device Settings screen, tap Video and Photo Settings.
- Find End Clip Early if Motion Stops. Tap the switch to turn it on.
Note: Not available for the Wired Floodlight Camera.
What does it do?
When this setting is switched on, your camera stops recording a video clip if motion is no longer occurring before the Clip Length reaches its stopping point.
For example, let's say your Clip Length is set to record for 30 seconds after motion is detected, and a car passes by your camera's view.
- Setting off: The camera will keep recording until the set Clip Length is reached. In this example, the clip would be 30 seconds long.
- Setting on: Your camera would record the clip of the car passing by and end immediately afterwards if no more motion occurs.
This feature may not always end the clip early under certain conditions.