In diesem Artikel wird beschrieben, wie Sie die Bewegungserkennungsfunktion Ihrer Blink Kamera verwalten.
So erkennen Blink Kameras Bewegungen
Blink Kameras verwenden entweder Passiv-Infrarot (PIR) oder Pixel Difference Analysis (PDA), um Bewegungen zu erkennen. Beide Technologien bieten eine ähnliche Bewegungserkennung. Blink Kameras erkennen Bewegungen am besten aus einer Entfernung von etwa 2 bis 6 Metern und können auf Bewegungen in einer Entfernung von 10 Metern reagieren. Welche Bewegungen erkannt werden, hängt von anderen Faktoren ab, wie z. B. der Platzierung der Kamera , der Größe des Objekts und der Temperatur.
Bewegungserkennung mit passiven Infrarotsensoren (PIR)
Blink Outdoor 4 , Wired Floodlight , Outdoor und Indoor (3rd Gen) , Blink Indoor (1. Generation), XT2 und XT
Der Passiv-Infrarot-Sensor (PIR) erkennt Wärmeenergie von allen sichtbaren Objekten. Um Bewegungen zu erkennen, übertreibt eine spezielle Linse die Aktivität über den Sensor hinweg. PIR kann auf Bewegungsgruppen wie Sonnenlicht und Schatten durch einen Baum, wehendes Laub oder Regen empfindlich reagieren.
PIR reagiert am empfindlichsten auf Bewegungen, die sich durch das Sichtfeld bewegen. Objekte, die die gleiche gefühlte Temperatur wie der Hintergrund haben, werden möglicherweise nicht erkannt, wenn sie sich bewegen. PIR-Sensoren funktionieren auch gut mit dem Nachtsicht-IR-Licht in Blink Kameras.
Bewegungserkennung mittels Pixeldifferenzanalyse
Blink Mini und Mini 2
Die Pixel Difference Analysis (PDA) vergleicht jedes Videobild mit dem nächsten und sucht nach einem bestimmten Unterschied. Der Grad der Änderung, der für ein Bewegungserkennungsereignis erforderlich ist, wird mit der Empfindlichkeitseinstellung in der Blink app gesteuert. Eine niedrige Empfindlichkeit bedeutet, dass es schwieriger ist, ein Bewegungserkennungsereignis zu erzeugen. Eine hohe Empfindlichkeit reagiert auf geringe Bewegungen.
Mini werden verwendet, um Bewegungen durch Glas hindurch zu erkennen. Dies ist zwar nicht die genaueste Methode zur Bewegungserkennung, Sie können jedoch die folgenden Vorsichtsmaßnahmen treffen.
- Stellen Sie sicher, dass der überwachte Bereich gut beleuchtet ist.
- Platzieren Sie die Vorderseite des Mini so nah wie möglich am Fenster. Manche Leute haben sogar Gaffer-Tape verwendet, um den Mini am Fenster abzudichten.
- Schalten Sie die Aufnahme-LED und die Nachtsicht-IR-LED aus, um Blendung durch reflektiertes Licht zu vermeiden.
Hinweis: Die Mini ist nicht dafür ausgelegt, Bewegungen durch Glas zu erkennen, und Ihre Ergebnisse sind möglicherweise nicht konsistent.
Bewegungseinstellungen
Mit den Bewegungseinstellungen können Sie anpassen, wie Ihre Blink Kamera Bewegungen erkennt. Diese Einstellung ist zugänglich, indem Sie auf das Mehr tippen  Schaltfläche in der unteren rechten Ecke der Geräteminiaturansicht, um auf die Geräteeinstellungen zuzugreifen. Sie können dann Bewegungserkennung, Zonen, erneute Auslösezeit und mehr steuern. Eine vollständige Liste der Bewegungseinstellungen für Ihre Blink Kamera finden Sie im Artikel Gerätelayouteinstellungen. Hinweis : Bevor Sie die Bewegungserkennung auf Ihrer Kamera aktivieren, müssen Sie zuerst Ihr Blink System scharfschalten.
Aktivieren und Deaktivieren Ihres Blink Systems
Standardmäßig ist Ihr System deaktiviert, wenn Sie ein neues System einrichten. Wenn Ihre Kameras aktiviert sind, erkennen sie Bewegungen und senden Benachrichtigungen. Um Bewegungsclips zu sichern, müssen Sie über eine Speicheroption verfügen. Mehr erfahren über Speicheroptionen.
Aktivierung Ihres Systems
Um Ihr System zu aktivieren:
- Tippen Sie auf Aktiviert am unteren Rand des Startbildschirms des Systems, das Sie aktivieren möchten. Sobald das System aktiviert ist, wird eine Bestätigungsmeldung angezeigt.
Sie können Ihr System auch aktivieren mit:
- Zeitplänen: Stellen Sie Ihr System mit Zeitplan Aktivierung so ein, dass es zu bestimmten Zeiten automatisch aktiviert wird.
- Alexa: Aktivieren Sie Ihr System mit dem Blink SmartHome Alexa Skill.
Die folgende Tabelle zeigt, wie eine einzelne Kamera funktioniert, wenn Sie Ihr System aktivieren/deaktivieren:
| Systemstatus | Bewegungserkennung* | Bewegungsaufzeichnung** | Bewegungsbenachrichtigung |
|---|---|---|---|
| Aktiviert | An | ||
| Deaktiviert | An | ||
| Aktiviert | Aus | ||
| Deaktiviert | Aus |
*Wenn Sie eine Kamera zu Ihrem System hinzufügen, ist die Bewegungserkennung standardmäßig aktiviert. Um Benachrichtigungen über Bewegungen zu erhalten, muss die Bewegungserkennung aktiviert sein. Die Bewegungserkennung kann für jede Kamera einzeln aktiviert oder deaktiviert werden.
**Um Bewegungsaufzeichnungen zu speichern, ist eine Speicheroption erforderlich. Mehr erfahren über Speicheroptionen.
Um die Bewegungserkennungseinstellungen Ihrer Kamera anzupassen, tippen Sie auf dem Startbildschirm auf die Schaltfläche Mehr  in der unteren rechten Ecke der Geräteminiaturansicht und wählen Sie dann Geräteeinstellungen > Bewegungseinstellungen.
In der nachstehenden Tabelle werden die verschiedenen Symbole erläutert, die Sie möglicherweise vorfinden:
| Symbole | Beschreibung |
|---|---|
|
System ist deaktiviert. |
 |
Bewegungserkennung ist eingeschaltet. |
 |
Bewegungserkennung ist ausgeschaltet. |
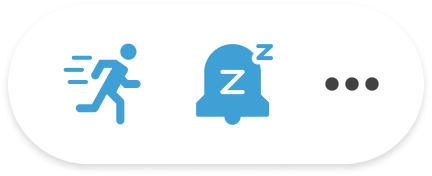 |
Bewegungserkennung ist eingeschaltet und Schlummern* ist aktiv. |
*Wenn die Schlummerfunktion aktiv ist, zeichnen Ihre Kameras weiterhin Bewegungen auf, wenn Sie eine Speicheroption eingerichtet haben, aber die Bewegungsbenachrichtigungen werden ausgesetzt. Mehr erfahren über Ausgesetzte Bewegungsbenachrichtigungen.
Deaktivieren Ihres Systems
Wenn Ihr System deaktiviert ist, zeichnen die Kameras keine Bewegungsereignisse auf und senden keine Bewegungsbenachrichtigungen an Ihr Mobilgerät.
Um Ihr System zu deaktivieren:
- Tippen Sie unten auf dem Startbildschirm auf Deaktiviert. Sobald das System deaktiviert ist, erscheint eine Bestätigungsmeldung.
Häufig gestellte Fragen
Benötige ich einen Speicher, um Bewegungsclips zu speichern?
Ja, um Bewegungsclips zu speichern, müssen Sie über eine Speicheroption verfügen. Mehr erfahren über Speicheroptionen.
LöschenWarum werden meine Bewegungsclips nicht gespeichert, obwohl mein System aktiviert ist?
Wenn Ihr System aktiviert ist und die Bewegungsaufzeichnungen nicht gespeichert werden, überprüfen Sie Folgendes:
- Sie haben eine aktive Speicheroption, um Bewegungsclips in zu speichern. Mehr erfahren über Speicheroptionen.
- Die Bewegungserkennung ist für Ihr Gerät aktiviert. Wenn die Bewegungserkennung ausgeschaltet ist, werden die Bewegungsclips nicht gespeichert. Mehr erfahren über Bewegungserkennung.
Wird beim Aktivieren Ihres Systems automatisch die Bewegungserkennung für alle Geräte aktiviert?
Nein, wenn Sie Ihr System aktivieren, wird die Bewegungserkennung nicht automatisch für alle Geräte aktiviert. Die Bewegungserkennung ist standardmäßig für jedes Gerät aktiviert, kann aber individuell deaktiviert werden. Wenn Sie Ihr System aktivieren, werden nur Kameras mit aktivierter Bewegungserkennung Bewegungen erkennen. Wenn die Bewegungserkennung für eine Kamera deaktiviert ist, bleibt sie ausgeschaltet, auch wenn das System aktiviert ist.
So aktivieren oder deaktivieren Sie die Bewegungserkennung:
- Tippen Sie im unteren Navigationsmenü auf Einstellungen.
- Tippen Sie auf Geräte- und Systemeinstellungen.
- Wählen Sie unter Systeme Ihr System aus.
- Tippen Sie auf Alle Geräte.
- Wählen Sie das Gerät, für das Sie die Bewegungserkennung einstellen möchten.
- Tippen Sie in den Geräteeinstellungen auf Bewegungseinstellungen.
- In den Bewegungseinstellungen können Sie die Bewegungserkennung für Ihre Kamera aktivieren oder deaktivieren.
Mehr erfahren über Bewegungserkennung.
LöschenKann ich Bewegungsbenachrichtigungen unterbrechen, ohne mein System zu deaktivieren?
Ja, Sie können die Bewegungsbenachrichtigungen mit Schlummern aussetzen. Sie können die Schlummerfunktion für 30 Minuten, 1, 2, 3 oder 4 Stunden einstellen. Mit einem Blink Plus-Abonnement oder einer Testversion können Sie die Dauer der Schlummerfunktion von 1 Minute bis zu 24 Stunden einstellen.
Wenn Sie über eine Speicheroption verfügen, werden Ihre Clips auch dann aufgenommen und gespeichert, wenn die Schlummerfunktion aktiviert ist. Mehr erfahren über Schlummern.
LöschenKann ich mein System manuell aktivieren/deaktivieren, wenn ein Zeitplan eingestellt ist?
Ja, Sie können Ihr System manuell aktivieren oder deaktivieren, auch wenn ein Zeitplan festgelegt ist. Wenn Ihr System beispielsweise werktags von 8 bis 17 Uhr aktiviert werden soll und Sie es am Montag um 12 Uhr deaktivieren, bleibt es bis zur nächsten Zeitplan-Aktivierung um 8 Uhr am Dienstag deaktiviert. Mehr erfahren über Zeitpläne.
LöschenBewegungserkennung aktivieren
In diesem Artikel erfahren Sie, wie Sie die Bewegungserkennung Einschalten oder Ausschalten.
Standardmäßig ist die Bewegungserkennung für jede Kamera in Ihrem System eingeschaltet.
Wenn die Bewegungserkennung für eine Kamera eingeschaltet ist:
-
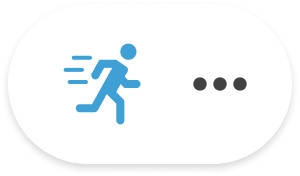
Das Symbol Bewegungserkennung (Laufender Mann)
 erscheint auf dem Startbildschirm neben Mehr
 für alle Miniaturbilder Ihrer Kameras.
 - Sie werden Benachrichtigungen über Bewegungsereignisse auf Ihrem Mobilgerät erhalten, sobald Sie Ihr System Aktiviert haben.
- Wenn Sie ein Blink-Abonnementoder einen Testzeitraum haben oder einen lokalen Speicher mit einem Sync Module 2 und einem USB-Laufwerk verwenden, werden Ereignisse als Bewegungsclips aufgezeichnet. Wenn Sie kein Blink-Abonnement abschließen oder keinen lokalen Speicher haben, werden keine Bewegungsclips gespeichert. Mehr erfahren unter Blink-Speicheroptionen für Bewegungsclips.
Wenn die Bewegungserkennung für eine Kamera ausgeschaltet ist:
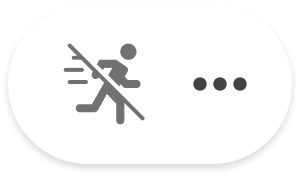
- Das Symbol Bewegungserkennung (Laufender Mann) ändert sich zu
 .
.
- Sie werden keine Bewegungsbenachrichtigungen auf Ihrem Mobilgerät erhalten.
- Bewegungsclips werden nicht aufgezeichnet und auf Ihrem Speicherort gespeichert.
So aktivieren Sie sie
Tippen Sie unten rechts in der Miniaturansicht der Kamera auf Mehr und dann auf Bewegungserkennung . Dadurch wird die Einstellung Bewegungserkennung ein-oder ausgeschaltet.
- Oben in der Miniaturansicht Ihrer Kamera wird eine Meldung angezeigt, die bestätigt, dass die Bewegungserkennung eingeschaltet oder ausgeschaltet wurde.
-
 bedeutet, dass Bewegungserkennung eingeschaltet ist und die Kamera aktiv auf Bewegungen achtet.
 -
 bedeutet, dass Bewegungserkennung für diese Kamera ausgeschaltet ist.
Hinweis: Die Einstellung Bewegungserkennung kann auch durch Tippen auf Mehr > Geräteeinstellungen aufgerufen werden.
Ausschalten des Bewegungssensors
Wenn Sie über ein Blink-Abonnement oder einen Testzeitraum verfügen und möchten, dass eine bestimmte Kamera in Ihrem System Bewegungsclips aufzeichnet, kann das Ausschalten der Bewegungserkennung eine Lösung sein.
Sie möchten z. B. Benachrichtigungen erhalten, wenn ein Besucher an Ihrer „Haustür“-Kamera ankommt, aber Sie möchten nicht über Bewegungsereignisse benachrichtigt werden, die von Ihrer „Wohnzimmer“-Kamera in Innenräumen erkannt werden. In diesem Szenario ist die Bewegungserkennung für die „Haustür“ eingeschaltet und für das „Wohnzimmer“ ausgeschaltet.
- Wenn das System aktiviert ist, wird bei jeder Bewegung an der „Haustür“ eine Benachrichtigung ausgelöst, aber nicht bei einer Bewegung im „Wohnzimmer“.
- Wenn das System aktiviert ist, werden Videoclips für „Haustür“-Ereignisse, aber keine Bewegungsclips aus dem „Wohnzimmer“ aufgezeichnet.
- Wenn das System deaktiviert ist, werden keine Benachrichtigungen gesendet und die Clips werden von keiner der Kameras aufgezeichnet.
Aussetzen
Wenn Sie den Bewegungssensor vorübergehend deaktivieren möchten, können Sie alternativ Aussetzen verwenden. Mehr erfahren darüber, Wie man Bewegungsbenachrichtigungen aussetzt.
Speicher für Einstellungen
Jedes Mal, wenn Ihr System aktiviert wird, bleiben Ihre Einstellungen unverändert. Kameras, die Bewegungserkennung eingeschaltet oder ausgeschaltet haben, bleiben so, bis Sie sie ändern.
Ein- oder Ausschalten der Bewegungserkennung in den Geräteeinstellungen
Sie können die Bewegungserkennung auch über die Geräteeinstellungen Ihrer Kamera einschalten oder ausschalten.
Hinweis: Diese Einstellung funktioniert genauso wie das Ein- und Ausschalten der Bewegungserkennung über Mehr.
- Tippen Sie in der Miniaturansicht Ihrer Kamera auf Mehr
 .
. - Tippen Sie auf Geräteeinstellungen
 .
. - Tippen Sie auf Bewegungseinstellungen.
- Die erste Einstellung ist Bewegungserkennung. Tippen Sie auf den Schalter, um sie Ein- oder Auszuschalten.
Bewegungsbenachrichtigungen schlummern lassen
Sie können Bewegungsbenachrichtigungen auf Ihrem Mobilgerät mit der Schlummerfunktion pausieren. Ihre Benachrichtigungen werden nach Ablauf des ausgewählten Zeitraums automatisch fortgesetzt.
Ihre Kamera nimmt während der Schlummerfunktion weiter auf, wenn Sie:
- Ein Blink -Abonnementplan (aktiv oder Test).
- Lokaler Speicher mit einem Sync Module 2 und USB-Laufwerk oder Sync Module XR und MicroSD-Karte.
Mit einem Blink Abonnement können Sie die benutzerdefinierte Schlummerfunktion nutzen, um Benachrichtigungen zwischen 1 Minute und 24 Stunden zu pausieren. Weitere Informationen dazu finden Sie weiter unten im Abschnitt „ Benutzerdefinierte Schlummerfunktion “.
Schlummerfunktion in der Blink app aktivieren
- Tippen Sie auf der Miniaturansicht Ihrer Kamera auf „Mehr“ (...).
- Tippen Sie auf die Schlummertaste
 und wählen Sie dann aus, wie lange die Schlummerfunktion dauern soll.
- Wählen Sie 30 Minuten (Standard) oder bis zu 4 Stunden. Wenn Sie abbrechen möchten, tippen Sie auf den Zurück-Pfeil.
- Wenn Sie die gewünschte Schlummerdauer gewählt haben, tippen Sie auf „Schlummern starten“.
- Wenn Sie möchten, dass die Schlummerfunktion auf alle Kameras in Ihrem System angewendet wird, aktivieren Sie das Kontrollkästchen neben „ Auf alle Geräte anwenden“.
- Wenn die Benachrichtigungen Ihrer Kamera auf Schlummern gestellt sind, wird das Schlummersymbol
.png) wird links neben der Bewegungserkennung angezeigt
wird links neben der Bewegungserkennung angezeigt .png) .
.
Schlummerfunktion in der Blink app ausschalten
Um eine aktive Schlummerfunktion vorzeitig zu beenden, tippen Sie auf die blaue Schaltfläche. Eine Bestätigungsmeldung zeigt die verbleibende Schlummerzeit an.
- Das Schlummersymbol wird wieder grau.
- Tippen Sie auf das Kontrollkästchen „Auf alle Geräte anwenden“, um die Schlummerfunktion für alle Kameras im System zu beenden.
Schlummern von Bewegungsalarmen aus einer Benachrichtigung
Sie können Bewegungsalarme direkt aus einer Bewegungsbenachrichtigung heraus schnell schlummern lassen:
- So schalten Sie Bewegungsalarme aus:
iOS – Halten Sie die an Ihr Mobilgerät gesendete Blink -Benachrichtigung gedrückt.
Android – Tippen Sie auf die Blink -Benachrichtigung, die an Ihr Mobilgerät gesendet wurde. - Wählen Sie im angezeigten Schnellaktionsmenü entweder „Schlummern: 1 Stunde“ oder „Schlummern: 4 Stunden“ aus.
Um die Schlummerfunktion länger zu halten, befolgen Sie die Schritte oben unter „ Schlummerfunktion in der Blink app aktivieren “.
Alexa Snooze-Benachrichtigungen
Alexa kündigt weiterhin Ereignisse an, auch wenn Sie die Schlummerfunktion für Ihre Kamera oder Ihr System aktiviert haben. So deaktivieren Sie Alexa-Bewegungsankündigungen:
- Gehen Sie zur Alexa-App.
- Gehen Sie zu Einstellungen > Geräteeinstellungen .
- Wählen Sie das Gerät aus, für das Sie die Ansagen stoppen möchten.
- Deaktivieren Sie unter ANKÜNDIGUNGEN die Option Bewegungsankündigungen .
Wenn Sie möchten, dass Alexa weiterhin Bewegungsbenachrichtigungen ankündigt, müssen Sie Bewegungsankündigungen in der Alexa-App aktivieren.
LöschenFestlegen benutzerdefinierter Schlummerbenachrichtigungen
Mit einem Blink -Abonnement oder einer Testversion können Sie einen benutzerdefinierten Zeitrahmen für die Schlummerfunktion Ihrer Bewegungsbenachrichtigungen festlegen und Zeitintervalle zwischen 1 Minute und 24 Stunden eingeben. Erfahren Sie mehr über Blink -Abonnements.
- Tippen Sie auf dem Startbildschirm auf „Mehr“ (...) und dann auf „Benachrichtigungs-Snooze“ .
- Tippen Sie auf Benutzerdefiniert .
- Wählen Sie die Dauer für die Schlummerfunktion Ihrer Benachrichtigungen und tippen Sie anschließend auf „Schlummerfunktion starten“ . Wählen Sie eine beliebige Zeit zwischen 1 Minute und 24 Stunden, um Benachrichtigungen zu pausieren. Die von Ihnen festgelegte Schlummerzeit wird dann als Benachrichtigung auf dem Startbildschirm angezeigt.
Um wieder Benachrichtigungen zu erhalten, tippen Sie auf das ausgefüllte Schlummersymbol. Wenn es deaktiviert ist, wird es grau.
Bewegungszonen
Aktivitätszonen sind für alle Blink Kameras verfügbar. Durch das Festlegen von Aktivitätszonen können Sie Bereiche im Sichtfeld Ihrer Kamera entfernen, die möglicherweise zu viele Bewegungsbenachrichtigungen verursachen.
Wenn Ihre Outdoor beispielsweise einen Baum oder Busch erfasst, der unerwünschte Bewegungsclips auslöst, können Sie Ihre Aktivitätszonen anpassen, um diesen Bereich auszuschließen. Die Kamera ignoriert die Bewegung in der Aktivitätszone und verhindert so das Senden unerwünschter Bewegungsbenachrichtigungen.
Erstellen von Aktivitätszonen
- Wählen Sie die Kamera aus, der Sie Aktivitätszonen hinzufügen möchten, und tippen Sie auf Mehr (...) Wählen Sie dann Geräteeinstellungen aus.
- Wählen Sie in den Geräteeinstellungen Bewegungseinstellungen“ und tippen Sie dann auf „Bewegungszonen.
- Auf dem Bildschirm „Aktivitätszonen“ wird die aktuellste Miniaturansicht mit einem Gittermuster angezeigt.
Tippen Sie auf „Foto aktualisieren“ , um das Miniaturbild zu aktualisieren, damit Ihre Einstellungen korrekt sind. - Wählen Sie die gewünschten inaktiven Aktivitätszonen aus, indem Sie auf das Rechteck tippen, das Sie isolieren möchten. Der ausgewählte Bereich wird ausgegraut. Der Bereich innerhalb des grauen Quadrats erkennt keine Bewegung, selbst wenn eine Bewegung stattfindet.
Im folgenden Beispiel werden Büsche und Pflanzen als inaktive Aktivitätszonen ausgewählt, da diese Außenelemente unnötige Bewegungsereignisse verursachen können.
Hinweis : Die Option „Erweitert“ im Bildschirm „Bewegungszonen“ ist nur für die Kameras Mini 2 , Outdoor 4, Wired Floodlight , Indoor und Outdoor (3rd Gen) und XT2 verfügbar. Sie können die Miniaturansicht vergrößern, um die Zonen präziser auszuwählen. Wischen Sie in der Option „Erweitert“ durch Wischen, um die Ansicht zu verschieben, und tippen Sie, um Bereiche auszuwählen, die für die Bewegungserkennung aktiviert oder deaktiviert sind. Tippen Sie abschließend auf „Speichern“ .
- Nachdem Sie die gewünschten inaktiven Aktivitätszonen ausgewählt haben, tippen Sie auf Fertig. Um alle Zonen zu aktivieren und den Vorgang neu zu starten, tippen Sie auf Zonen zurücksetzen.
Privatsphärenzonen
Mit Privatsphärezonen können Sie Bereiche in Ihrem Kamerabild sperren, die nicht aufgezeichnet werden. Diese Funktion ist nur für die Mini 2 , Outdoor 4, Wired Floodlight , Video Doorbell sowie die Indoor und Outdoor (3rd Gen) verfügbar. Erfahren Sie mehr über integrierte Privatsphärezonen .
Fehlerbehebung
Aktivitätszonen
Wenn Sie Probleme mit Aktivitätszonen haben, ist es wichtig zu verstehen, wie Aktivitätszonen funktionieren.
Bei einem typischen Ereignis ohne aktivierte Aktivitätszonen nutzt die Kamera den passiven Infrarotsensor (PIR) zur Bewegungserkennung. Läuft eine Person an der Kamera vorbei, hat diese eine andere Temperatur als das vom PIR-Sensor erfasste Hintergrundbild und löst ein Bewegungsereignis aus.
Bei Aktivitätszonen nutzt die Kamera zusätzlich zur Bildanalyse den PIR-Sensor, um nach Veränderungen zu suchen. Die Kamera analysiert das Bewegungsereignis zwei Sekunden lang und sucht nach Pixelveränderungen in den Bildern.
- Wenn die Kamera eine Pixeländerung in Aktivitätszonen erkennt, nimmt sie weiterhin auf und sendet eine Benachrichtigung.
- Wenn die Kamera eine Pixeländerung innerhalb einer Nicht-Aktivitätszone erkennt, schaltet sie sich aus und stoppt die Aufnahme.
Überlegungen
In bestimmten Situationen können sich Pixel außerhalb Ihrer Aktivitätszonen ändern, wenn technisch gesehen keine Bewegung vorliegt.
- Beispiel: Ihre Kamera ist auf die Straße gerichtet, Sie haben jedoch Aktivitätszonen im Straßenbereich eingerichtet, um zu verhindern, dass vorbeifahrende Autos Ihnen Benachrichtigungen senden. Tagsüber funktionieren Aktivitätszonen wie vorgesehen. Nachts könnten die Scheinwerfer eines Autos jedoch Bereiche außerhalb Ihrer Aktivitätszonen beleuchten. Dies könnte von der Kamera als Bewegung wahrgenommen werden, da sie Pixeländerungen erkennt und Ihnen daher eine unerwünschte Benachrichtigung sendet.
Um das oben beschriebene Szenario zu beheben, müssen Sie möglicherweise die genaue Positionierung und den Winkel der Kamera feinabstimmen und die Aktivitätszonen anpassen, damit Sie herausfinden können, was in Ihrer Umgebung am besten funktioniert.
Wenn Sie weiterhin Probleme mit unerwünschten Benachrichtigungen haben, er/video-doorbell-2nd-gen-installing-a-corner-or-wedge-mountfahren Sie mehr unter Fehlerbehebung bei Bewegungsbenachrichtigungen .
LöschenTürklingel
Die Video Doorbell bietet zwei Lösungen, um unerwünschte Bewegungsalarme zu minimieren:
- Aktivitätszonen: Definieren Sie bestimmte Bereiche, in denen die Bewegungserkennung aktiv ist
- Montagemöglichkeiten:
- Keilhalterung: Passt die Ansicht nach oben oder unten an.
- Eckmontage: Passt die Ansicht nach links oder rechts an.
Um beispielsweise Alarme durch den Straßenverkehr zu reduzieren, können Sie die Kamera mithilfe der Keilhalterung nach unten neigen und auf den unmittelbaren Türbereich fokussieren.
Weitere Informationen:
- Informationen zur Video Doorbell (1. Generation) finden Sie unter Installieren einer Keil- oder Eckhalterung .
- Informationen zur Video Doorbell (2. Generation) finden Sie unter Video Doorbell : (2. Generation) Installieren einer Eck- oder Keilhalterung .
Privatsphärenzonen
Ein Privatsphärenbereich ist ein von Ihnen gewählter Bereich, der nicht von Ihrer Kamera aufgezeichnet wird. So können Sie z. B. ausschließen, dass die Tür oder das Fenster eines Nachbarn von Ihrer Kamera gesehen oder aufgenommen wird. Es können bis zu zwei Privatsphärenbereiche eingerichtet werden, die leicht als graue Bereiche auf dem Bildschirm zu erkennen sind.
Hinweis: Privatsphärenbereiche sind nur für Mini 2, Outdoor 4, Wired Floodlight, Video Doorbell und Indoor und Outdoor (3rd Gen) Camera verfügbar.
Erstellen von Privatsphärenbereichen
- Wählen Sie die Kamera, der Sie Aktivitätszonen hinzufügen möchten, und tippen Sie auf Mehr (...) in der unteren rechten Ecke der Geräteminiaturansicht, um auf die Geräteeinstellungen zuzugreifen.
- Wählen Sie in den Geräteeinstellungen Bewegungseinstellungen und tippen Sie dann auf Bewegungszonen.
- Tippen Sie im Bildschirm Bewegungszonen oben auf Privatsphärenbereiche.
Die neueste Miniaturansicht wird mit einem Gittermuster angezeigt. Tippen Sie auf Foto aktualisieren, um das Vorschaubild zu aktualisieren, damit Ihre Einstellungen korrekt sind. - Durch Tippen auf Privatsphärenbereiche zurücksetzen werden die vorhandenen Zonen gelöscht. Privatsphärenbereiche können nicht bearbeitet, sondern nur gelöscht (zurückgesetzt) und neu erstellt werden.
- Tippen und ziehen Sie auf dem Bildschirm, um bis zu zwei Zonen zu zeichnen, die in der Miniaturansicht ausgewählt sein sollen. Nachdem Zonen einmal erstellt wurden, können Sie die blauen Punkte in ihren Ecken verwenden, um sie zu verschieben oder ihre Größe zu ändern.
- Nachdem Sie Ihre Zonen gezeichnet haben, tippen Sie auf Fertig, um sie zu speichern. Sie können Speichern tippen, um alle Änderungen an den Einstellungen zu übernehmen und zum Startbildschirm zu gelangen.
- Wenn Sie erneut auf Zonen tippen, werden die Privatsphärenbereiche jetzt in Schwarz angezeigt, um einen besseren Kontrast zu den Aktivitätszonen zu schaffen, die in der Aktivitätszonenansicht grau dargestellt sind.
Retrigger-Zeit
Dieser Artikel beschreibt, wie Sie die Reaktivierungszeit für Ihre Blink-Kamera einstellen können.
Die Reaktivierungszeit ist die Zeitspanne zwischen dem Ende einer Bewegungsaufnahme und dem Beginn eines neuen Ereignisses. Während der Reaktivierungszeit zeichnet Ihre Kamera keine Bewegungsereignisse auf.
Standardmäßig nimmt das System einen fünf Sekunden langen Clip auf und wartet die Reaktivierungszeit von 30 Sekunden ab. Wenn die Bewegung fortgesetzt wird, nimmt die Kamera einen weiteren Fünf-Sekunden-Clip auf. Die Reaktivierungszeit kann unter Geräteeinstellungen angepasst werden.
Hinweis: Für jede Kamera in Ihrem System ist eine individuelle Reaktivierungszeit eingestellt.
Einstellen der Reaktivierungszeit
- Tippen Sie auf dem Startbildschirm auf die Schaltfläche Mehr (...) und wählen Sie dann Geräteeinstellungen.
- Tippen Sie auf dem Bildschirm Geräteeinstellungen auf Bewegungseinstellungen.
- In den Bewegungseinstellungen können Sie den Wert für die Reaktivierungszeit zwischen 10 und 60Sekunden einstellen. Sie können die Reaktivierungszeit erhöhen, indem Sie den Schieberegler nach rechts bewegen. Wenn Sie ihn nach links bewegen, wird die Verzögerung verkürzt.
- Je länger die Reaktivierungszeit eingestellt ist, desto mehr Zeit lässt Ihre Kamera zwischen der Benachrichtigung über das nächste erkannte Bewegungsereignis. Dies ist nützlich, wenn Ihre Kamera einen Bereich betrachtet, in dem häufig Bewegungen auftreten, oder wenn Sie falsche Auslöser erhalten.
- Wenn Sie diese Einstellung Ihren Wünschen entsprechend justiert haben, tippen Sie auf Fertig.
Testen Sie Ihre Einstellungen
Nachdem Sie die gewünschte Reaktivierungszeit eingestellt haben, aktivieren Sie Ihr Blink-System und gehen dann durch das Sichtfeld der eingestellten Kamera. Sie erhalten auf Ihrem Bildschirm einen Bewegungsalarm. Gehen Sie über die Dauer Ihrer Verzögerung hinweg weiter durch das Sichtfeld dieser Kamera. Sie erhalten einen zweiten Bewegungsalarm, nachdem Ihr System ein weiteres Video aufgenommen hat. Wen die Reaktivierungszeit zwischen den aufgezeichneten Videos zu kurz oder zu lang war, gehen Sie zu den Kamera-Einstellungen zurück, um diese zu optimieren.
Anpassen der Empfindlichkeit Ihrer Blink Kamera
Ihre Blink Kamera erfasst Bewegungen entweder auf der Basis von Passiv-Infrarot (PIR) oder Pixel-Differenzanalyse (PDA). Die Bewegungsempfindlichkeitseinstellung Ihrer Kamera bestimmt, wie viel Eingabe erforderlich ist, um Ihnen eine Benachrichtigung zu senden. Erfahren Sie mehr darüber, wie Blink -Kameras Bewegungen erkennen .
Bei niedriger Empfindlichkeit reagiert das Gerät weniger schnell, sodass eine größere Wärmemenge oder Bewegung erforderlich ist, um eine Benachrichtigung auszulösen. Die höchste Einstellung kann Alarme durch wehende Blätter oder sogar Schatten auslösen.
Wenn Sie zu viele Benachrichtigungen ohne interessante Informationen erhalten, versuchen Sie, die Bewegungsempfindlichkeit um zwei Stufen zu verringern. Wenn dies wirksam ist, testen Sie es, indem Sie das System scharfschalten und bei eingeschalteter Bewegungserkennung in das Sichtfeld gehen, um sicherzustellen, dass ein menschengroßes Objekt eine Benachrichtigung auslöst.
Seien Sie vorsichtig, wenn Sie auf die Benachrichtigung tippen und Live View mit eingeschaltetem Mikrofon oder eingeschalteten Lautsprechern aufrufen, da es zu sehr lauten Rückkopplungen kommen kann. Tippen Sie in diesem Fall oben rechts in der Live View auf „Lautsprecher stumm schalten“.
Jede Kamera verfügt über eine individuelle Empfindlichkeitseinstellung. Diese finden Sie in den Geräteeinstellungen für jede Kamera in Ihrem System.
Auswahl einer hohen oder niedrigen Empfindlichkeit
Die Einstellung der Bewegungsempfindlichkeit Ihrer Kamera hängt nicht nur davon ab, was die Bewegung verursacht, sondern auch davon, wie lange die Bewegung andauert.
- Eine hohe Empfindlichkeit (Werte von 6–9) bedeutet, dass weniger Bewegung über einen kürzeren Zeitraum eine Benachrichtigung auslöst.
- Geringe Empfindlichkeit (Werte von 1–4) bedeutet, dass mehr Bewegung über einen längeren Zeitraum eine Benachrichtigung auslöst.
Hinweis : Die Standardempfindlichkeit liegt normalerweise bei 5, mit Ausnahme der Outdoor 4-Kameras, die eine Standardempfindlichkeit von 6 haben.
Die Bewegung kann ein großes oder kleines Objekt oder viele kleine Objekte betreffen. Die Bewegungserkennung hängt davon ab, wo sich das Objekt im Verhältnis zum Kameraobjektiv befindet. Beispielsweise kann ein Vogel, der dicht an der Kamera vorbeifliegt, als größer wahrgenommen werden als eine Person, die in der Ferne auf dem Bürgersteig läuft. Eine Person, die direkt auf die Kamera zugeht, erzeugt weniger Bewegung als ein Hund, der von links nach rechts durch das Sichtfeld der Kamera läuft. Es geht um die Menge der Bewegung, die innerhalb der Erkennungszone der Kamera stattfindet, und nicht unbedingt darum, wie groß das Objekt ist.
Testen der Empfindlichkeit Ihrer Heimkamera
- Tippen Sie auf „Mehr“ (...) Klicken Sie auf die Miniaturansicht Ihrer Kamera und wählen Sie Geräteeinstellungen
 .
. - Wählen Sie Bewegungseinstellungen.
- Bewegen Sie den Schieberegler bei der Bewegungsempfindlichkeit zwei oder drei Schritte nach links, um eine niedrigere numerische Einstellung zu erhalten. Tippen Sie auf „Speichern“, um diese Einstellung zu speichern und den Sichtrahmen dieser Kamera zu verlassen.
- Stellen Sie Ihr System auf dem Hauptbildschirm der Blink app auf „Aktiviert“ , um die Bewegungserkennung zu aktivieren.
- Testen Sie die Empfindlichkeit der Kamera, indem Sie Bewegung einführen.
- Wenn die Empfindlichkeit nicht zufriedenstellend ist, reduzieren Sie den Schieberegler weiter, speichern Sie und versuchen Sie es erneut.
- Wenn Sie die Empfindlichkeit nach Ihren Wünschen eingestellt haben, testen Sie sie mit einem größeren bewegten Objekt, beispielsweise sich selbst. Gehen Sie vor Ihrer Kamera herum und prüfen Sie, ob die Einstellung den gewünschten Bewegungsalarm ausgibt.
- Wenn die niedrigste Empfindlichkeit weiterhin eine unerwünschte Bewegungsbenachrichtigung verursacht, müssen Sie möglicherweise stattdessen eine Aktivitätszone erstellen. Erfahren Sie mehr über das Einrichten von Aktivitätszonen.
Frühzeitige Benachrichtigung
Wenn die frühzeitige Benachrichtigung aktiviert ist, sendet Ihre Kamera eine Benachrichtigung an Ihr Mobilgerät, sobald eine Bewegung erkannt wird. Wenn die frühzeitige Benachrichtigung deaktiviert ist, wird die Benachrichtigung gesendet, nachdem der Clip aufgenommen wurde und in der Clipliste zur Anzeige bereitsteht. Erfahren Sie mehr über die Bewegungserkennung und Bewegungsbenachrichtigungen.
Was passiert, wenn Sie eine frühzeitige Benachrichtigung erhalten?
Wenn Sie während der Aufnahme eines Clips auf eine Bewegungsbenachrichtigung tippen, gelangen Sie direkt zur Clipliste, wo die Meldung „Aufnahme läuft“ angezeigt wird. Sobald die Aufnahme des Clips abgeschlossen ist, wird automatisch die Meldung „Der Clip kann jetzt angesehen werden“ angezeigt.
Wenn Sie die Clipliste verlassen, bevor die Aufnahme des Clips abgeschlossen ist, wird unten in der App ein Banner angezeigt, das Sie darüber informiert, dass ein neuer Clip zur Ansicht verfügbar ist.
Verfügbarkeit der frühzeitigen Benachrichtigung
Die frühzeitige Benachrichtigung ist verfügbar für:
- Outdoor und Indoor (3rd Gen)
- Mini
- XT2
- Mini 2*
- Outdoor 4*
- Wired Floodlight Camera*
- Video Doorbell*
*Die frühzeitige Benachrichtigung ist standardmäßig aktiviert und kann nicht deaktiviert werden.
Frühzeitige Benachrichtigung ein-/ausschalten
So schalten Sie die frühzeitige Benachrichtigung ein oder aus:
- Tippen Sie auf die Schaltfläche Mehr (...) in der unteren rechten Ecke der Miniaturansicht des Geräts.
- Tippen Sie auf Geräteeinstellungen.
- Tippen Sie auf Bewegungseinstellungen.
- Aktivieren Sie die Option Frühzeitige Benachrichtigung.
Clip vorzeitig beenden, wenn die Bewegung stoppt
So aktivieren Sie die Einstellung
- Tippen Sie auf dem Startbildschirm Mehr
 auf die gewünschte Kamera und dann auf Geräteeinstellungen
 .
. - Tippen Sie auf dem Bildschirm „Geräteeinstellungen“ auf Video- und Fotoeinstellungen.
- Lokalisieren Sie Video stoppen, wenn Aktion endet Tippen Sie auf den Schalter, um ihn einzuschalten.
Hinweis: Nicht verfügbar für die Wired Floodlight Camera.
Was bewirkt es?
Wenn diese Einstellung aktiviert ist, stoppt Ihre Kamera die Aufnahme eines Videos, wenn keine Bewegung mehr stattfindet, bevor die Videolänge ihren Haltepunkt erreicht.
Nehmen wir zum Beispiel an, Ihre Videolänge ist so eingestellt, dass sie 30 Sekunden lang aufzeichnet, nachdem eine Bewegung erkannt wurde und ein Auto an Ihrer Kamera vorbeifährt.
- Einstellung aus: Die Kamera nimmt so lange auf, bis die eingestellte Videolänge erreicht ist. In diesem Beispiel würde der Clip 30 Sekunden lang sein.
- Einstellungen an: Ihre Kamera würde den Clip des vorbeifahrenden Autos aufzeichnen und unmittelbar danach beenden, wenn keine Bewegung mehr stattfindet.
Unter bestimmten Umständen kann diese Funktion den Clip nicht immer vorzeitig beenden.