All Blink cameras require a 2.4 GHz Wi-Fi Internet connection. The cameras use Wi-Fi to send images and notifications so you can view them from the Blink app on your mobile device. At minimum, Blink systems need a connection of at least 2 Mbps upload speed.
Note: The Blink Mini, Wired Floodlight, and Video Doorbell do not require a Sync Module to function, but do require a local Wi-Fi signal.
General Wi-Fi issues
Understanding Wi-Fi and network requirements
Use this article to understand optimum network requirements for your Blink devices.
Wi-Fi Network Requirements
- 2.4GHz Wi-Fi Network 802.11b/g/n
- A high-speed internet connection (DSL, Cable, Fiber) with a minimum upload speed of 2 Mbit/sec.
- IP Configuration: DHCP
- Wi-Fi Security: WEP, WPA, WPA2 with TKIP SSID
Note: Blink does not support satellite internet due to high latency issues.
Things to check first
Start with the following:
- Verify signal strengths. Blink App > Device Settings > General Settings > Camera to Wi-Fi will show your device's signal strength.
- Find out more in the Network layout and Connectivity sections below.
- Power cycle all devices that allow connection to the internet.
- Verify your internet connection and account are active.
Network layout
Where to place your Sync Module
The Sync Module is the hub between the Blink app, Blink Servers and your camera. Without an internet connection, this data exchange is not possible.
In a typical situation (single building, no unusually dense construction materials), the Sync Module should be able to communicate with Blink cameras up to 100 ft. (30m) away in any direction. We recommend keeping the Sync Module near your wireless router for best signal strength. For optimum camera and Sync Module usage, three bars of signal strength displaying on the Sync Module screen is ideal.
Examples of less than ideal Sync Module locations:
- Behind a Television
- Inside a closed cabinet
- Directly on top of your Wi-Fi router
- In a basement
Examples of good Sync Module locations:
- On a window sill, in a central location between your indoor and outdoor cameras
- On TV stand or cabinet, and no less than 3 ft. (1m) and no more than 10 ft. (3m) away from your Wi-Fi router
- Near other equipment that may also be using your Wi-Fi
Connectivity
Camera connectivity issues with your network
The Blink system relies on having good signal strengths for optimal performance in viewing Live Views, uploading motion clips and for best video quality. It is critical for the cameras to show 3 bars of connectivity to avoid performance issues.
Fewer than 3 bars for each connection can create intermittent issues with the performance of your system.
In case of any camera issues on a mesh network, rebooting the router should be a first step.
Assuming standard construction techniques (single building, no unusually dense construction materials) the Sync Module should be able to communicate with Blink cameras up to 100 feet (33m) away in any direction. We recommend keeping the Sync Module near your wireless router for best signal strength.
See the section below to learn about signal strengths and how to check them. You should have three bars of signal connectivity at the Sync Module and each camera, as depicted on the Sync Module screen in the Blink app.
Where to find signal strength in the Blink app
Tap the More (...) button at the bottom right of the device's thumbnail image and select Device Settings. Then tap General Settings.
You will see a Network section. Depending on the type of camera you have, this section can contain:
-
Change Wi-Fi
- Tapping this allows you to change your device's existing Wi-Fi connection. Use this if you have installed a new router for your network or want to change access points for your devices.
-
Connection to Wi-Fi
- The icon here represents the strength of your Wi-Fi connection to the camera.
-
Connection to Sync Module
- The icon represents the connection strength between your camera and the Sync Module. To view the connection strength between the Sync Module and your Wi-Fi network, refer to the Sync Module Status screen.
Signal types
Its important to note that the cameras use two types of signals for communication:
- LFR - Low Frequency Radio - is the signal that cameras share with the Sync Module.
- Wi-Fi (2.4 GHz) - is the frequency that the cameras communicate with your Wi-Fi router on. Blink supports mesh and merged networks with a single SSID but only communicates on the 2.4 GHz band.
How to boost internet signal
One solution, other than moving the camera closer to the Wi-Fi router, is to install a Wi-Fi extender or booster. A newer, more effective solution is called mesh Wi-Fi.
-
Extenders
A Wi-Fi extender repeats the wireless signal from your router to expand its coverage. Extenders function as a bridge to capture the Wi-Fi from your router and rebroadcast it to areas where the Wi-Fi is weak or nonexistent. This improves the overall Wi-Fi performance and signal strength for all connected devices within range. Learn more about using extenders with Blink cameras. -
Mesh Wi-Fi
Mesh networks eliminate connectivity dead zones by blanketing your home in Wi-Fi. They work by allowing different types of devices to chain off each other as nodes in a network, each broadcasting the radio signal further than the last. The typical mesh network includes several nodes, which act like satellites for your network. One of these nodes is a gateway and connects to the internet through your modem. The other nodes communicate to each other and will expand your wireless coverage every time you add a new node. Rather than communicating with a single access point (like a traditional network), each node of a mesh network communicates with the others. This distributes the overall signal strength and Wi-Fi coverage throughout an area.
Troubleshooting your connection
If your connections to either your Wi-Fi or Sync Module are below 2 bars or less, attempt the following troubleshooting steps.
- Device placement
- Move the device closer to the Wi-Fi router and tap Pull to Refresh to check if the bars increase. Repeat until you see improved signal strength.
- Check your internet
- If you haven't already, attempt a power cycle of the Wi-Fi router.
- Check that your 2.4 GHz Wi-Fi network is functioning normally and that the internet is available.
- Check that the Wi-Fi network speed is not being reduced by streaming movies and games, or other high bandwidth activities. Two Megabit per second (2 Mb/sec) upload speed (going from your location) must be available to the Blink system at all times. Test your connection by temporarily suspending any streaming of music, movies, video or gaming to prevent consumption of bandwidth.
- If your Wi-Fi password or network has changed, the Blink system will not function correctly until you update the settings.
- Check that the outlet provides power
- To confirm that power is present to the wall outlet, you can try plugging in a different device or appliance.
- Some outlets are controlled by a wall switch, check to see if this applies to your outlet.
- If the wall outlet is not providing power, you can try a different outlet.
- It is also possible that a circuit breaker has tripped, so you may want to check your electrical distribution panel.
- Check that the wall charger provides power
- If your outlet has power and the camera is not getting power, try to use a different wall charger.
- Any standard 5 volt USB wall charger should work. 5 volt USB phone chargers are commonly available.
- Check the cable
- It is possible that the USB cable became damaged from being bumped into. The damage may not be visible from outside.
- You can try the camera's power cable with another device to see if power is present.
- You can also try to use another USB Type A male, to micro-USB Type B male or USB-C cable. These are commonly used for charging phones and other devices.
Network frequency
Wi-Fi Router Band Settings
Blink products can only connect to 2.4 GHz (802.11 b/g/n) networks.
The Sync Module will not respond if it has been switched to a 5 GHz network.
What’s the Difference Between 2.4 GHz vs 5 GHz Wi-Fi?
Blink devices cannot connect to a 5 GHz network. The differences between 2.4 GHz and 5 GHz bands are the speed and range of their networks. A 2.4 GHz band transmits farther and can penetrate building materials better with lower power transmission. A 5 GHz band; however, can send more data.
5 GHz should not be confused with 5G networks that mobile devices use for data transmission.
Dual-Band Routers
A dual-band router is any wireless internet router that sends out a signal on both 2.4GHz and 5GHz frequencies. Routers have features that vary based on manufacturer and model. Most dual-band routers automatically broadcast on both bands without any additional configuration, which is why it may not be obvious there are two bands.
Which Band is Better?
The main differences between 2.4GHz and 5GHz bands are the speed and range of their networks. A 2.4GHz band transmits farther and can penetrate building materials better with lower power transmission. A 5GHz band; however, can send more data. 5GHz should not be confused with 5G networks that mobile devices use for data transmission.
Many other devices commonly found in homes, such as microwave ovens and garage door openers, also operate on the 2.4GHz band. This can cause interference and reduce speeds. In addition, placing your devices behind dense building materials such as brick, stone, concrete, steel, and aluminum can interfere with signal strength, even when connecting on 2.4GHz.
Band Merging
With the technological advancement of routers, "band steering" is becoming more common. Routers with this feature use the same Wi-Fi network name (SSID) and password for both 2.4GHz and 5GHz bands, allowing you to join a single network and receive the advantages of both frequencies.
Note: Blink devices only connect to 2.4GHz bands, even when bands are merged on your router.
Password
- Often, when adding a camera or Sync Module to your Blink system, the password is mistyped. Try carefully re-entering your password. If you continue to receive the "Incorrect password for Your W-Fi" message, try the next steps.
- Verify the password by checking if it's written on a sticker located on your router.
- Try forgetting the Wi-Fi network on your mobile device's network settings, and then reconnect to it. If you can successfully reconnect using this method, your password is correct.
Router settings
Make sure that your router is not blocking access to the Sync Module. This can happen if you are alerted that a device is attempting access but the name is not familiar. Blink devices are sometimes identified by their radio chip instead of the Blink product name.
Disable VPN
Do you use a virtual private network (VPN) on your mobile device? If so, please disable the VPN before you set up Blink devices. You can enable your VPN after you complete setup.
If you're continuing to have issues with VPN after setup, make sure your VPN server is in the same time zone as your device.
Important information to discuss with your Internet Service Provider (ISP)
We suggest speaking with your ISP to discuss your home network capabilities. Here is a guide for reviewing your network setup with your ISP.
- Upload speed - The Blink system requires a consistent minimum upload speed of 2Mbps per device. Any result lower than 2Mbps may cause latency and/or issues establishing or maintaining connection.
- Network congestion - The more devices in your home use Wi-Fi, the more they will be sharing your network's bandwidth. You can disable the Wi-Fi setting for non-Blink devices not in use and reenable it as needed.
- Old routing equipment - What is the age/model of your router? We recommend a router model less than 5 years old to ensure it supports the latest technology.
- Packet loss - This means bits of information are being dropped when communicated over the network. This can cause communication failure from your device to your router or your mobile device to your router. Packet loss can occur within your home (device to router) and/or within your connection from your router to your ISP's server.
- Privacy settings/Parental Controls/Firewalls - Network security is important. Ensure these settings are set up so they do not interfere with your ability to connect to your connection to your Blink system. Ensure that each individual Blink device is allowed to establish its own connection. Tip: you can white-list your Blink device's individual MAC addresses. If you are unsure how to do so, check with your ISP.
- Duplicate SSIDs - When two networks in the same location have the same SSID/name, your Blink system may try to connect to the wrong one. This other SSID may be in a different location that is too far for reliable connectivity or may be and incompatible network. Ensure you are attempting to connect to the appropriate SSID.
Wi-Fi 6 (802.11ax) compatibility
Wi-Fi 6, also known as Wi-Fi 802.11ax is a new wireless technology being implemented in new routers.
Blink devices (Camera and Sync Module) require the use of an 802.11b/g/n network. Blink devices do not support the upcoming standard Wi-Fi 6 (802.11ax), but those new routers are backwards compatible with 802.11b/g/n, so Blink will continue to function as it does today.
Compatibility List:
802.11b |
2.4 GHz |
Compatible |
802.11g |
2.4 GHz |
Compatible |
802.11n |
2.4 GHz |
Compatible |
802.11n |
5 GHz |
Not Compatible |
802.11ac |
5 GHz |
Not Compatible |
802.11ax |
1-6 GHz |
Not Compatible |
802.11w |
1-6 GHz |
Not Compatible |
Mobile Devices Not Connecting to Wi-Fi
If your mobile device has no connection to your Wi-Fi network, you will not be able to add a Sync Module or Blink camera. However, if you have Wi-Fi off, the Blink app attempts to turn Wi-Fi on in the install process.After a device is added to your Blink system, use the Blink app for all other functions on mobile data alone, or on another Wi-Fi network. Learn more about how to set up and add devices to a Blink system. Here's some tips to help get your device connected to your Wi-Fi network.
- Make sure your device’s Wi-Fi is turned on and not in airplane mode. Depending on your device, Wi-Fi settings can be usually located within your Settings app or by swiping down from the top or up from the bottom of your screen.
- Restart your device, or try switching the Wi-Fi setting off and on again to establish a connection.
- Make sure your mobile device is within range of your router or access point.
- Check that your router and any access points are powered on. Restarting your Wi-Fi router may also resolve this issue.
- Check that other devices are able to connect and function properly on your Wi-Fi. This will rule out any network issues.
- Make sure you have the latest OS installed on your device.
- Turn off Location Services which could cause connectivity issues in some cases.
Learn more about how to set up your Blink devices.
DeleteMy Wi-Fi password doesn't work
Wi-Fi password troubleshooting
If you encounter an "Incorrect Password for Your Wi-Fi" alert while adding a camera or Sync Module to your Blink app, attempt the following troubleshooting steps:
- Re-enter Wi-Fi Password: Double-check that you've entered the correct Wi-Fi password, and try again. If the "Incorrect Password for Your Wi-Fi" alert persists, proceed with the next steps.
- Check Password on Router: Check your router for a sticker containing the Wi-Fi password. Keep in mind, some routers might not have this sticker.
-
Forget and Reconnect Wi-Fi Network: On your mobile device, go to network settings and choose to forget the Wi-Fi network. Then, try connecting to it again. If you can reconnect successfully, it means the password is correct.
- iOS users: How to forget a Wi-Fi network on iPhone, iPad, or Mac
- Android users: Remove saved networks
Special characters in your Wi-Fi password
Using special characters (e.g., *, @, $, #) in your Wi-Fi password can sometimes create challenges during the initial setup of your Blink device. If you encounter any problems after confirming that your Wi-Fi password is correct, as outlined in the steps above, attempt the following troubleshooting steps:
- Temporarily change your Wi-Fi password: Temporarily change your Wi-Fi password, ensuring it does not include any special characters.
- Create a temporary guest network: Create a temporary guest network specifically for setting up your Blink device. After successfully setting up and connecting your Blink device to the internet, you can remove the temporary or guest network without impacting the device's functionality.
If you change your Wi-Fi password at any point after the initial setup, you must also update the password on your Blink devices and any other devices that connect to your Wi-Fi network.
Saving your Wi-Fi password in the Blink app
The Blink app lets you save your Wi-Fi password, making it easier to set up new devices. Once saved, you won't need to re-enter your password when adding additional devices to your system, unless you change your Wi-Fi password.
This feature is available for the following devices:
- Mini 2K+
- Sync Module Core
- Sync Module XR
Note: Some Sync Module 2 models may also support this feature. Feature availability depends on your device model.
When setting up a compatible device, you'll see the option to save your Wi-Fi password from the Add Device screen. When prompted, tap Save Password if you'd like to save your password in the Blink app.
If you change your Wi-Fi password, you can update it in the Blink app anytime:
- Go to Device Settings.
- Select General Settings.
- Tap Change Wi-Fi.
What is the Blink Wi-Fi Network?
When adding a Sync Module, Mini, Video Doorbell, or Wired Floodlight Camera, you will be prompted to connect your Blink app to the temporary Wi-Fi network. It is named “BLINK-" followed by the last four digits of the device's serial number.
The Sync Module manages communications between your Blink devices and our secure servers; therefore your camera needs to connect to its local Wi-Fi. The Blink Mini, Video Doorbell, and Wired Floodlight do not require Sync Modules for those communications, which is why they broadcast their own local Wi-Fi connections.
It is completely safe to connect your mobile device to your local "BLINK-XXXX" Wi-Fi connection and there are no security issues. If you encounter any problems connecting to your local Blink Wi-Fi, make sure you have the Blink app Local Network (iOS) or Location (Android) permissions enabled on your mobile device. See the links below for more information.
iOS
Learn more about enabling Local Network for your Blink app on your iOS device.
Android
Learn more about changing the Blink app permissions on your Android device.
Updating the Wi-Fi Connection on your device
This article describes how to update the Wi-Fi setting for any of your Blink devices.
Updating the Wi-Fi settings for your Sync Module
When you move your Sync Module to a new location or Wi-Fi network, you will need to set up the Sync Module for its new network. Your Sync Module may stay connected to the same Wi-Fi setup when you move it, but we do not guarantee it will perform. We recommend that you manually update the Wi-Fi settings for the Sync Module's new network.
Before you begin
This procedure requires direct communication between the mobile app and the Sync Module. Both must be active and on the same Wi-Fi network. To complete this procedure, you must be physically with your system and have your Sync Module plugged in to a power supply.
Note: Reconfiguring the Sync Module Wi-Fi network will not delete saved clips.
Change a Sync Module's Wi-Fi Network
- From the Home screen, tap on Sync Module.
- Tap on Change Wi-Fi Network.
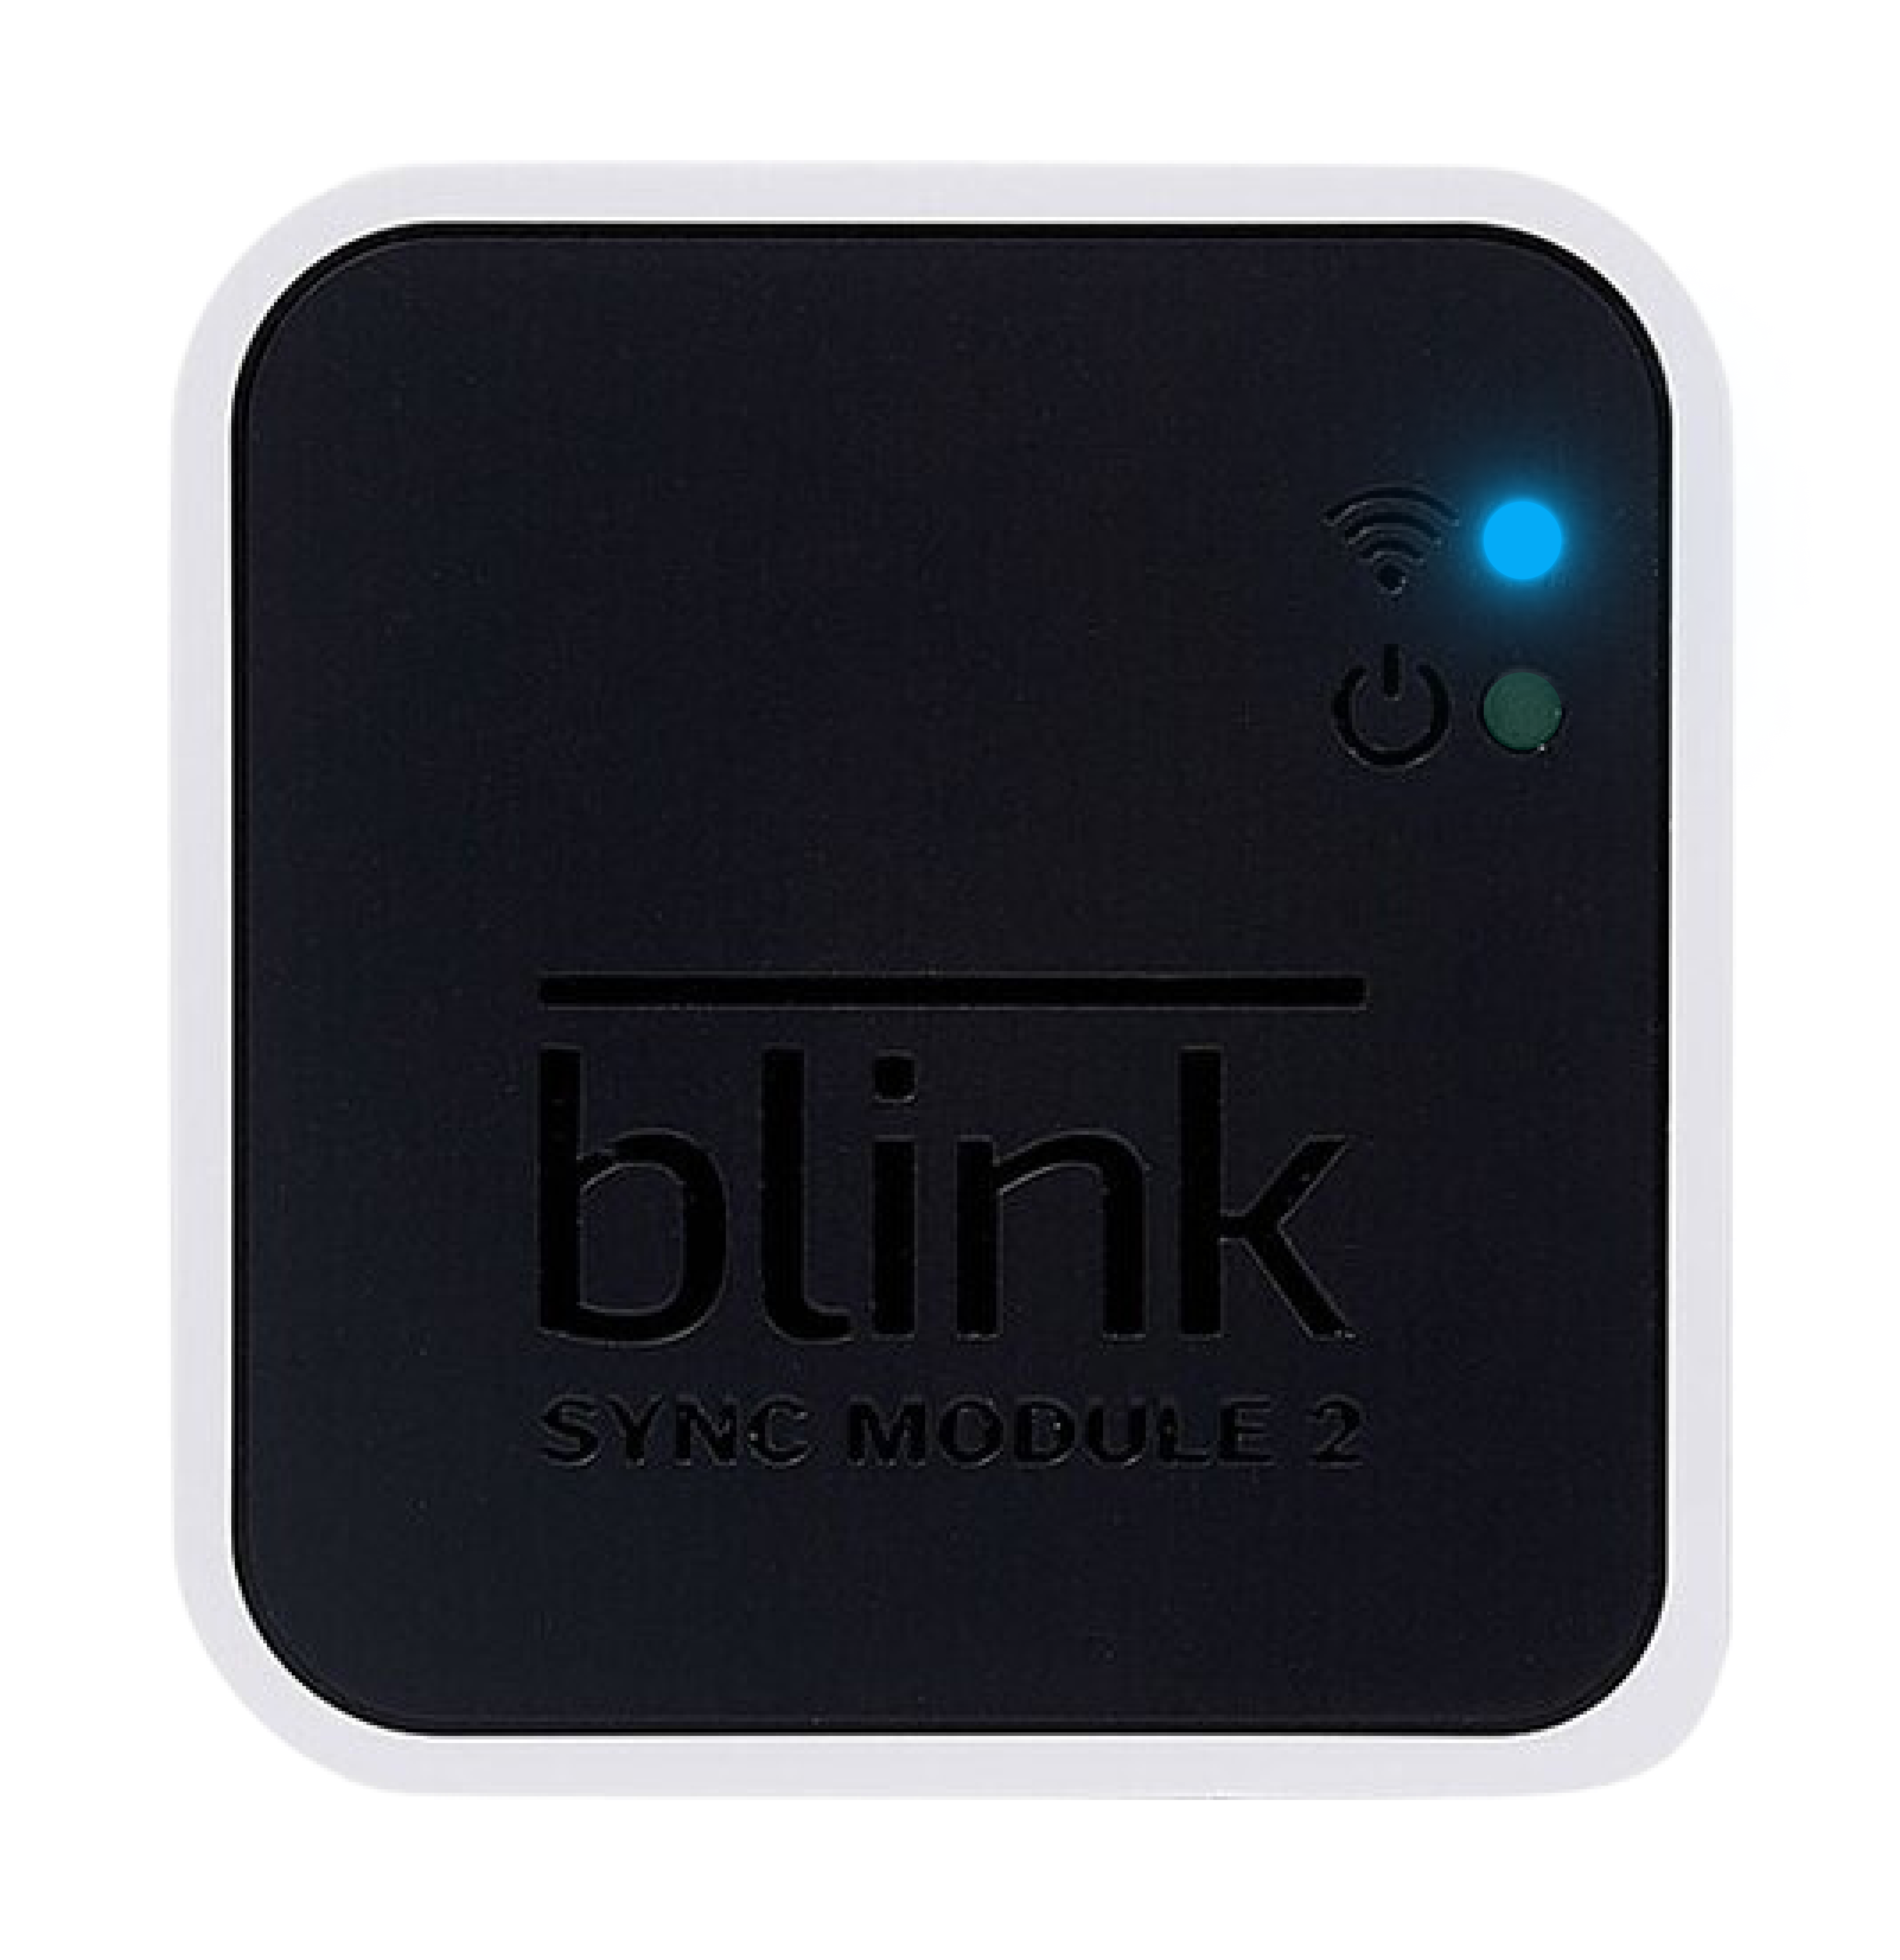
- On the change Wi-Fi screen, you will see a blinking blue light above a steady green light.
- Press the Reset button, or in some specific models of the Sync Module, insert a pin to reach the Reset button.
- Press until you feel it click, and hold until one LED turns red; then release the button.

- Press until you feel it click, and hold until one LED turns red; then release the button.
- When the lights match a blinking blue and solid green pattern, tap Discover Device when prompted to join the Sync Module's temporary Wi-Fi network. Tap Join, and then select your Wi-Fi network.
- Enter your Wi-Fi password and tap Join.
- After the devices have finished communicating, you’ll receive a message, “Sync Module added to <system name> system!”. Once you receive that message, tap Done.
- Your system is ready to be used as normal.
Updating the Wi-Fi settings for your Wired Floodlight camera
This article outlines the steps for updating the Wi-Fi settings for your Wired Floodlight camera.
Please have your Wi-Fi credentials available and have power connected to your camera before proceeding.
- Tap the More (...) button located at the bottom-right corner of the device thumbnail to access Device Settings.
- Select General Settings > Change Wi-Fi.
- On the Change Wi-Fi screen, follow the instruction to wait for blinking blue and steady green lights to display. If this doesn't occur, you can press the reset button located above the camera housing, or power off and on your camera by flipping a wall switch or circuit breaker.
- Tap Discover Device and a pop-up window prompts you to join the "Blink" Wi-Fi network, "BLINK-XXXX."
- Tap Join and select your Wi-Fi network from the list. If your network is not listed, tap Refresh List.
Note: You may be required to move the camera closer to your Wi-Fi router or troubleshoot your router. - Enter your Wi-Fi password and tap Join.
- If successful, the following message displays “Wired Floodlight camera Wi-Fi changed!”
Tap Done to return to the Home screen.
Updating the Wi-Fi settings for your Mini camera
This section will outline the steps for updating the Wi-Fi settings for your Blink Mini and Mini 2 cameras.
- Tap More (...) on your camera's thumbnail and select Device Settings.
- Tap General Settings > Change Wi-Fi.
- On the Change Wi-Fi screen, follow the instruction to "Press and release the reset button on the camera until red and blue lights flash. When ready, the lights will display: Blinking Blue, Steady Green." Learn more about the reset button on Mini and Mini 2 cameras.
- Tap Discover Device, a pop-up window prompts you to join the "Blink" Wi-Fi network, "BLINK-XXXX."
- Tap Join, select your Wi-Fi network from the list. If your network is not listed, tap Refresh List.
Note: You may be required to move the camera closer to your Wi-Fi router or troubleshoot your router. - Enter your Wi-Fi password and tap Join on your keyboard.
- If successful, the following message displays “Mini camera changed Wi-Fi!”
Tap Done to return to the Home screen.
Updating the Wi-Fi settings for your Blink Video Doorbell
This article describes how to update the Wi-Fi setting for your Video Doorbell. These are the same steps you follow after tapping the "Doorbell Offline" message in the Blink app.
To update your Wi-Fi settings, follow these steps.
- Tap the More button located at the bottom-right corner of the doorbell's thumbnail to access Device Settings.
- Tap General Settings.
- Tap Change Wi-Fi.
- If your doorbell is connected to chime wiring, turn off power to the chime system and then tap Continue.
- If your doorbell is not connected to chime wiring, tap Continue.
- Remove the doorbell from its mounting plate with the release key.
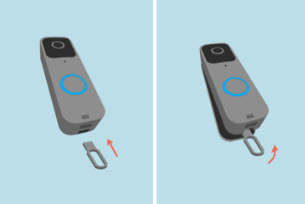
- After you remove the doorbell, tap Continue.
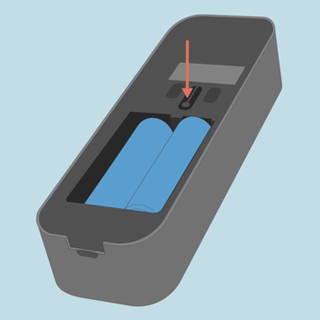
- When the Change Wi-Fi screen displays, press and release the reset button on the doorbell (shown below) until the red and blue LED flashes.
- Once the red LED flashes, release the reset button and tap Continue.
- If the red LED does not flash after 30 seconds, try replacing your batteries.
- To learn more about your doorbell's LED patterns, visit Understanding the LEDs on your Video Doorbell.
- Select your network name among the list of discovered 2.4 GHz Wi-Fi networks. While the red LED flashes, tap Discover Device. To learn more about your doorbell's LED patterns, visit Understanding the LEDs on your Video Doorbell.
- Tap Join to connect to the temporary Blink Wi-Fi network. Note: If you do not see your Wi-Fi network, tap Refresh List.
- Enter your Wi-Fi password. Tap the eye icon in the password field to make the characters visible. Carefully enter your password and then tap Continue. For Wi-Fi password help, visit Troubleshooting Incorrect Wi-Fi Password in the Blink App.
- The doorbell connects to the Blink servers and performs network updates. When the Wi-Fi network update is complete, a confirmation message displays. Tap Continue.
- Reconnect the doorbell by aligning the top edge of your Video Doorbell to the back plate. Push it firmly against the back plate until you hear and feel a slight click.
- Your doorbell mounting is how complete. Tap Done to return to the Home screen.
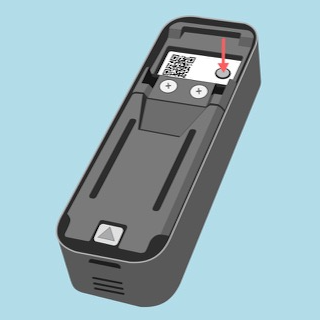
Two-hole back plate reset button location
If your Video Doorbell has a two-hole backplate instead of three mounting holes, your reset button is located on the back of doorbell as shown below.
Device issues
Wired Floodlight Offline
If your Wired Floodlight displays a "Camera is offline" message in your app thumbnail, you may need to update its Wi-Fi settings. This would be necessary if your Wi-Fi network name or password has changed. Power cycling your Wired Floodlight camera can also resolve this issue. If your camera stays offline after checking your Wi-Fi settings and performing a power cycle, you can also try manually resetting it.
The camera in the Wired Floodlight Camera has a reset button at the top, which is not visible from the ground when it's mounted. This button can put the camera in setup mode to be added to a new or existing system or to a new Wi-Fi network.
- Short press (less than 5 seconds) resets it and resolves most setup issues.
- Long press puts the camera into setup mode. This also erases your Wi-Fi credentials; therefore, you need to enter your network name and password again to reconnect to your Internet.

Blink Mini Camera Offline
If you receive a Camera is offline message on your Blink app home screen, it means the Blink servers lost communication with your Mini camera. This will normally fix itself when the network comes back up, or when there is less traffic on the Wi-Fi network. When your camera comes back online, the message will disappear.
Most often, disconnected or slow internet makes the Mini camera lose contact. Most internet providers provide downloads to your location much faster than uploads from your location. If there is a sudden jump in the data being used, the Mini camera may miss a check-in and the offline message may appear.
If your camera keeps disconnecting even when power and Wi-Fi internet are steady, please contact Blink support.
Troubleshoot Mini camera offline message
Check Power
The Blink Mini compact camera is powered by direct connection to a USB standard power adapter instead of batteries. To function, the power cord must be reliably connected to a 5 volt 1 Amp power source, and the molded USB connector must be fully inserted into the camera.
Check Internet
To send you images and sounds, the Mini camera needs a 2.4 GHz Wi-Fi internet connection with upload speeds (going out from your network) at least two megabits per second (2 Mb/sec) at all times, including when others are on the same internet connection.
When you tap the alert shown in the app home screen, a Camera Offline screen provides helpful tips. The first, is to check the Wi-Fi internet and the power supply, then check the camera power connection.
Troubleshooting Wi-Fi
- Check Wi-Fi. Ensure that you can connect to the internet, and that the password has not been changed. If the password has been changed, refer to the next step.
Rebooting the Wi-Fi router is often very effective to resolve Blink connectivity issues.
If you have rebooted your router and Blink does not connect after 3 minutes, continue. - Check your password. If the password is changed, or if you wish to use a different Wi-Fi network, tap the Change Wi-Fi button: Change Wi-Fi and follow the instructions.
If the password or network have not changed, continue. - To repeat the camera installation process, tap the Delete Camera button: Delete Camera and follow the instructions.
If these steps do not reconnect your camera, please contact Blink support.
Doorbell Offline error message
Learn how to get your Video Doorbell back online or connected to Wi-Fi.
Remove or replace batteries
If the doorbell falls offline or it can't connect during setup, try these steps.
-
Remove and reinsert the batteries
Take out the batteries for five seconds, then put them back in. If the red LED flashes, your doorbell is now ready to be added to your Blink account.
Depending on which model of Video Doorbell you have, the instructions are slightly different. Choose accordingly from the options below:- Video Doorbell (1st Gen): If the red LED flashes, press the Reset button on the back of the doorbell for five seconds. Your doorbell is now ready to be added to your Blink account.
- Video Doorbell (2nd Gen): Take out the batteries for five seconds, then put them back in. If the red LED flashes, your doorbell is now ready to be added to your Blink account.
Replace the batteries
If the LED still doesn't flash, replace the existing batteries with three new Energizer AA 1.5-volt lithium non-rechargeable batteries. If the device remains offline, contact Blink support.
Reboot your router and check your Wi-Fi password
If the doorbell can't connect to your Wi-Fi network, try these steps:
- Reboot your Wi-Fi router - Unplug your Wi-Fi router for 30 seconds and plug it back in. Restarting your router can help when your Wi-Fi is slow or stops intermittently.
- Check your Password - Ensure you have entered your Wi-Fi password correctly. Tap the eye icon in the password field to see the password you enter. To learn more, visit My Wi-Fi password doesn't work.
-
Check the connection between your Wi-Fi router and your doorbell - If your internet speeds are good, you may still have an issue with the strength of the signal between your router and the doorbell. To verify signal strength:
- Tap the More(...) button at the bottom right of the doorbell's thumbnail image and select Device Settings.
- Tap General Settings.
- Locate Network and confirm the Connection to Wi-Fi is sufficient.
- If these steps don't work try disabling your VPN on your mobile or uninstall any apps that may conflict with the Blink app. Learn more about conflicting apps.
Learn more about Blink Wi-Fi Network Requirements.
Poor connectivity with Blink severs
You may receive an in-app message alerting you to poor connectivity to Blink servers. Be sure your internet connection is working and that it can provide a minimum of 2Mbps of upload speed.
Sync Module placement
If your doorbell is connected to a Sync Module, consider moving the Sync Module to provide better signal strength between the Wi-Fi router and the doorbell. To check your Sync Module signal strength, follow these steps.
- Tap Device Settings > General Settings.
- Under Network, the signal strength of the Sync Module to the doorbell is displayed.
- If your signal strength is two bars or less, you may need to bring the Sync Module closer to the doorbell.
For more information, visit the "Where to Place your Sync Module" section of Understanding Blink Wi-Fi Requirements.
Delete your Doorbell
If you've attempted the troubleshooting steps listed above but are still experiencing issues, try deleting and re-adding the doorbell to your Blink system.
- Tap the More (...) button at the bottom the doorbell's thumbnail image and select Device Settings.
- Tap General Settings.
- Tap Delete Device.
- When the confirmation message displays, tap DELETE to remove the doorbell.
- After you tap DELETE, you will receive an email confirming the doorbell has been deleted from your account.
Once your doorbell is removed from your account, you can set it up again.
One camera isn't responding
If one of your Blink cameras isn't responding, you may see error messages such as "Camera Busy" or "Thumbnail Failed."
These messages can happen if your Sync Module isn't able to communicate with the camera.
The following steps may also help in resolving this issue.
- Move your camera closer to your Sync Module. Also make certain that you have 3 bars of signal strength for Camera to Wi-Fi and Camera to Sync Module (see "Where to find signal strength in the Blink app" below).
- Power cycle both your modem and router by unplugging them for 30 seconds and plugging them back in. Then wait two minutes for Internet service to be restored and then try using your camera again.
- Power cycle your camera by removing the batteries for 10 seconds and reinsert them. Then check to see if your camera responds to commands.
- If the steps above don't resolve the issue, try a different power source. You can use a micro USB cable and USB power adapter to power the camera with the batteries removed.
How to resolve connectivity issues
The Blink system relies on having good signal strengths for optimal performance in viewing Live Views, uploading motion clips and for best video quality. It is critical for the cameras to show 3 bars of connectivity to avoid performance issues.
Fewer than 3 bars for each connection can create intermittent issues with the performance of your system.
In case of any camera issues on a mesh network, rebooting the router should be a first step.
Assuming standard construction techniques (single building, no unusually dense construction materials) the Sync Module should be able to communicate with Blink cameras up to 100 feet (33m) away in any direction. We recommend keeping the Sync Module near your wireless router for best signal strength.
See the section below to learn about signal strengths and how to check them. You should have three bars of signal connectivity at the Sync Module and each camera, as depicted on the Sync Module screen in the Blink app.
Where to find signal strength in the Blink app
Tap the More (...) button at the bottom right of the device's thumbnail image and select Device Settings. Then tap General Settings.
You will see a Network section. Depending on the type of camera you have, this section can contain:
-
Change Wi-Fi
- Tapping this allows you to change your device's existing Wi-Fi connection. Use this if you have installed a new router for your network or want to change access points for your devices.
-
Connection to Wi-Fi
- The icon here represents the strength of your Wi-Fi connection to the camera.
-
Connection to Sync Module
- The icon represents the connection strength between your camera and the Sync Module. To view the connection strength between the Sync Module and your Wi-Fi network, refer to the Sync Module Status screen.
Signal types
Its important to note that the cameras use two types of signals for communication:
- LFR - Low Frequency Radio - is the signal that cameras share with the Sync Module.
- Wi-Fi (2.4 GHz) - is the frequency that the cameras communicate with your Wi-Fi router on. Blink supports mesh and merged networks with a single SSID but only communicates on the 2.4 GHz band.
How to boost internet signal
One solution, other than moving the camera closer to the Wi-Fi router, is to install a Wi-Fi extender or booster. A newer, more effective solution is called mesh Wi-Fi.
-
Extenders
A Wi-Fi extender repeats the wireless signal from your router to expand its coverage. Extenders function as a bridge to capture the Wi-Fi from your router and rebroadcast it to areas where the Wi-Fi is weak or nonexistent. This improves the overall Wi-Fi performance and signal strength for all connected devices within range. Learn more about using extenders with Blink cameras. -
Mesh Wi-Fi
Mesh networks eliminate connectivity dead zones by blanketing your home in Wi-Fi. They work by allowing different types of devices to chain off each other as nodes in a network, each broadcasting the radio signal further than the last. The typical mesh network includes several nodes, which act like satellites for your network. One of these nodes is a gateway and connects to the internet through your modem. The other nodes communicate to each other and will expand your wireless coverage every time you add a new node. Rather than communicating with a single access point (like a traditional network), each node of a mesh network communicates with the others. This distributes the overall signal strength and Wi-Fi coverage throughout an area.
Troubleshooting your connection
If your connections to either your Wi-Fi or Sync Module are below 2 bars or less, attempt the following troubleshooting steps.
- Device placement
- Move the device closer to the Wi-Fi router and tap Pull to Refresh to check if the bars increase. Repeat until you see improved signal strength.
- Check your internet
- If you haven't already, attempt a power cycle of the Wi-Fi router.
- Check that your 2.4 GHz Wi-Fi network is functioning normally and that the internet is available.
- Check that the Wi-Fi network speed is not being reduced by streaming movies and games, or other high bandwidth activities. Two Megabit per second (2 Mb/sec) upload speed (going from your location) must be available to the Blink system at all times. Test your connection by temporarily suspending any streaming of music, movies, video or gaming to prevent consumption of bandwidth.
- If your Wi-Fi password or network has changed, the Blink system will not function correctly until you update the settings.
- Check that the outlet provides power
- To confirm that power is present to the wall outlet, you can try plugging in a different device or appliance.
- Some outlets are controlled by a wall switch, check to see if this applies to your outlet.
- If the wall outlet is not providing power, you can try a different outlet.
- It is also possible that a circuit breaker has tripped, so you may want to check your electrical distribution panel.
- Check that the wall charger provides power
- If your outlet has power and the camera is not getting power, try to use a different wall charger.
- Any standard 5 volt USB wall charger should work. 5 volt USB phone chargers are commonly available.
- Check the cable
- It is possible that the USB cable became damaged from being bumped into. The damage may not be visible from outside.
- You can try the camera's power cable with another device to see if power is present.
- You can also try to use another USB Type A male, to micro-USB Type B male or USB-C cable. These are commonly used for charging phones and other devices.
If you continue to experience issues, please contact Technical Support to assist you further.
Sync Module Is Offline
If your Sync Module is offline or if you encounter any issues during setup, begin by verifying the LED patterns on the device. Then, proceed with the troubleshooting steps outlined below:
Solid blue / blinking green LED
If your Sync Module displays a solid blue and a blinking green LED, this indicates the Sync Module is offline and attempting to reconnect to the previously configured Wi-Fi network.
Several reasons why your Sync Module may have gone offline include power interruptions (such as outages or being unplugged for a prolonged period of time), updated Wi-Fi settings (such as a new password), or signal interference from devices like pods and extenders.
If your Sync Module goes offline, you will notice the following in the Blink app:
- A "Sync Module is Offline" banner will appear at the top of the home screen.
- The thumbnails of each camera that require a Sync Module will blur and display a "Sync Module is offline" message in the center.
Before you attempt troubleshooting, verify:
- Network compatibility: Your network meets the requirements necessary for Blink devices as outlined in Understanding Wi-Fi and Network Requirements.
- Wi-Fi password: Your Wi-Fi password has not changed since you last set up your Sync Module. If it has changed, you will need to update the Sync Module with the new Wi-Fi password. For guidance, visit Updating the Wi-Fi Setting for Your Sync Module System.
After confirming the information above, if the issue persists, attempt the following troubleshooting steps:
- Power-cycle your router: Unplug your router from the power outlet, wait 30 seconds, and then plug it back in.
- Power-cycle the Sync Module: Disconnect the Sync Module from power for 10 seconds, then plug it back in. After rebooting, a solid blue and solid green LED indicates the Sync Module has successfully reconnected to the network.
- Re-enter Wi-Fi password: Refresh the Sync Module's Wi-Fi connection by re-entering your Wi-Fi password. For guidance on updating your Sync Module's Wi-Fi settings, visit Updating the Wi-Fi Setting for Your Sync Module System.
-
Simplify Wi-Fi configuration: Disconnect any pods or extenders, and ensure that only your main router is powered on.
Note: After your Sync Module connects successfully, you can reconnect any pods or extenders that were previously disconnected.
If the issue persists after following the above steps, you'll need to delete and re-add your Sync Module.
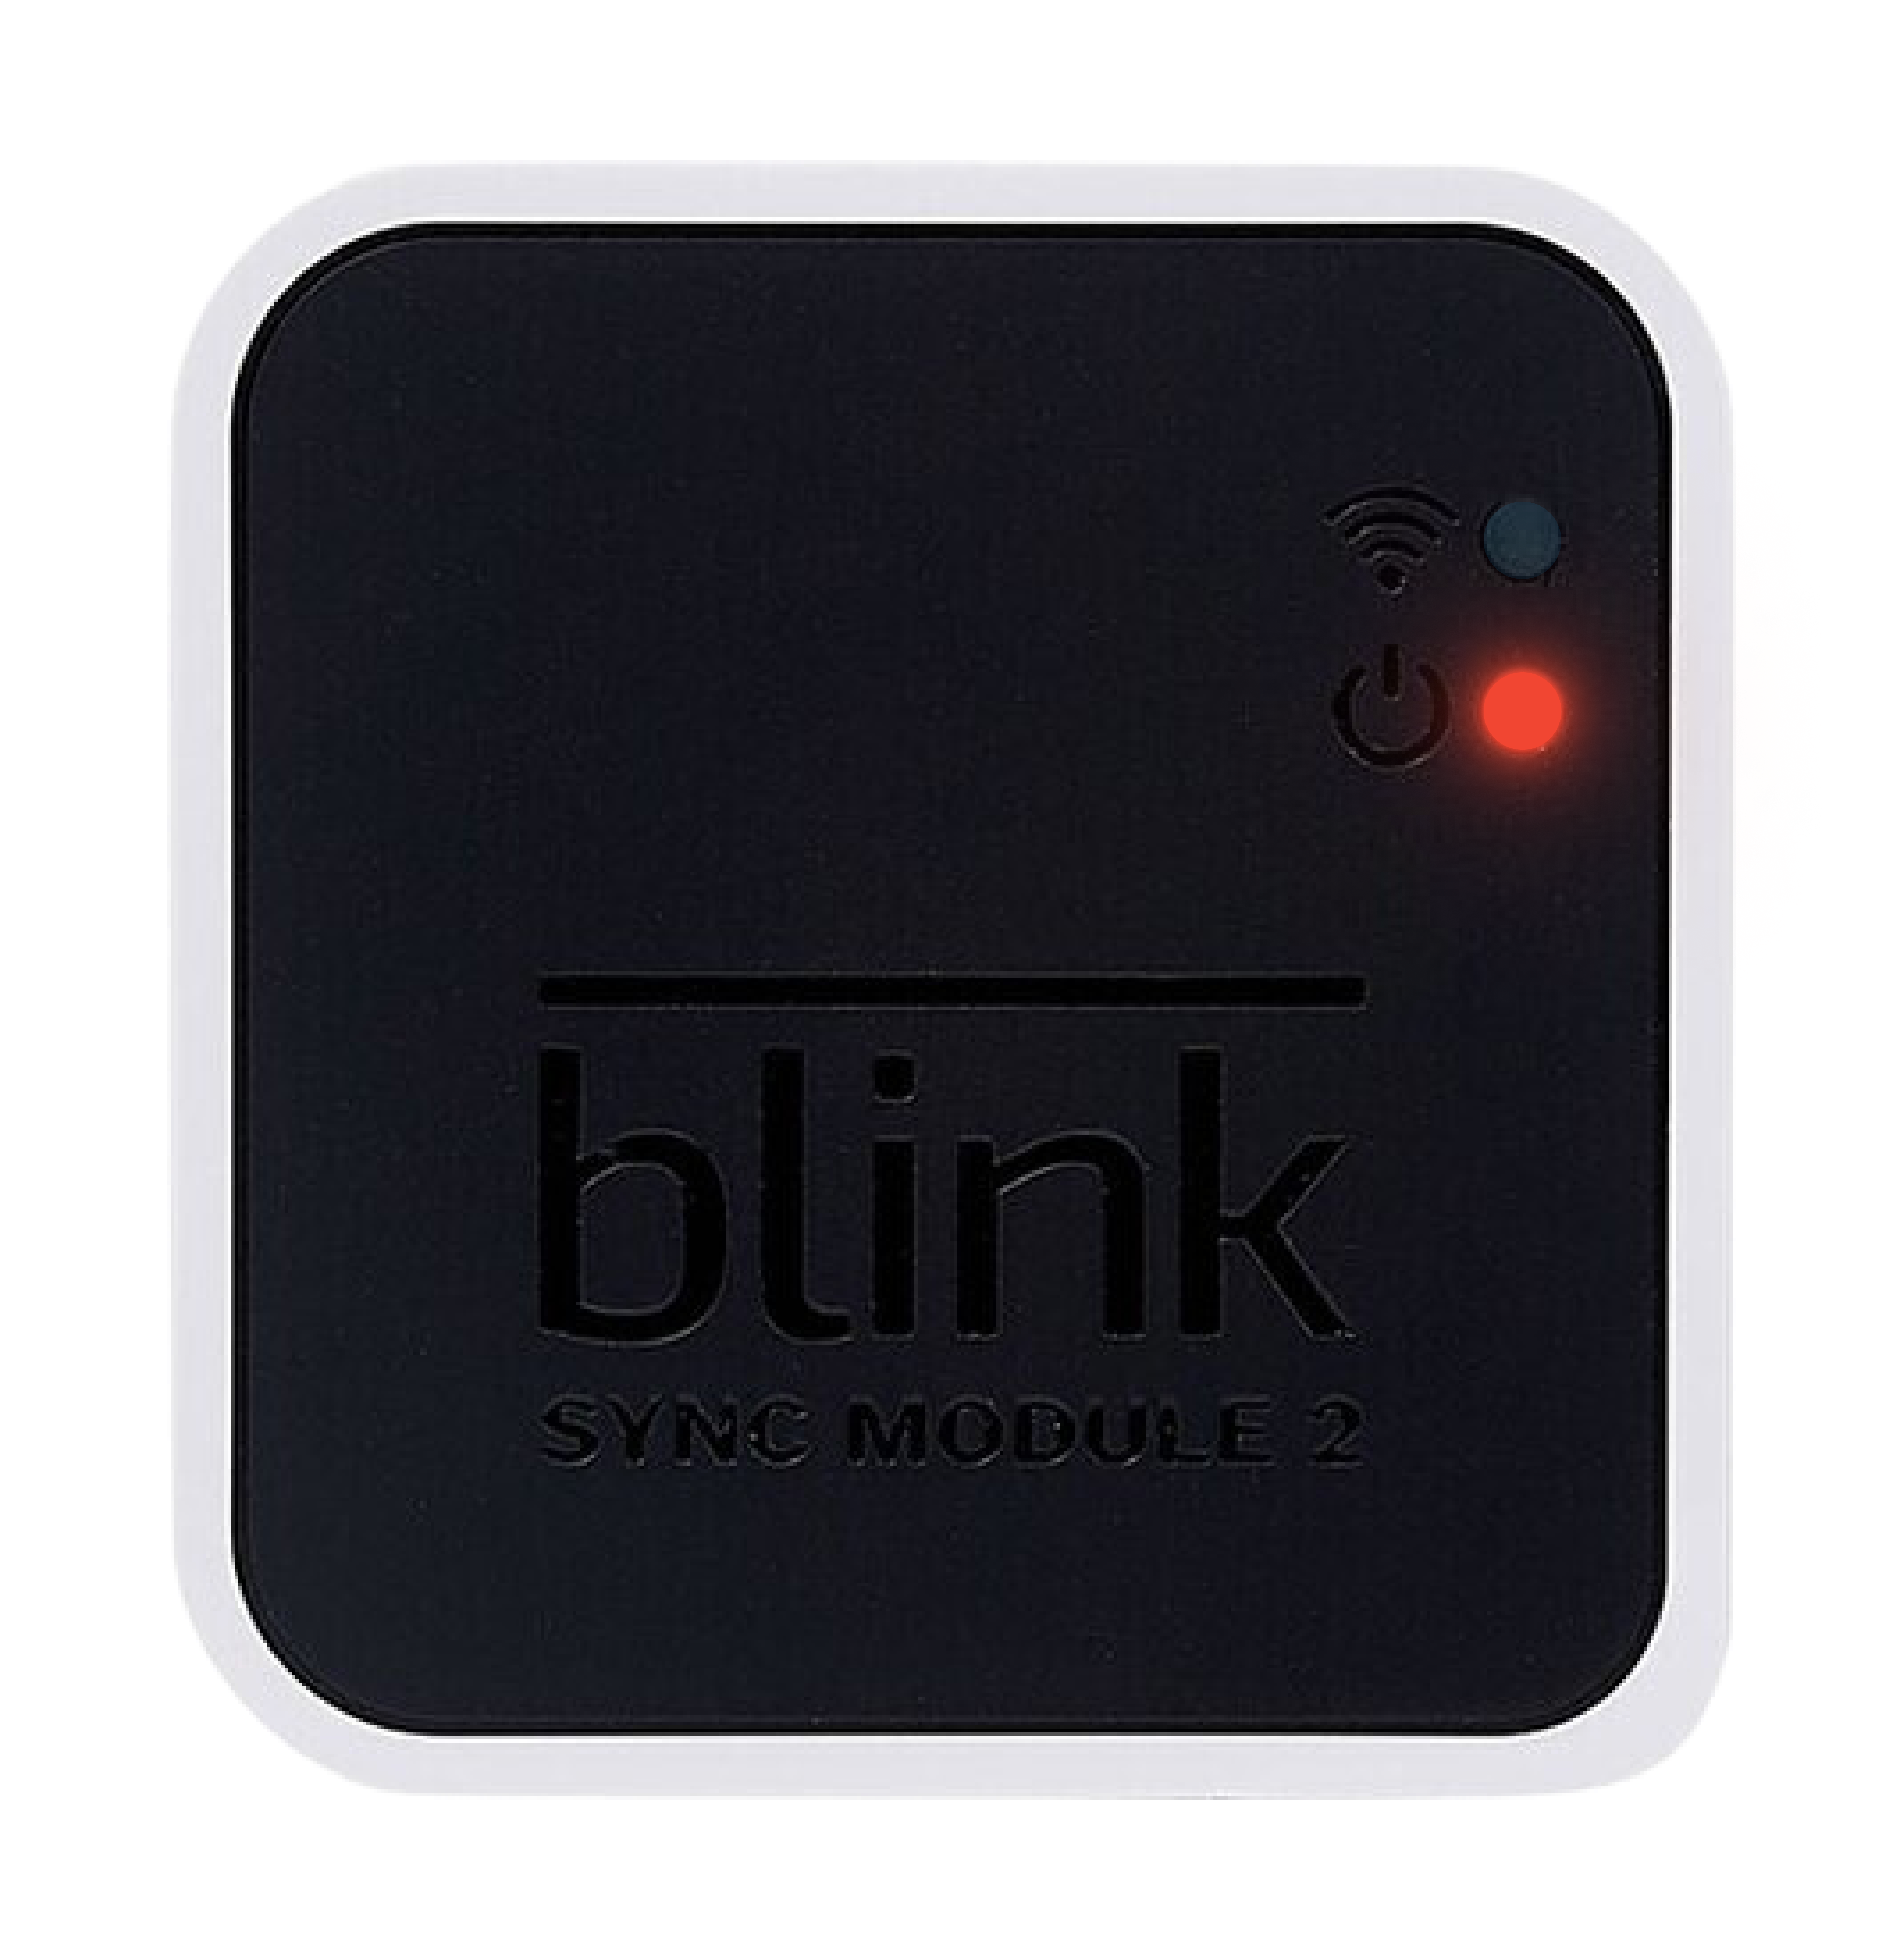
Solid red LED
If your Sync Module displays a solid red LED during setup, it indicates that the Sync Module is unable to connect to your Wi-Fi network, or the entered Wi-Fi password may be incorrect.
Before you attempt troubleshooting, verify:
- Network compatibility: Your network meets the requirements necessary for Blink devices as outlined in Understanding Wi-Fi and Network Requirements.
- Sync Module placement: The Sync Module is in the same room as your router, but not too close, ensuring it's also positioned away from physical obstructions to avoid network interference. For placement best practices, refer to Understanding the Placement of Your Sync Module.
- Wi-Fi password: The Wi-Fi password entered is correct. If you receive an "Incorrect Password for Your Wi-Fi" alert in the Blink app during Sync Module setup, re-enter the password carefully and try again. For additional troubleshooting, visit Troubleshooting Incorrect Wi-Fi Password in the Blink App.
- No app conflicts or network interferences: There are no apps that conflict with the Blink app, or any VPNs, firewalls, or anti-virus apps active or connected to your mobile device.
After confirming the information above, if the issue persists, attempt the following troubleshooting steps:
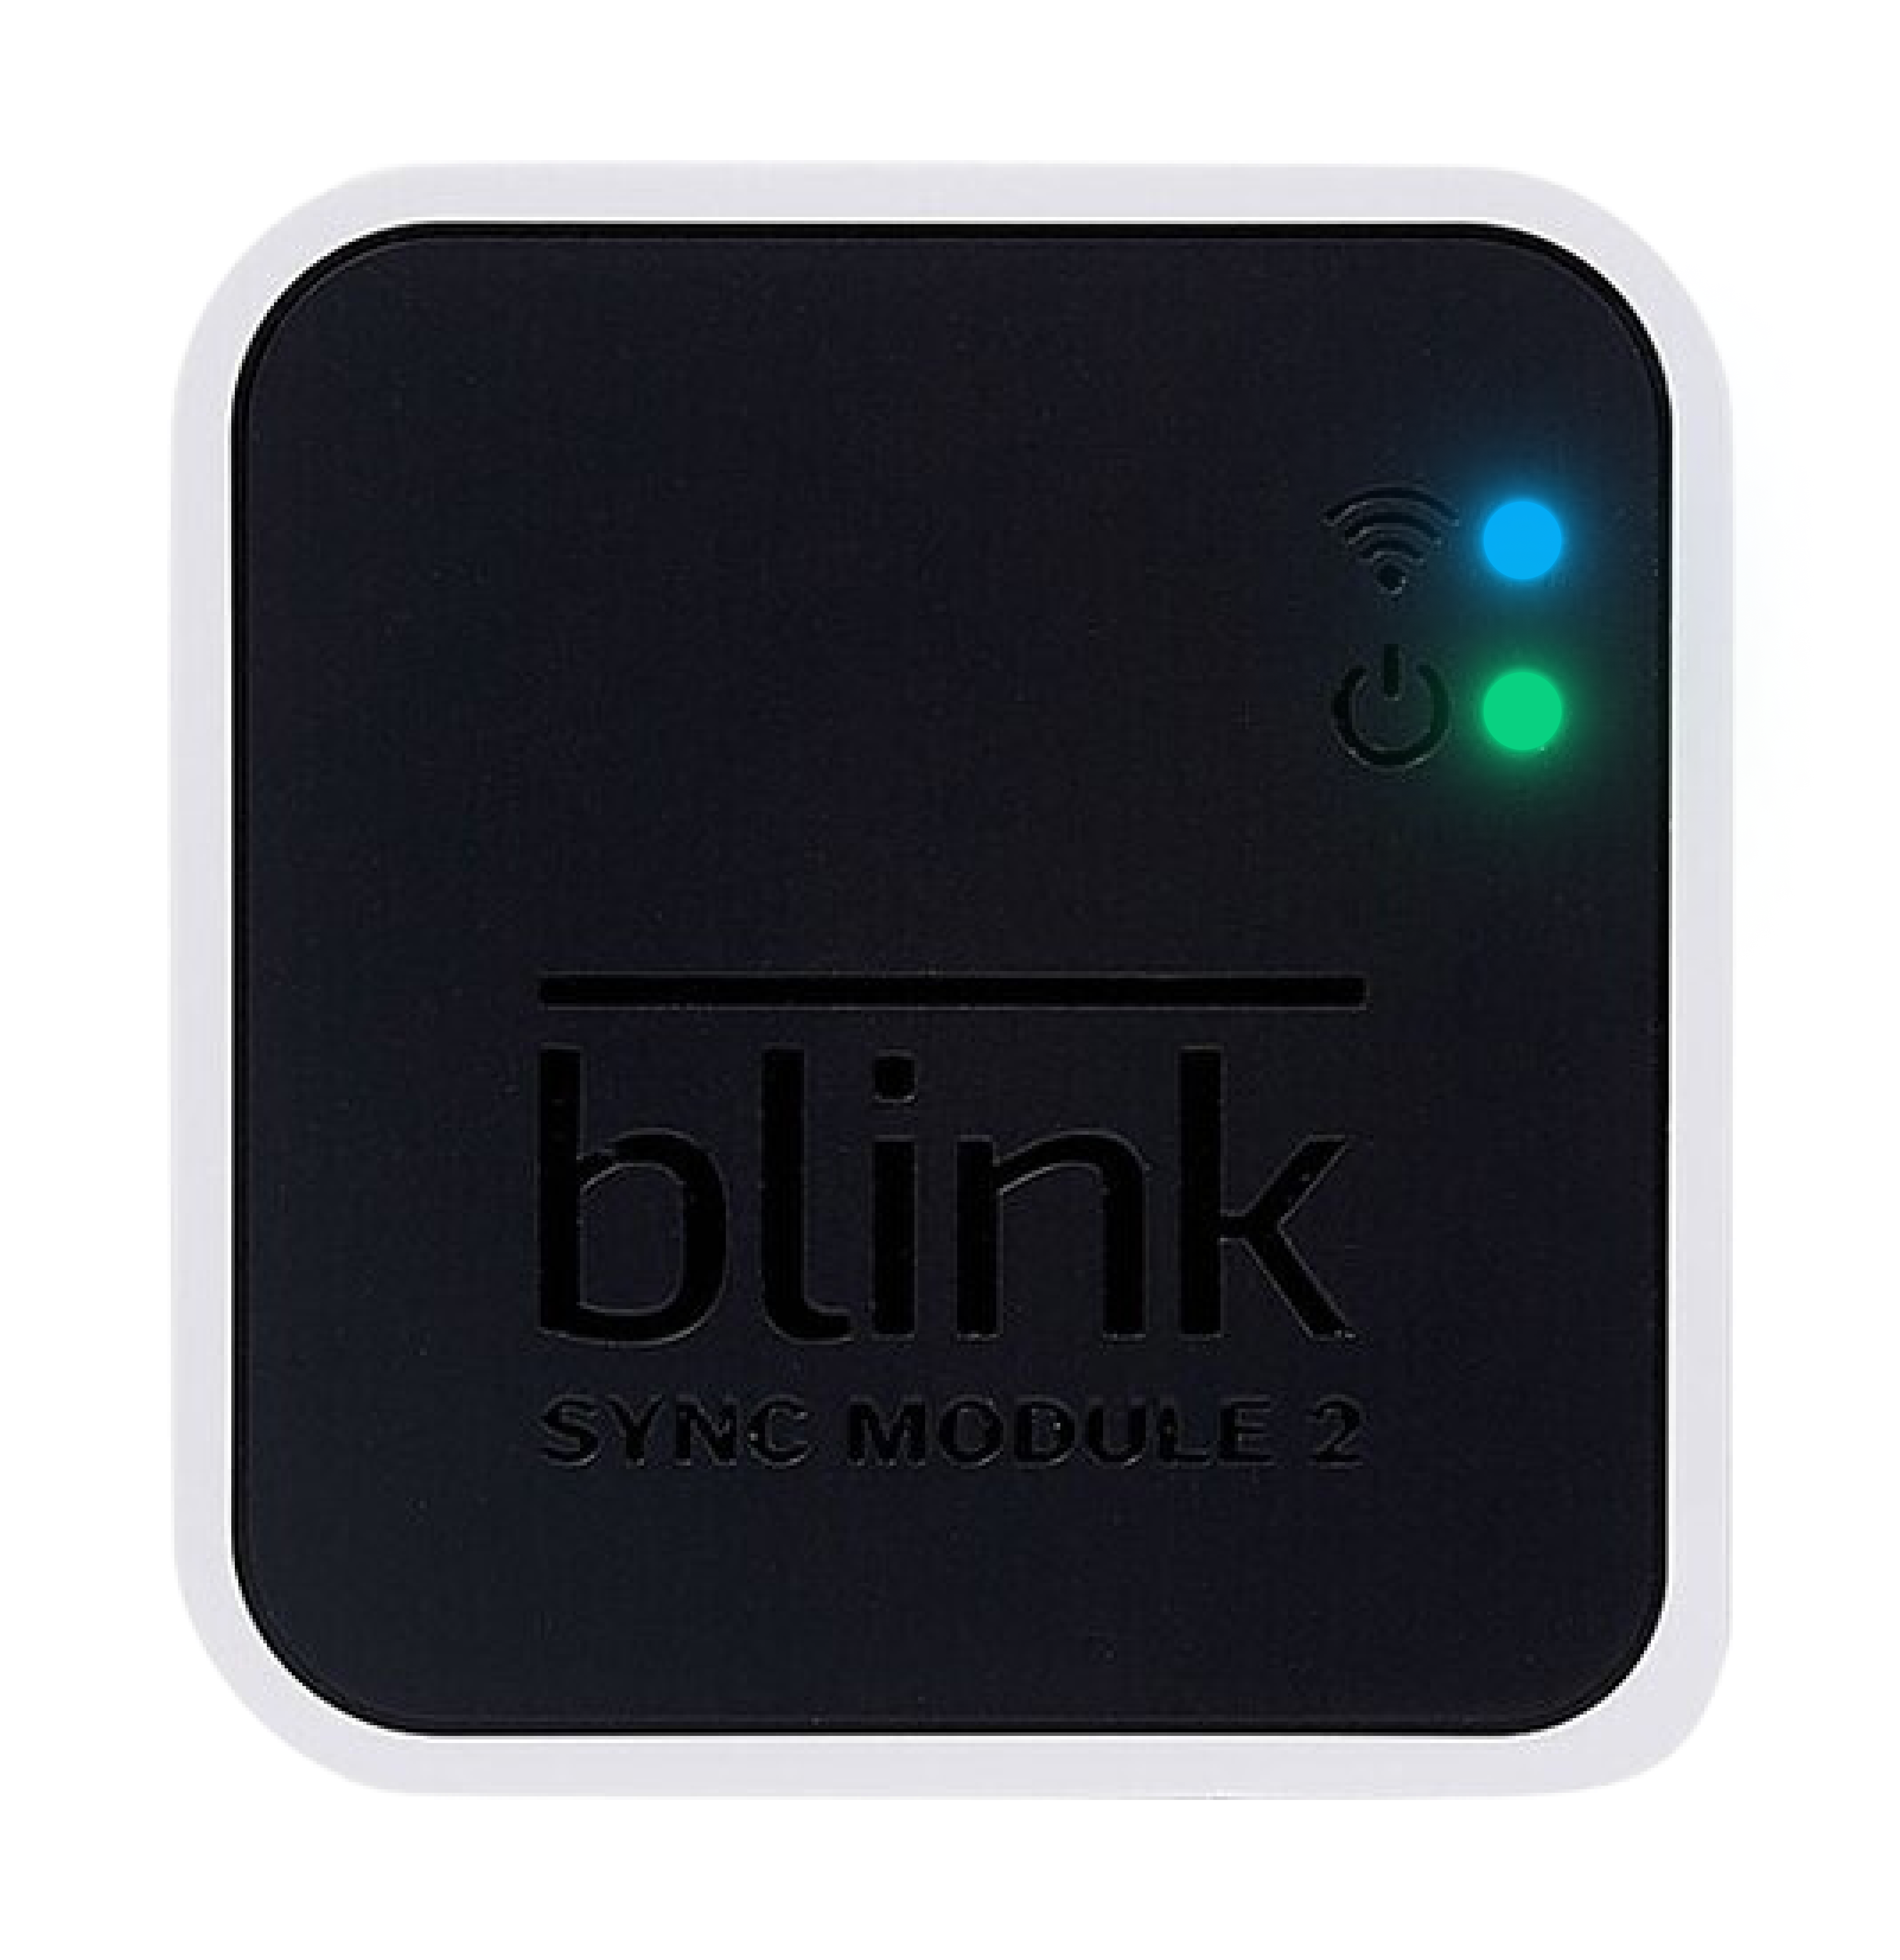
- Power-cycle the Sync Module: Disconnect the Sync Module from power for 10 seconds, then plug it back in. After rebooting, a blinking blue and solid green LED indicates the device is ready for setup.
- Power-cycle your router: Unplug your router from the power outlet, wait 30 seconds, and then plug it back in.
-
Simplify Wi-Fi configuration: Disconnect any pods or extenders, and ensure that only your main router is powered on.
Note: After your Sync Module connects successfully, you can reconnect any pods or extenders that were previously disconnected.
If the issue persists after following the steps above, proceed with a factory reset of the Sync Module.
Offline Sync Module XR
If your Sync Module XR is offline, it may indicate either a problem with receiving power or an issue with the inserted MicroSD card.
The Sync Module XR may display one of the following LED patterns:
- Solid blue and solid green LEDs
- Dim or flickering LEDs
- No LEDs
Before you attempt troubleshooting, verify:
- Power source: Ensure the power adapter is firmly connected to both the Sync Module and the power outlet. If the connection is secure, confirm that the outlet is working by testing it with a different device or trying another outlet.
After confirming the power source, if the issue persists, it may indicate the MicroSD card is faulty or damaged.
To verify the MicroSD card is not causing the Sync Module to remain offline, attempt the following troubleshooting steps:
- Check the MicroSD card: Disconnect the Sync Module from the power outlet. Remove the MicroSD card and inspect it for any visible damage. If damaged, replace the MicroSD card. Do not reinsert the MicroSD card until instructed in the next step.
- Reconnect the Sync Module to the power outlet: Once the Sync Module displays a solid blue and green LED, reinsert the MicroSD card only if it's undamaged or has been replaced. If the Sync Module goes offline again, the MicroSD card may be faulty and will need to be replaced.
If the Sync Module remains offline after replacing the MicroSD card and following the steps above, please contact Technical Support.


Sync Module 2 Reset Button
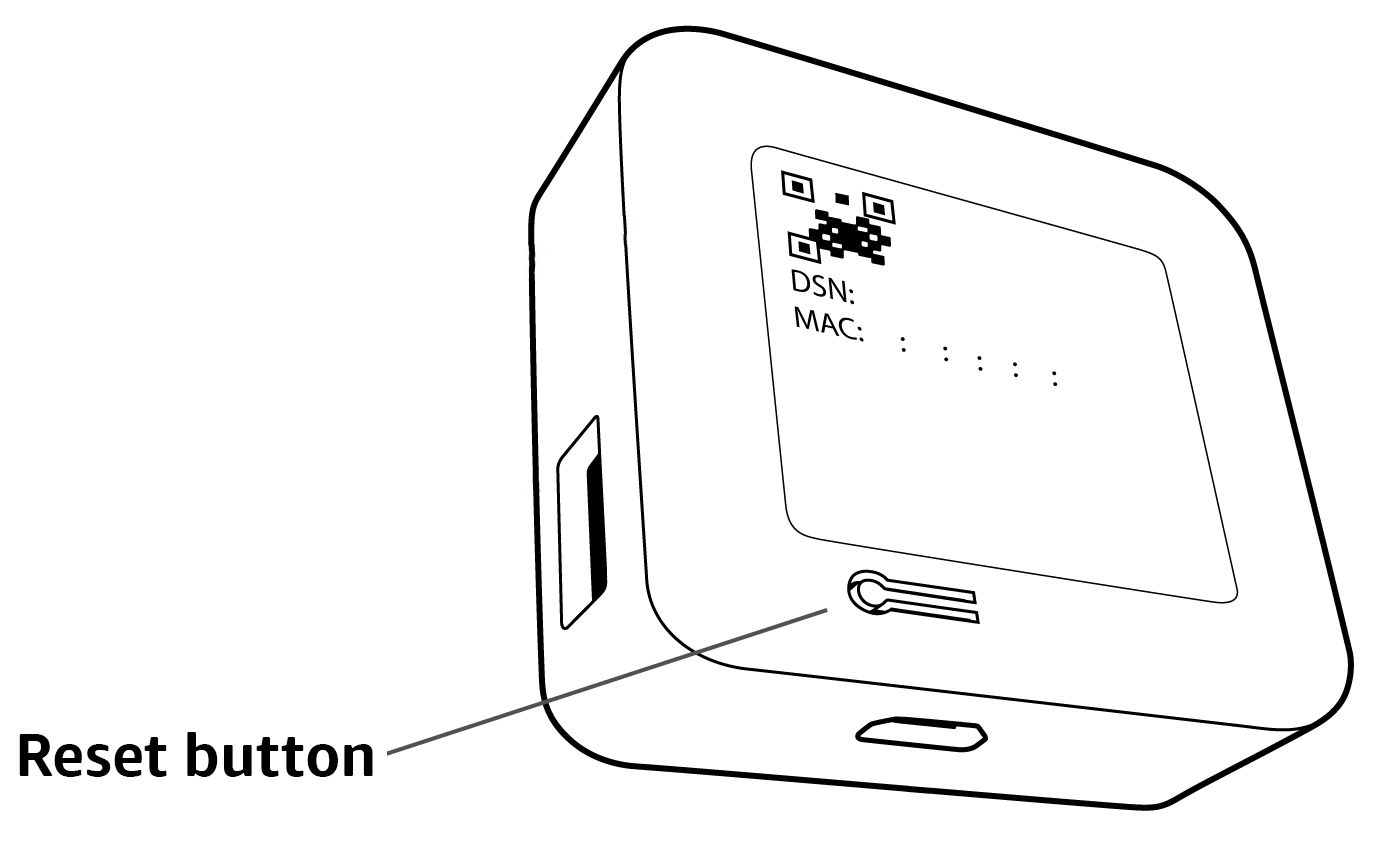
Sync Module Core
The Sync Module Core includes a reset button located on the back of the device.
To reset Sync Module Core:
- Press and hold the reset button on the back of the Sync Module until the LED turns solid red, then release.
- Once the LED indicators change to a blinking blue LED and a solid green LED, your Sync Module is ready to be setup.
Sync Module XR
The Sync Module XR includes a reset button located on the back of the device.
To reset Sync Module XR:
- Press and hold the reset button on the back of the Sync Module until the LED turns solid red, then release.
- Once the LED indicators change to a blinking blue LED and a solid green LED, your Sync Module is ready to be setup.
Sync Module 2
The Sync Module 2 includes a reset button located on the back of the device.
To reset Sync Module 2:
- Press and hold the reset button on the back of the Sync Module until the LED turns solid red, then release.
- Once the LED indicators change to a blinking blue LED and a solid green LED, your Sync Module is ready to be setup.
Sync Module (1st Gen)
The Sync Module (1st Gen) includes a reset button located on the side of the device, next to the USB port.
To reset Sync Module (1st Gen):
- Use a small, thin object like a paperclip or a toothpick to press the reset button until you feel a click.
- Once the LED indicators change to a blinking blue LED and a solid green LED, your Sync Module is ready to be setup.
If the issue persists after following the steps above, please contact Technical Support.