If your Sync Module is offline or if you encounter any issues during setup, begin by verifying the LED patterns on the device. Then, proceed with the troubleshooting steps outlined below:
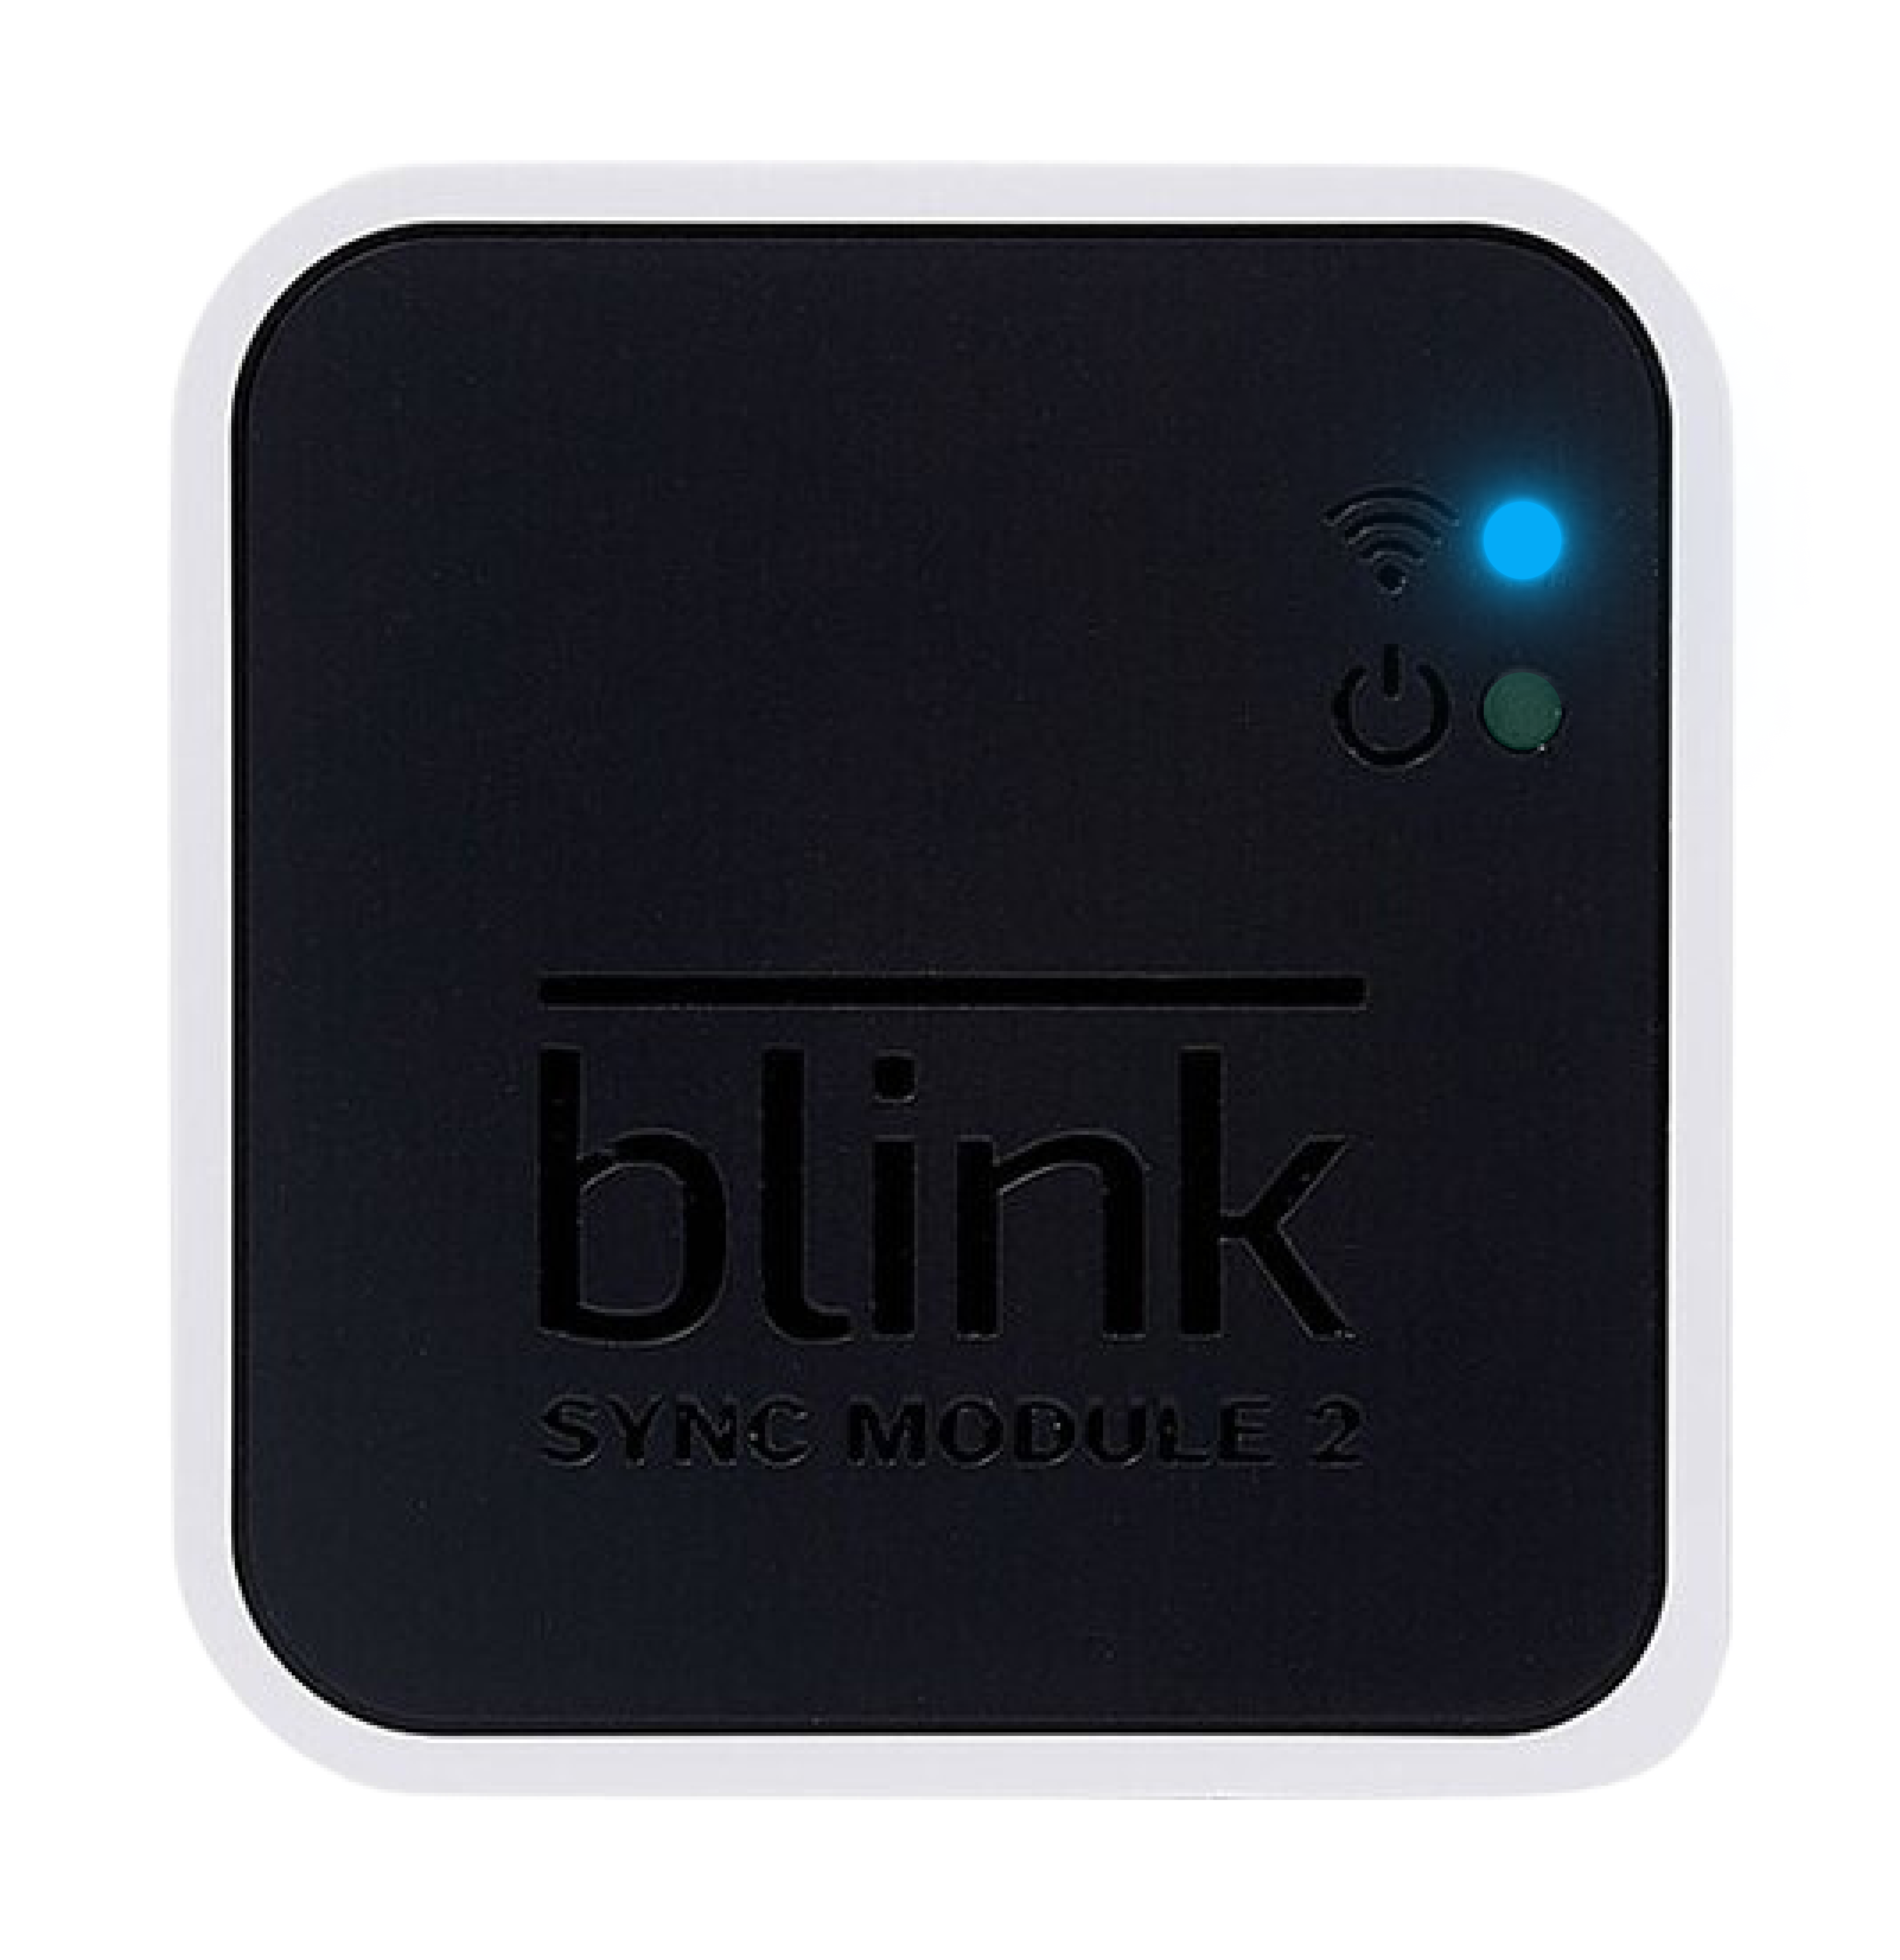
Solid blue / blinking green LED
If your Sync Module displays a solid blue and a blinking green LED, this indicates the Sync Module is offline and attempting to reconnect to the previously configured Wi-Fi network.
Several reasons why your Sync Module may have gone offline include power interruptions (such as outages or being unplugged for a prolonged period of time), updated Wi-Fi settings (such as a new password), or signal interference from devices like pods and extenders.
If your Sync Module goes offline, you will notice the following in the Blink app:
- A "Sync Module is Offline" banner will appear at the top of the home screen.
- The thumbnails of each camera that require a Sync Module will blur and display a "Sync Module is offline" message in the center.
Before you attempt troubleshooting, verify:
- Network compatibility: Your network meets the requirements necessary for Blink devices as outlined in Understanding Wi-Fi and Network Requirements.
- Wi-Fi password: Your Wi-Fi password has not changed since you last set up your Sync Module. If it has changed, you will need to update the Sync Module with the new Wi-Fi password. For guidance, visit Updating the Wi-Fi Setting for Your Sync Module System.
After confirming the information above, if the issue persists, attempt the following troubleshooting steps:
- Power-cycle your router: Unplug your router from the power outlet, wait 30 seconds, and then plug it back in.
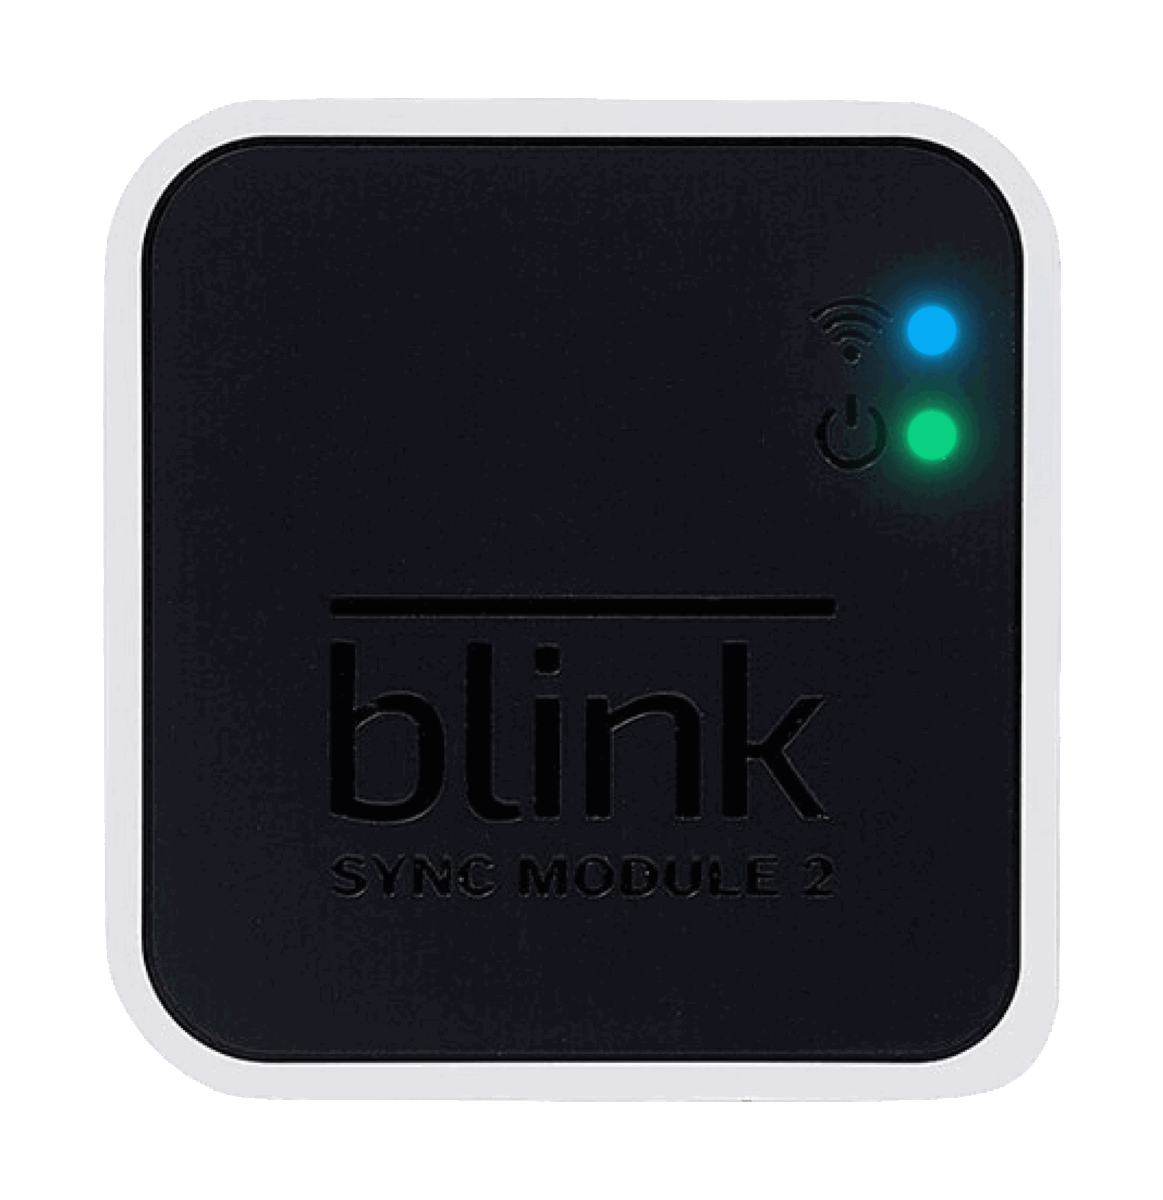
- Power-cycle the Sync Module: Disconnect the Sync Module from power for 10 seconds, then plug it back in. After rebooting, a solid blue and solid green LED indicates the Sync Module has successfully reconnected to the network.
- Re-enter Wi-Fi password: Refresh the Sync Module's Wi-Fi connection by re-entering your Wi-Fi password. For guidance on updating your Sync Module's Wi-Fi settings, visit Updating the Wi-Fi Setting for Your Sync Module System.
-
Simplify Wi-Fi configuration: Disconnect any pods or extenders, and ensure that only your main router is powered on.
Note: After your Sync Module connects successfully, you can reconnect any pods or extenders that were previously disconnected.
If the issue persists after following the above steps, you'll need to delete and re-add your Sync Module.
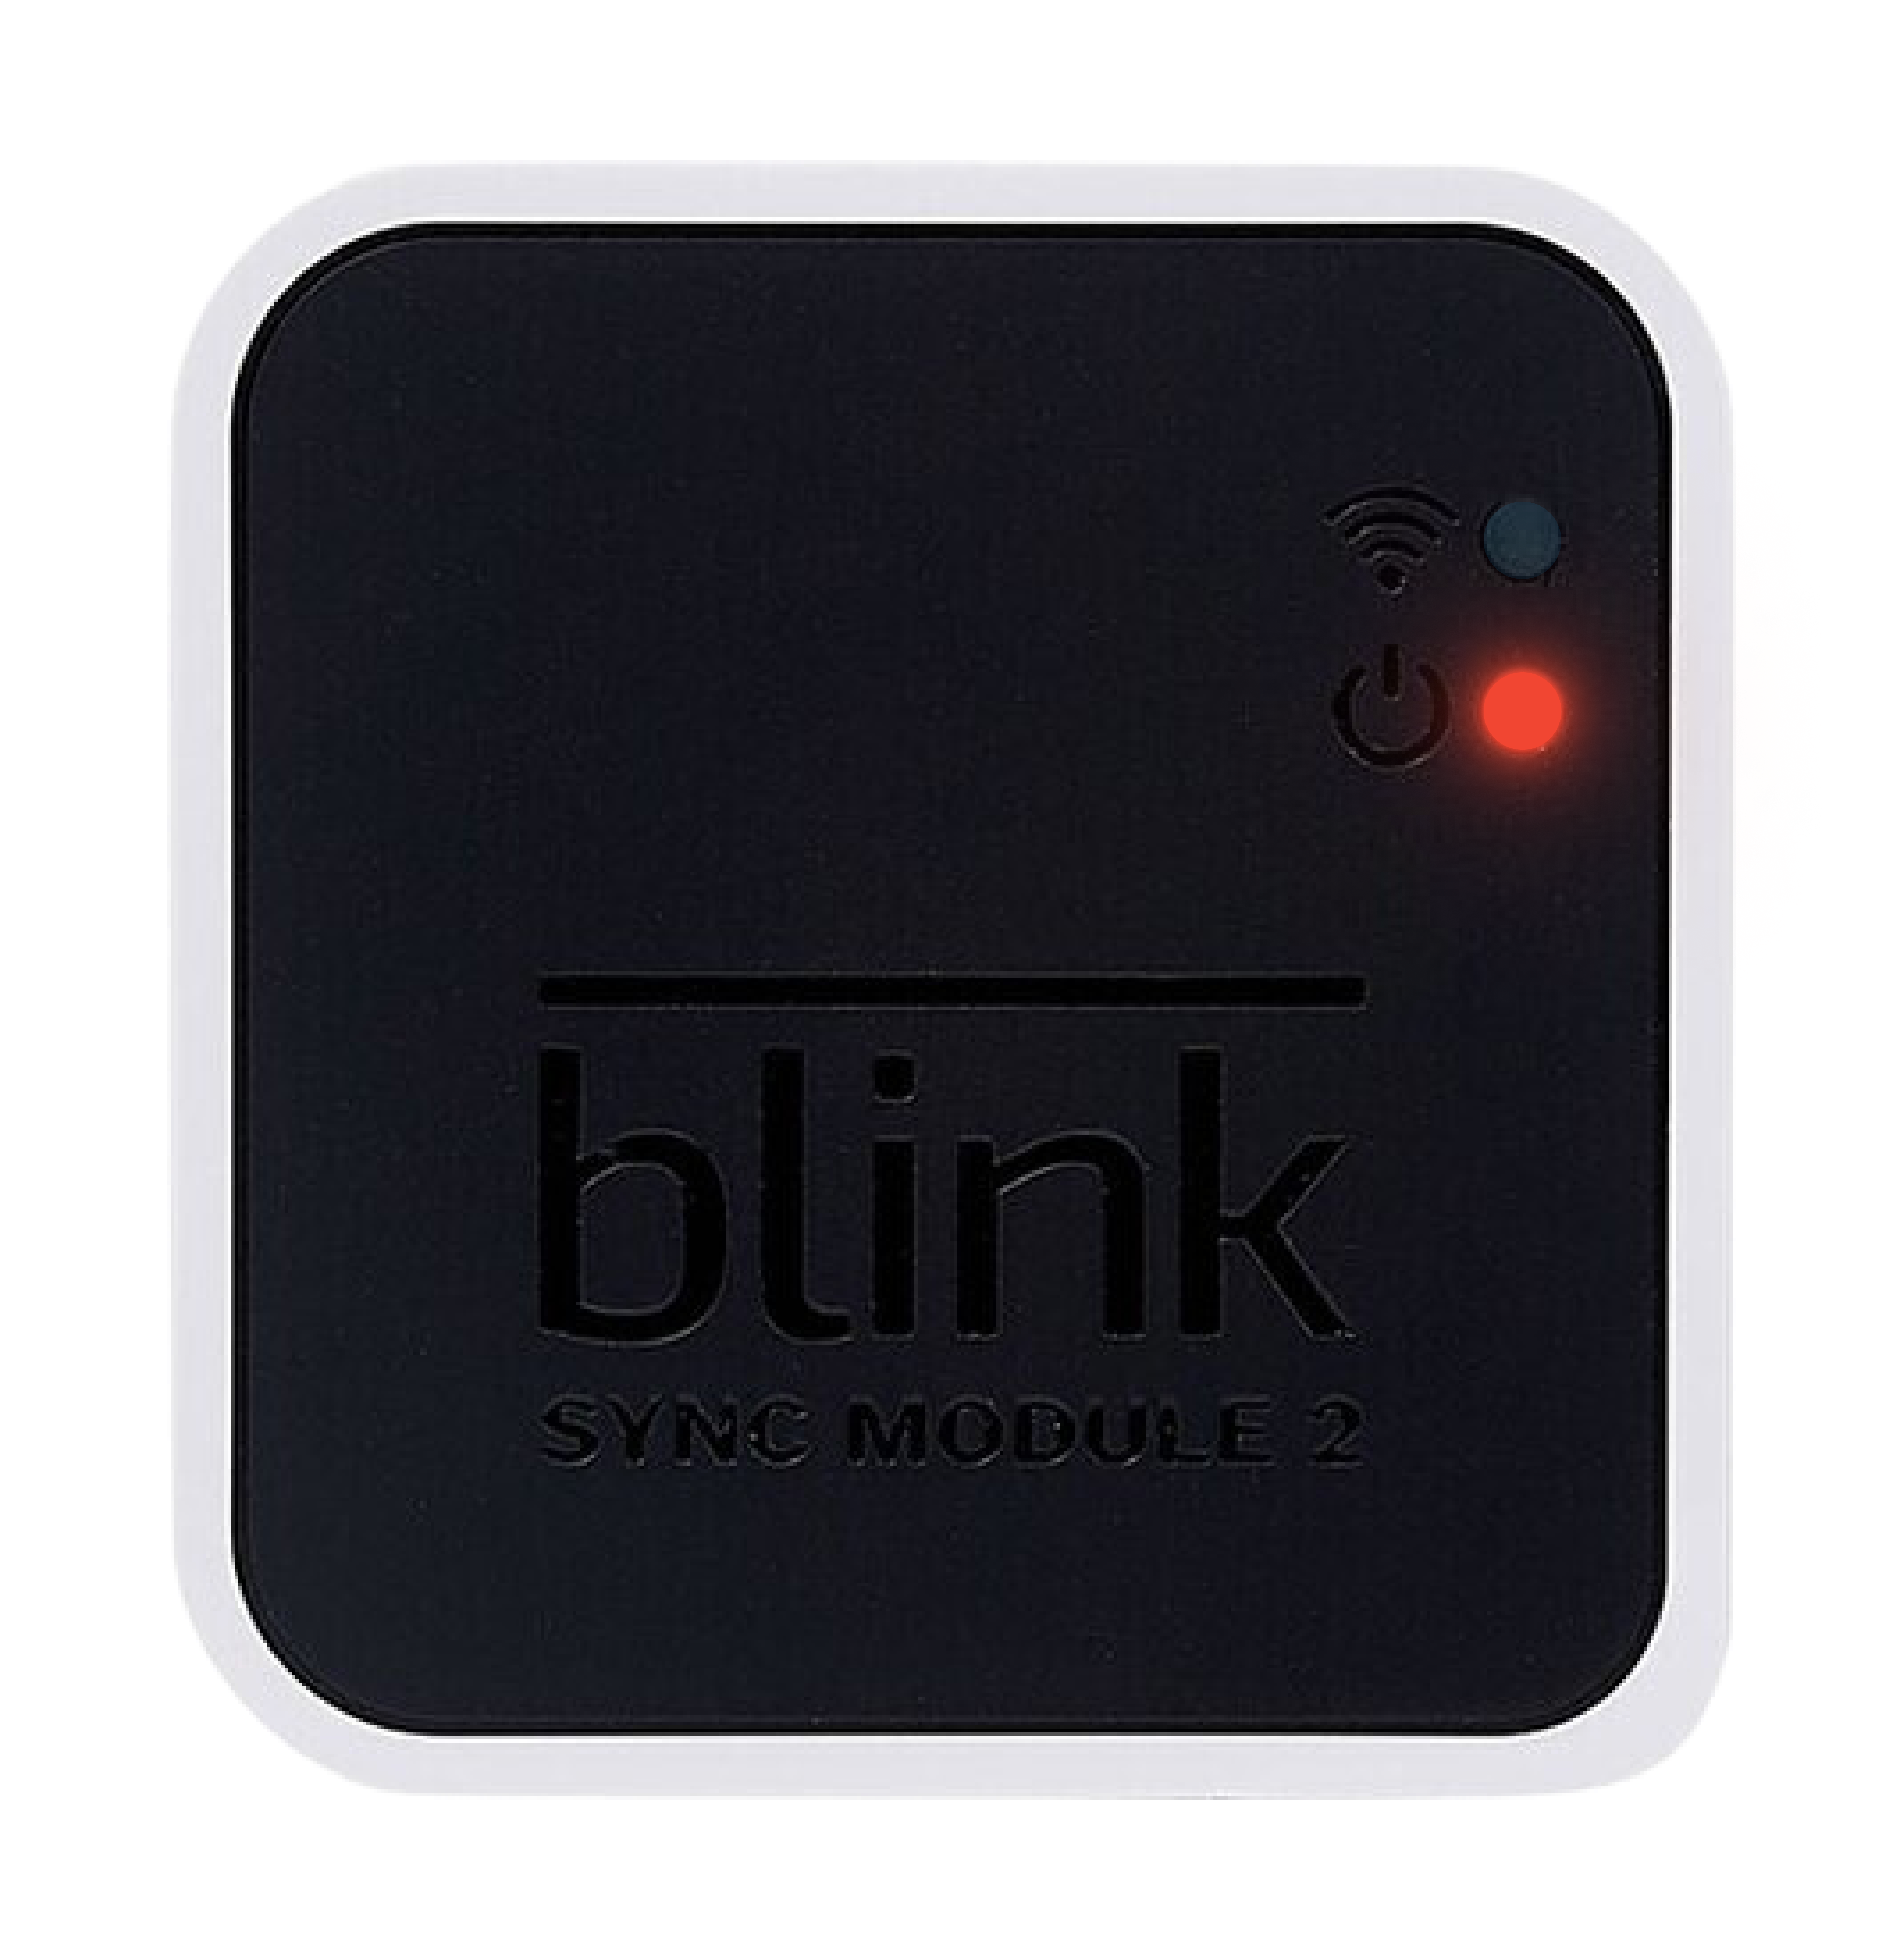
Solid red LED
If your Sync Module displays a solid red LED during setup, it indicates that the Sync Module is unable to connect to your Wi-Fi network, or the entered Wi-Fi password may be incorrect.
Before you attempt troubleshooting, verify:
- Network compatibility: Your network meets the requirements necessary for Blink devices as outlined in Understanding Wi-Fi and Network Requirements.
- Sync Module placement: The Sync Module is in the same room as your router, but not too close, ensuring it's also positioned away from physical obstructions to avoid network interference. For placement best practices, refer to Understanding the Placement of Your Sync Module.
- Wi-Fi password: The Wi-Fi password entered is correct. If you receive an "Incorrect Password for Your Wi-Fi" alert in the Blink app during Sync Module setup, re-enter the password carefully and try again. For additional troubleshooting, visit Troubleshooting Incorrect Wi-Fi Password in the Blink App.
- No app conflicts or network interferences: There are no apps that conflict with the Blink app, or any VPNs, firewalls, or anti-virus apps active or connected to your mobile device.
After confirming the information above, if the issue persists, attempt the following troubleshooting steps:
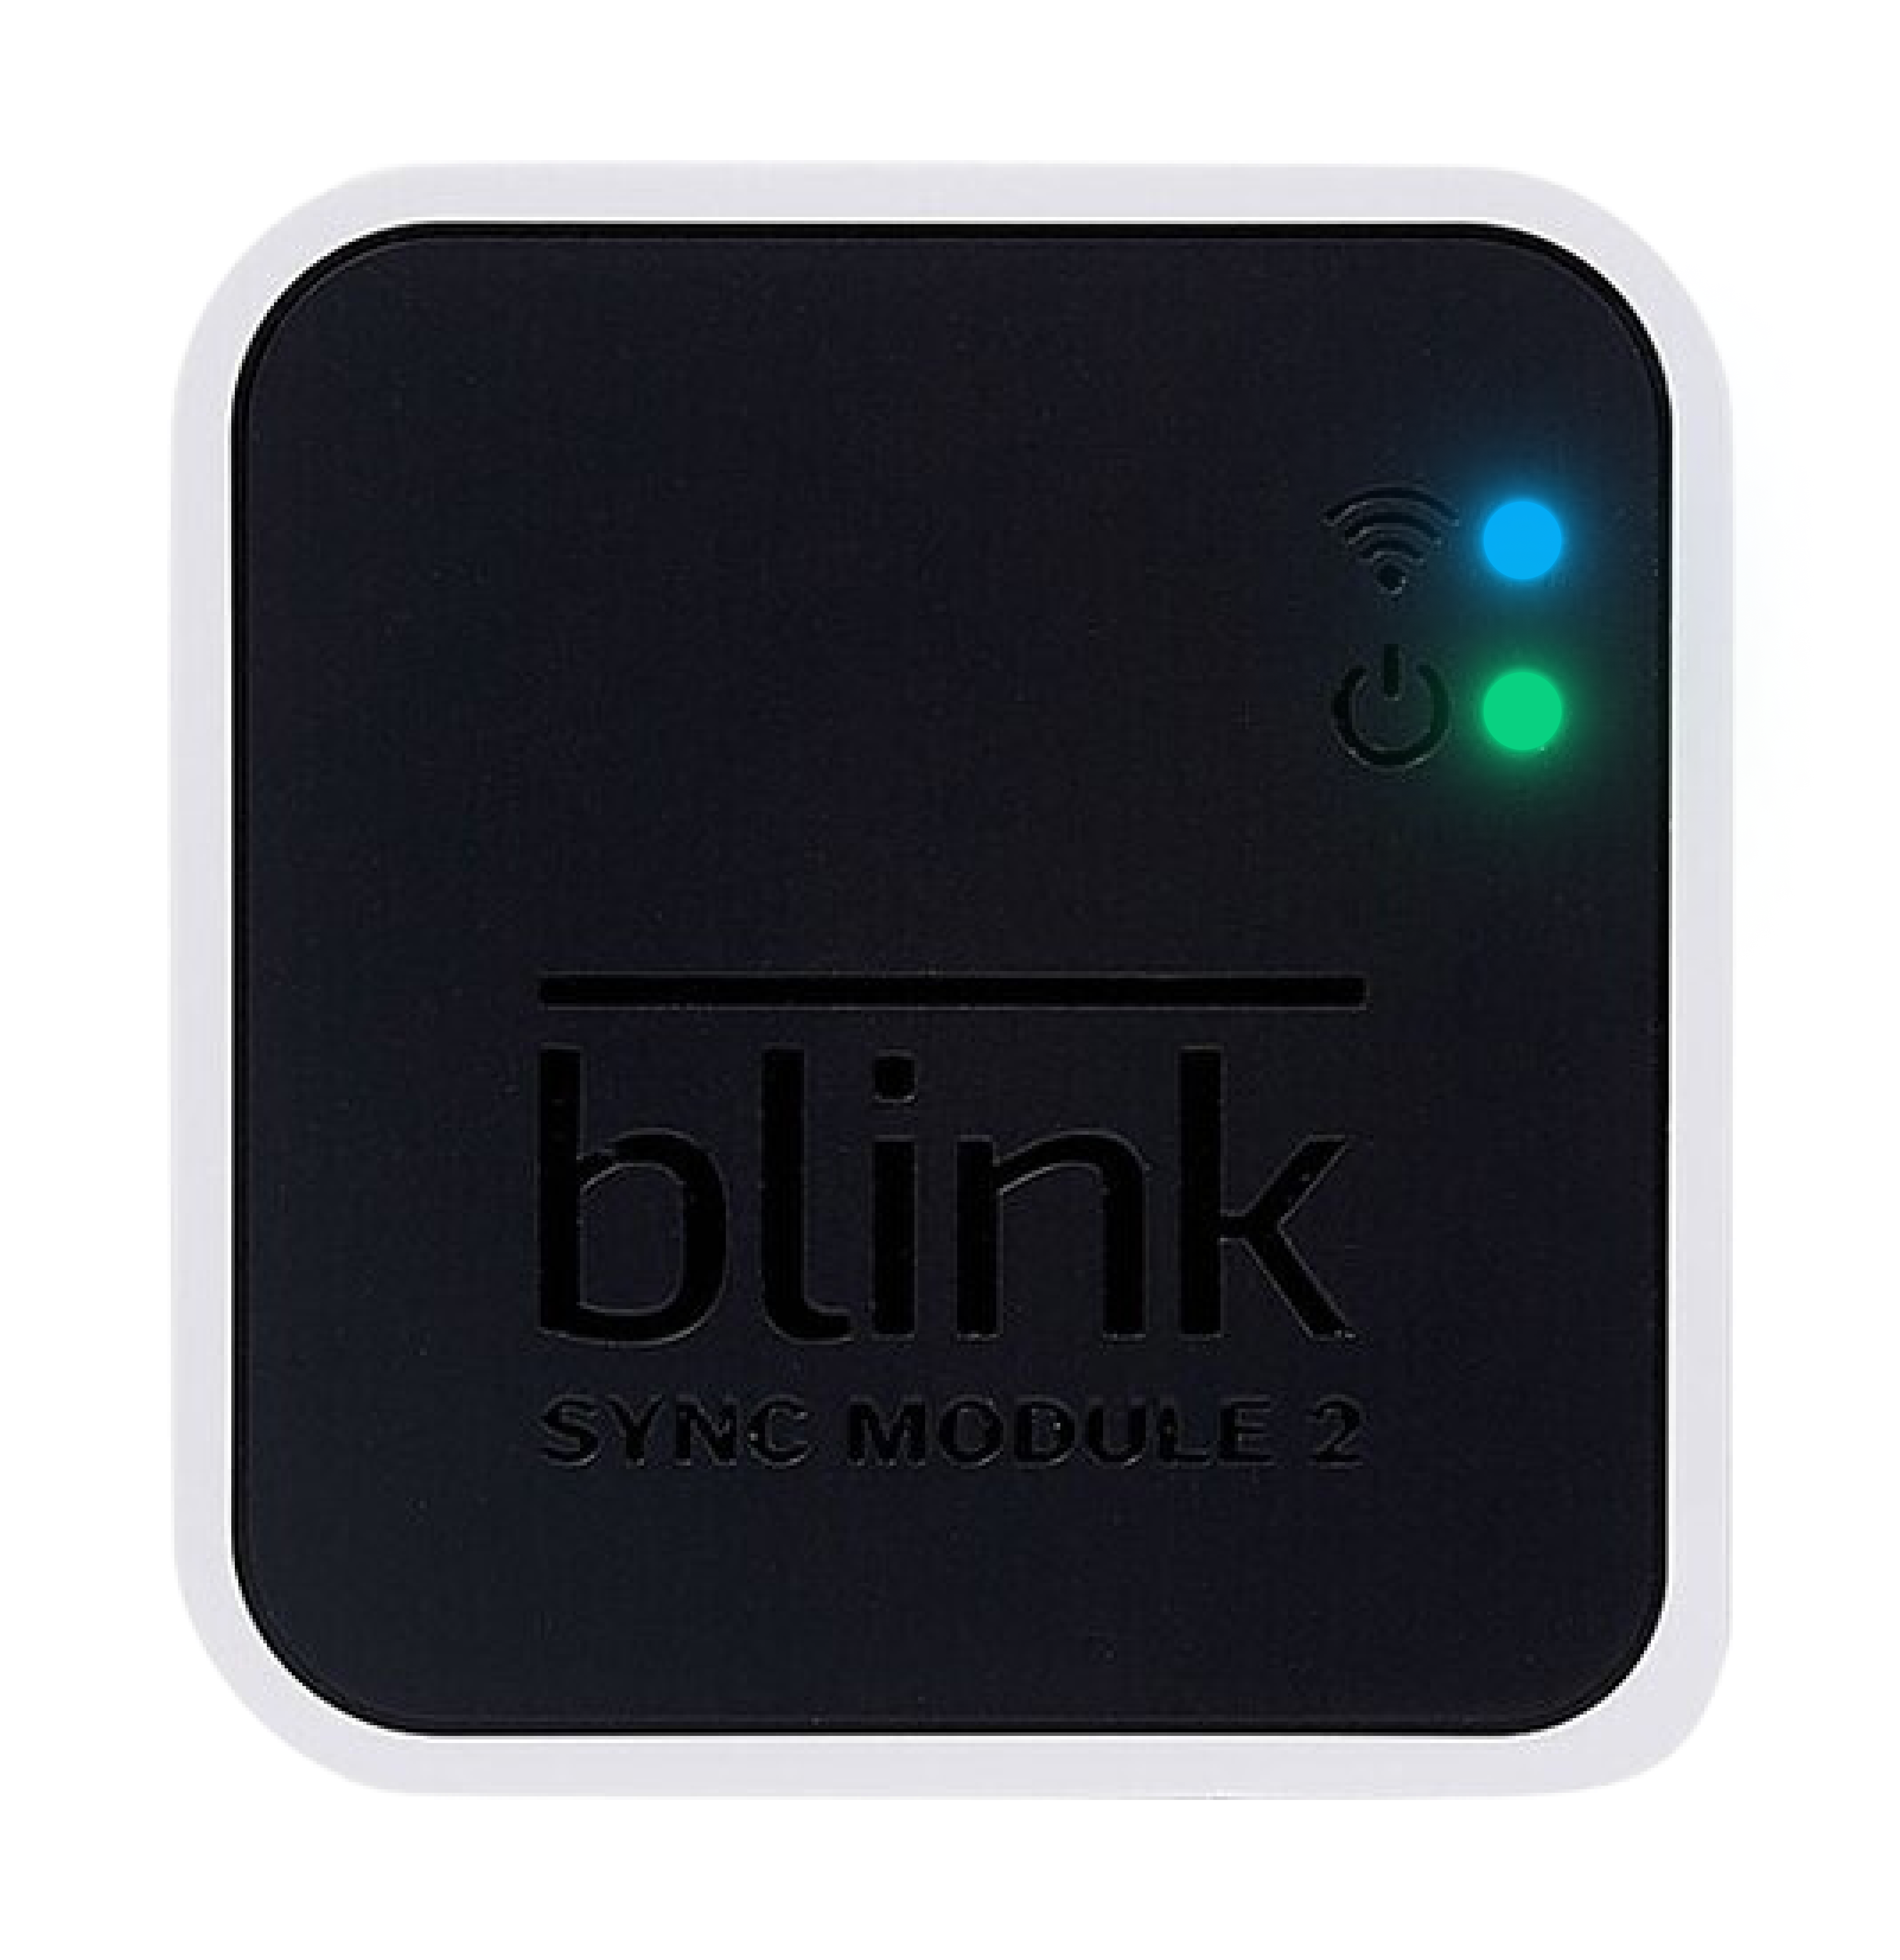
- Power-cycle the Sync Module: Disconnect the Sync Module from power for 10 seconds, then plug it back in. After rebooting, a blinking blue and solid green LED indicates the device is ready for setup.
- Power-cycle your router: Unplug your router from the power outlet, wait 30 seconds, and then plug it back in.
-
Simplify Wi-Fi configuration: Disconnect any pods or extenders, and ensure that only your main router is powered on.
Note: After your Sync Module connects successfully, you can reconnect any pods or extenders that were previously disconnected.
If the issue persists after following the steps above, proceed with a factory reset of the Sync Module.
Offline Sync Module XR
If your Sync Module XR is offline, it may indicate either a problem with receiving power or an issue with the inserted MicroSD card.
The Sync Module XR may display one of the following LED patterns:
- Solid blue and solid green LEDs
- Dim or flickering LEDs
- No LEDs
Before you attempt troubleshooting, verify:
- Power source: Ensure the power adapter is firmly connected to both the Sync Module and the power outlet. If the connection is secure, confirm that the outlet is working by testing it with a different device or trying another outlet.
After confirming the power source, if the issue persists, it may indicate the MicroSD card is faulty or damaged.
To verify the MicroSD card is not causing the Sync Module to remain offline, attempt the following troubleshooting steps:
- Check the MicroSD card: Disconnect the Sync Module from the power outlet. Remove the MicroSD card and inspect it for any visible damage. If damaged, replace the MicroSD card. Do not reinsert the MicroSD card until instructed in the next step.
- Reconnect the Sync Module to the power outlet: Once the Sync Module displays a solid blue and green LED, reinsert the MicroSD card only if it's undamaged or has been replaced. If the Sync Module goes offline again, the MicroSD card may be faulty and will need to be replaced.
If the Sync Module remains offline after replacing the MicroSD card and following the steps above, please contact Technical Support.